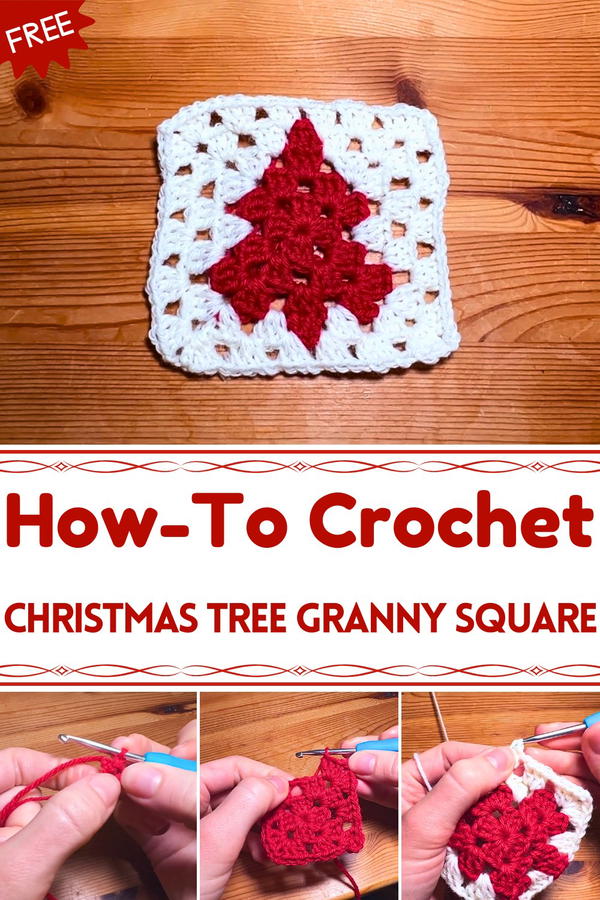
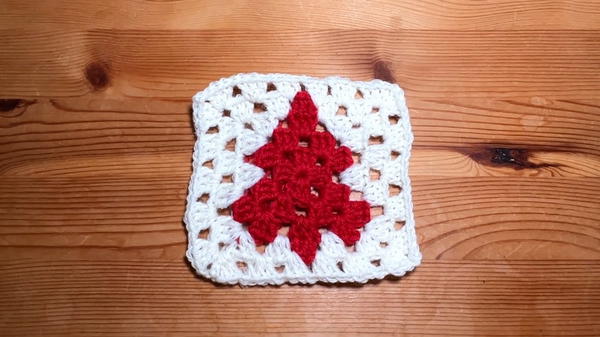
Celebrate the season with festive flair using this Free Crochet Christmas Tree Granny Square Pattern, adding cozy charm and a handmade holiday touch.
Its versatile size allows for creative combinations, letting colors, arrangements, and stitch variations reflect personal style. Beyond visual appeal, these granny squares provide a practical way to repurpose leftover yarn, transforming scraps into meaningful holiday décor. The repetitive, rhythmic stitching makes the process relaxing and satisfying, offering a mindful activity during busy seasons.
Perfect for beginners and experienced crocheters alike, each square comes together quickly yet produces a striking result. These pieces also make thoughtful handmade gifts, bringing joy and cheer to friends and family. When combined, the squares form cohesive, eye-catching projects that protect surfaces, brighten spaces, and celebrate the season with handcrafted elegance.
Materials Needed
- Yarn: Two different colors (e.g., one for the tree and one for the square background).
- Crochet hook: Sized appropriately for your yarn (e.g., 4.0mm).
- Scissors: For trimming yarn ends.
- Darning needle: For weaving in loose ends at the end of the project.
Step-by-Step Guide
Step 1: Start the Foundation (First Row)
- Slip Knot & Chain Foundation: Begin with a slip knot and chain 4. Connect the first and last chain with a slip stitch to form a ring.
- Double Crochet (Clusters):
- Chain 2, then crochet 3 double crochets (dc) into the ring. This forms the first cluster.
- Chain 2, and repeat with two more clusters of 3 double crochets.
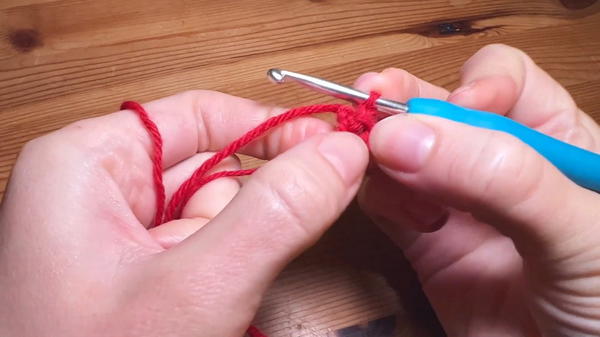
- After completing three clusters, chain 2 and join with a slip stitch at the start of the row.
- You should finish with a small square-like shape with noticeable chain spaces at the corners.
Step 2: Build the Layers (Second Row)
- Chain 3 to Begin: This creates the height for the new row.
- Work 2 double crochets into each corner of the previous row. Wherever there’s a corner (a chain-2 space), work the following:
- 3 double crochets, chain 2, and another 3 double crochets. This forms a "corner cluster."
- Chain 1 between corner clusters, ensuring clear spacing.
- Continue working this pattern until the row is complete and join with a slip stitch at the end.

Step 3: Expand the Granny Square (Third Row)
- Start with a Chain 3, then 2 double crochets into the first corner.
- In the gap between clusters, work 3 double crochets as a filler.
- At the corners, repeat the corner stitch sequence: 3 double crochets, chain 2, another 3 double crochets.
- Chain 1 between gaps and repeat the pattern across the row.
- Complete the row with a slip stitch to join.
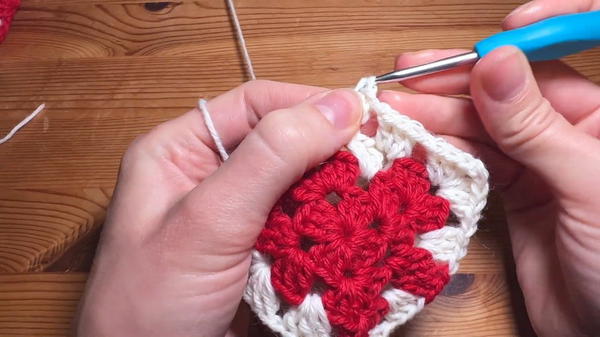
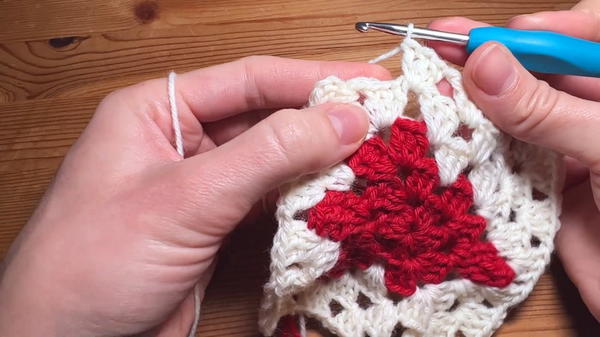
Step 4: Add the Tree Shape (Color Change)
- Introduce the Tree Color: Attach your second yarn color for the Christmas tree.
- Tip: Instead of fastening off completely, you can leave the first yarn color loosely attached to switch back later.
- Crochet the Tree:
- In the designated stitches in the row, work double crochets in the tree color to shape the tree within the square background.
- Alternate back to the first yarn color as needed, carrying the unused yarn loosely along the back of the project.
Step 5: Final Row (Top Layer in Background Color)
- For the final row, use only the background yarn.
- Work a standard granny square stitch pattern:
- 3 double crochets in gaps between clusters.
- For corners, use the corner stitch sequence (3 double crochets, chain 2, 3 double crochets).
- Finish off with a slip stitch and gently tighten.
Special Features
- Three-Dimensional Tree Design: Using color changes, the square incorporates a tree motif that stands out beautifully against the background.
- Corner Stitches: The corners are reinforced with double clusters, creating a defined and symmetrical square.
- Versatility: These squares can be used as ornaments, coasters, or pieced together for larger projects like blankets or wall hangings.
Tutor’s Suggestions
- Yarn Management: When switching between colors, the tutor suggests either tying the yarn loosely at the back or fasten it off and reattach as needed.
- Tight Corners: To ensure sharp corners, maintain consistent tension when working chain spaces.
- Experiment with Colors: Try different tree and background color combinations to match your holiday theme.
Difficulty Level
- Beginner to Intermediate: Basic knowledge of crochet stitches (slip stitch, double crochet, chain) is essential. The tutorials and clear visuals make it accessible for beginners ready to take on a slightly more complex project.
Uses of the Granny Square
- Make Christmas blankets, table runners, or cushion covers.
- Use as single coasters or hanging ornaments.
- Create decorative bunting by stringing multiple squares together.
Tip
When working with multiple yarn colors, secure and weave in the ends neatly. For a polished look, block the completed square by lightly dampening it and pinning it into shape before it dries.
Conclusion
This Christmas tree granny square is a delightful and versatile crochet project, perfect for bringing a festive vibe to your creations. With its simple yet engaging design, it’s ideal for spreading holiday cheer in your home or gifting as a handmade token of love.


