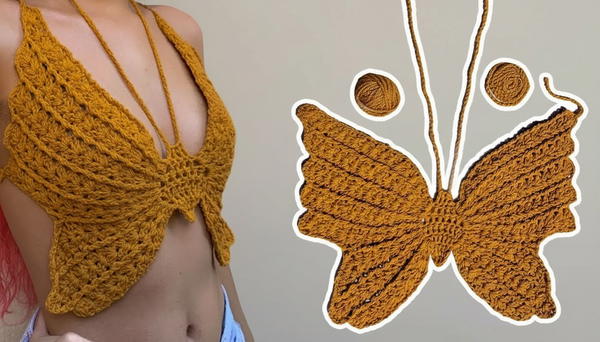
Flutter into style with this delightful butterfly cropped top that’s light, comfy, and perfect for adding charm to any casual look.
This lovely top brings a touch of nature’s charm right into your wardrobe. With soft, fluttering butterfly shapes softly joining together, it feels light and fresh to wear. The open, airy look lets the breeze play through it, making it perfect for warm days or layered over your favorite shirts when it’s cooler.
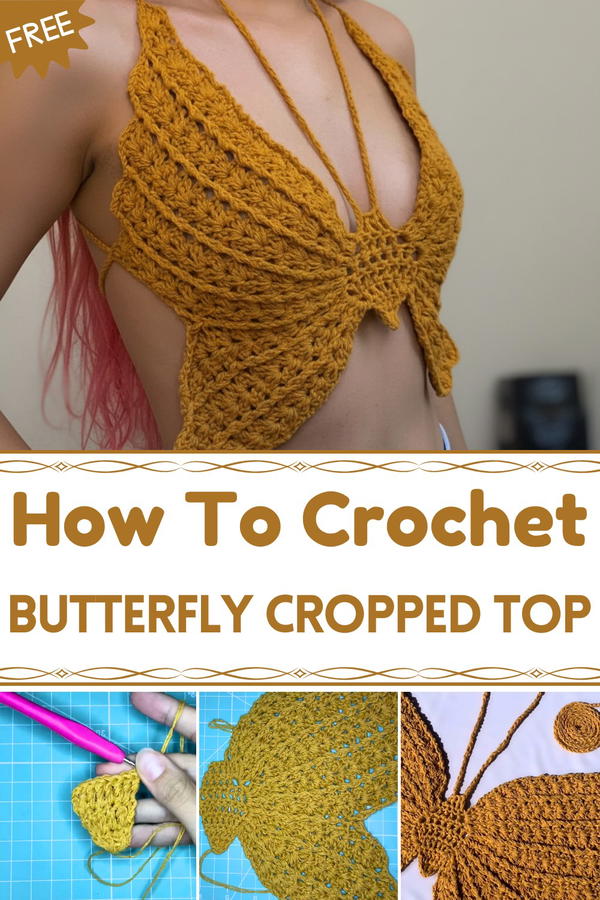
Quick Crochet Butterfly Cropped Top for a Fresh Look
Its delicate design shows off a playful, joyful style that can brighten any day. You can pair it with jeans, shorts, or skirts to add a sweet, handmade touch to simple outfits. Whether going to a casual gathering, a walk in the park, or just relaxing at home, this top fits many occasions with ease and comfort.
Its delicate design shows off a playful, joyful style that can brighten any day. The gentle colors and cheerful butterfly details make it a fresh and fun piece everyone will notice and admire. It’s a wonderful way to add a bit of creative flair while staying comfortable and stylish all day long.
Crochet Butterfly Crop Top Pattern
Materials
- Double yarn (Bia used Fiori double-layered yarn kit)
- Crochet hook appropriate for your yarn weight
- Scissors
- Tapestry needle for weaving in ends
Abbreviations (UK Terms)
- ch = chain
- dc = double crochet
- tr = treble crochet
- sl st = slip stitch
- sc = single crochet
- rel dc = relief double crochet (front or back post as indicated)
Special Features
- Butterfly motif with textured relief wing stitches
- Adjustable neck and back ties for customizable fit
- Double yarn for a denser, well-structured fabric
- Detailed increases and decreases to shape the butterfly body and wings
- Size options provided from S to XL
Step-by-Step Pattern
1. Starting the Body (Butterfly “Body”)
Step 1: Begin by making a foundation chain. Chain the desired length plus 3 chains to count as the first double crochet (dc). (e.g., chain 4)
Step 2: Yarn over and make your first double crochet into the first chain. You should have 4 dc stitches, including the turning chain.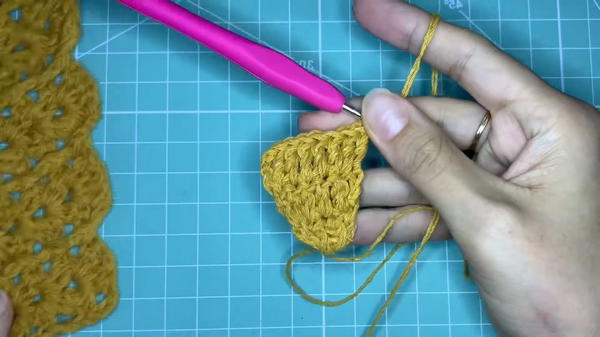
Step 3: Make two treble crochets (tr) in the first stitch to create an increase, then single treble crochet in the next two stitches to shape the base.
Step 4: Increase stitches near the edges by making two increases in the first and second-to-last stitches to gradually widen the piece.
Step 5: Continue working rows, performing strategic increases along the edges to expand the butterfly body. Check your stitch count matches the numbers in the video (e.g., 6, 8, 10 stitches across).
2. Increasing and Shaping Body
Step 6: For subsequent rows, chain 3 to start, turn, and increase on the first and second-to-last stitches.
Step 7: Work normal treble stitches (tr) across, placing increases to shape body scaling. Avoid increasing on the very last stitch for a tighter edge.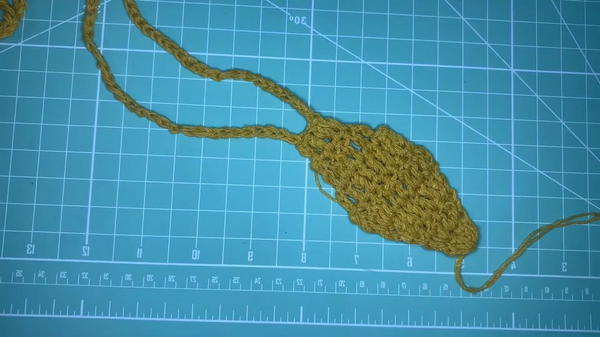
3. Beginning Decreases
Step 8: After reaching the desired width (e.g., 10 stitches), start decreasing to shape the body tapering.
Step 9: Turn your work, slip stitch into the next stitch, chain 3, and skip the first and last stitches in rows to decrease.
Step 10: Make sure to leave chain spaces unworked to achieve correct decreases, counting your stitches after each row to confirm (e.g., 8, 6, 4 stitches).
4. Creating Neck Cords
Step 11: After finishing the body, chain about 40 cm or your preferred length to create the neck strap.
Step 12: Tie securely around your neck. Repeat the same for the other strap symmetrically.
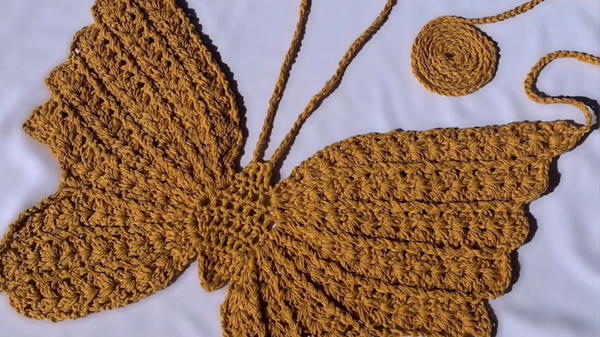
5. Constructing the Butterfly Wings
Step 13: Attach yarn to the side edge where wings will begin (e.g., 3rd row from bottom).
Step 14: Make a single crochet (sc), then chain 2 to reach double crochet height.
Step 15: Work double crochet (dc), treble crochet (tr), and fan stitches (example: tr, ch 1, tr) in intervals to form the wing shapes.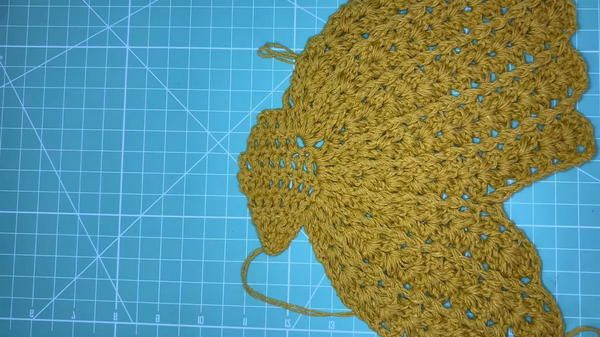
6. Working Relief Stitches on Wings
Step 16: Use relief double crochet stitches by inserting the hook behind stitches to create a 3D, textured effect representing butterfly wings.
Step 17: Alternate fans and relief stitches for texture, continuing across the wing width.
Step 18: Note that the top part of the wings has more stitches than the bottom part allowing for the natural wing taper.
7. Finishing Wings & Antennae
Step 19: Add antennae using simple chains and secure at the head of the butterfly.
Step 20: Repeat wing construction on the opposite side beginning from an opposite row (top down vs bottom up) for symmetry.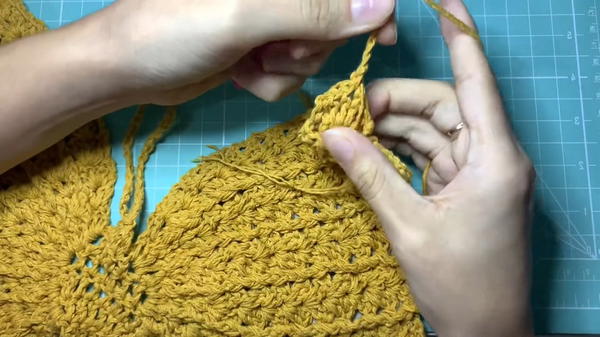
8. Back Straps & Final Assembly
Step 21: Create a small cord from chain stitches across the back and secure with single crochets on both sides.
Step 22: Cross the straps behind and tie comfortably to adjust fit.
Level of Difficulty
Intermediate — requires knowledge of increase/decrease techniques, treble crochet, relief stitches, and making fan stitches.
Tutor’s Suggestions
- Use stitch markers to mark increases and decreases for easier tracking.
- Try on the piece as you go to check fit.
- Keep the tension consistent when working relief stitches to maintain texture.
- Use the exact yarn or a yarn with similar weight and texture for best results.
Uses
- Perfect for summer beachwear, festivals, casual outings, or layering under sheer tops.
- Makes a stylish handmade gift for crochet lovers.
Final Tip
Always crochet a gauge swatch to ensure your sizing matches the pattern. When making the neck and back ties, make them longer than you think—it's easier to trim than lengthen later!
Conclusion:
Enjoy making this stunning Butterfly Crop Top! With its delicate yet bold textured wings and comfortable fit, it’s a fabulous crochet project that highlights your skills and brightens your wardrobe. Remember to check all detailed steps and size info for a perfect fit.