Delight in cozy elegance with this Free Crochet Flower Bouquet Blanket Pattern, bringing vibrant floral charm and warmth to your home décor.
On crisp mornings, a soft blanket can feel like a gentle hug, offering warmth and comfort that instantly lifts the spirit. The Free Crochet Flower Bouquet Blanket Pattern transforms this cozy experience into something visually captivating, where clusters of delicate floral motifs come together to form a vibrant, textured cover. Each bloom is created with attention to detail, giving the blanket a layered depth that mirrors the charm of a freshly gathered bouquet. Its soft, tactile feel makes it perfect for curling up with a book or adding a touch of elegance to any room.
Timeless Crochet Flower Bouquet Blanket That Feels Elegant
![]()
This blanket excels in versatility, serving both as a practical companion and a decorative statement. Draped over a sofa, chair, or bed, it adds color, personality, and a sense of liveliness to living spaces. Its warmth and softness make it ideal for cooler evenings, while its floral charm ensures it remains visually appealing year-round.
Beyond personal enjoyment, it also becomes a heartfelt gift, combining comfort and style in one thoughtful package. The Free Crochet Flower Bouquet Blanket Pattern transforms everyday comfort into an enduring piece of handmade artistry, bringing joy and coziness wherever it is used.
![]()
Special Features:
- The blanket is customizable in size and color to match your personal preferences.
- It incorporates detailed textures with 3D floral patterns, making it a centerpiece for any setting.
- The step-by-step process is beginner-friendly yet challenging enough to keep intermediate crafters engaged.
Materials Needed
- Yarn: Choose your colors for the blanket base, leaves, and flowers. Green is commonly used for leaves, and vibrant colors work well for flowers.
- Crochet Hook: Ensure to use the correct size hook for your yarn.
- Darning Needle: For weaving in loose ends.
- Scissors: For cutting yarn.
Step-by-Step Process
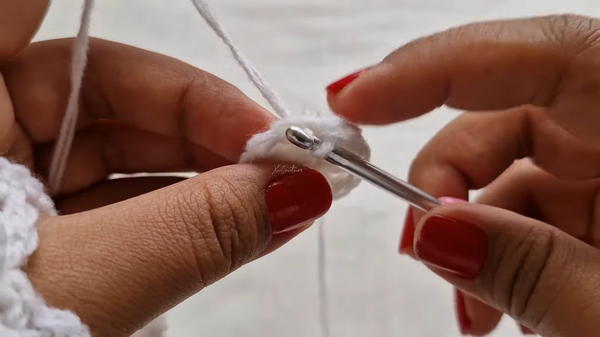
1. Creating the Blanket Base
Start with the blanket foundation for your project.
Round 1: Make a double magic ring:
- Yarn over twice, insert your hook between the loops, pull through, and chain 2.
- Make 12 double crochet into the magic ring. To create double crochet: yarn over, insert your hook, pull through, yarn over, pull through two loops, yarn over, and pull through the final two loops.
- Pull the tail to tighten the ring, adjust the loops, and make a slip stitch into the first double crochet to close the round.
Round 2:
- Chain 2, make 2 double crochet into the same stitch.
- Chain 1 and make another 2 double crochet into the next stitch. Repeat this pattern around the circle.
- Slip stitch into the first double crochet to close the round.
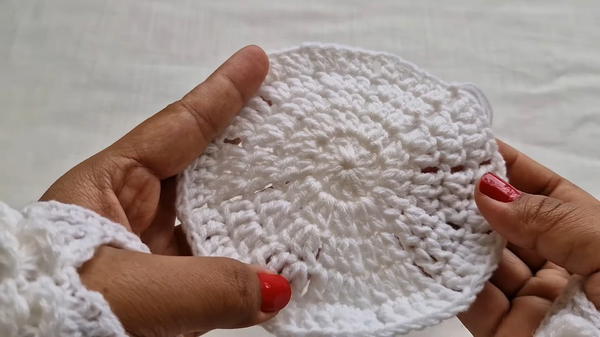
Rounds 3–5: Build the blanket base with increasing patterns:
- Row 3: Chain 2, make 1 double crochet into the same stitch, then add increasing double crochets into alternating stitches. Chain 1 between every segment.
- Row 4: Chain 2, make 2 double crochet into two consecutive stitches, add a double crochet increase in the next stitch, chain 1, and repeat the pattern.
- Row 5: Chain 2, make 3 double crochet into three consecutive stitches, then add an increase in the fourth stitch. Chain 1 and repeat.
Rows 6–22: Continue the same method of adding increasing stitches in the last stitch of every section until the blanket reaches the desired diameter.
2. Crocheting the Leaves
The leaves add a fresh, textured look to the blanket.
Starting the Row:
- Use green yarn and make a slip knot.
- Insert the slip knot into any stitch on the blanket edge, chain 1, and make a single crochet into the same stitch.
- Chain 5, skip two stitches, and make a single crochet into the third stitch. Repeat this pattern until the end of the row.
Second Row:
- Chain 1, make a single crochet into each chain space.
- Chain 3, make a series of double crochets into each chain space: chain 1, double crochet, chain 1, double crochet, and repeat.
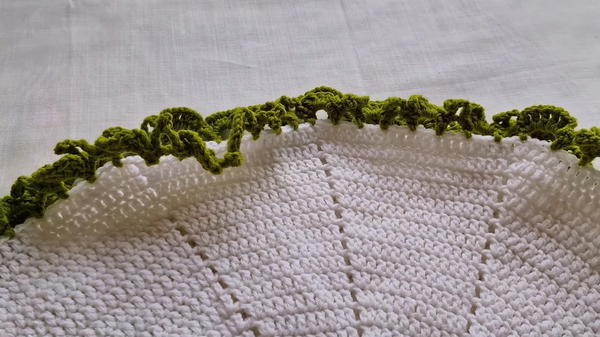
Final Row:
- Chain 7, skip three stitches, and make a slip stitch in the fourth stitch to form the tips of the leaves.
- Finish by slip stitching into the first single crochet, chain 2, and cut off the yarn. Use the darning needle to weave in the loose ends.
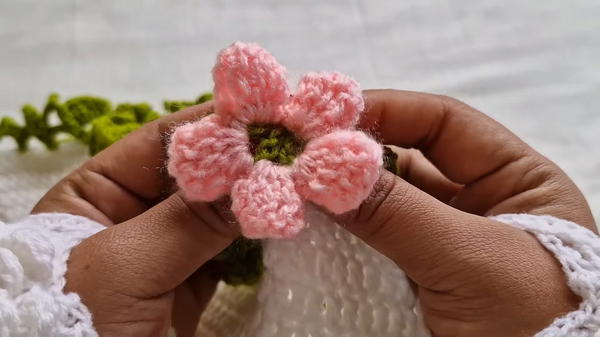
3. Crafting the Flowers
The flowers add a beautiful 3D effect to your blanket.
Starting the Flower:
- Take your yarn and make a slip knot.
- Insert the slip knot into the chain space, chain 1, and make a single crochet into the same stitch.
Creating Petals:
- Chain 3, make 4 triple crochet into the same stitch. (To make triple crochet: yarn over twice, insert the hook, pull through, yarn over, pull through two loops three times.)
- Chain 3 and make a single crochet into the same stitch.
Repeating Pattern:
- Move to the next chain space and repeat the sequence: chain 3, make 4 triple crochet, chain 3, and make a single crochet. Repeat this process until you’ve completed five petals.
Finishing the Flower:
- Slip stitch into the first single crochet, chain 2, and cut off the yarn. Weave in the ends with a darning needle.
- Slip stitch into the first single crochet, chain 2, and cut off the yarn. Weave in the ends with a darning needle.
Special Features of the Crochet Flower Blanket
- Versatility: Can be customized for use as a throw blanket, bedspread, or decorative wall hanging.
- Elegant Design: Features detailed floral and leaf patterns that provide a 3D, eye-catching texture.
- Beginner-Friendly Sections: Although intermediate techniques are used, the tutorial explains these steps clearly for learners.
Tutor’s Suggestions
- When working with a double magic ring, pull gently to avoid tightening too much, which can make it difficult to stitch.
- Count stitches carefully in rows with increases to ensure symmetry in the blanket base.
- Keep your tension even when crafting flowers to maintain consistent petal shapes.
Level of Difficulty
- Intermediate: While beginners can try this project, techniques like double magic rings, triple crochet, and increasing stitches might require practice.
Uses of the Crochet Blanket
- Home Décor: Perfect as a throw blanket for couches, beds, or chairs.
- Gift: A thoughtful handmade present for loved ones.
- Multi-Purpose: Works well as a play mat for children or a decorative accent in any room.
A Final Tip
When attaching flowers and leaves to the blanket, ensure they are positioned evenly and securely. Use additional stitching or fabric glue if needed for extra durability in decorative elements.
Conclusion
The crochet flower blanket is a beautiful project that combines artistry with functionality. By following the step-by-step instructions for crocheting the base, leaves, and flowers, you’ll create a stunning masterpiece that showcases your creativity and crochet skills.


