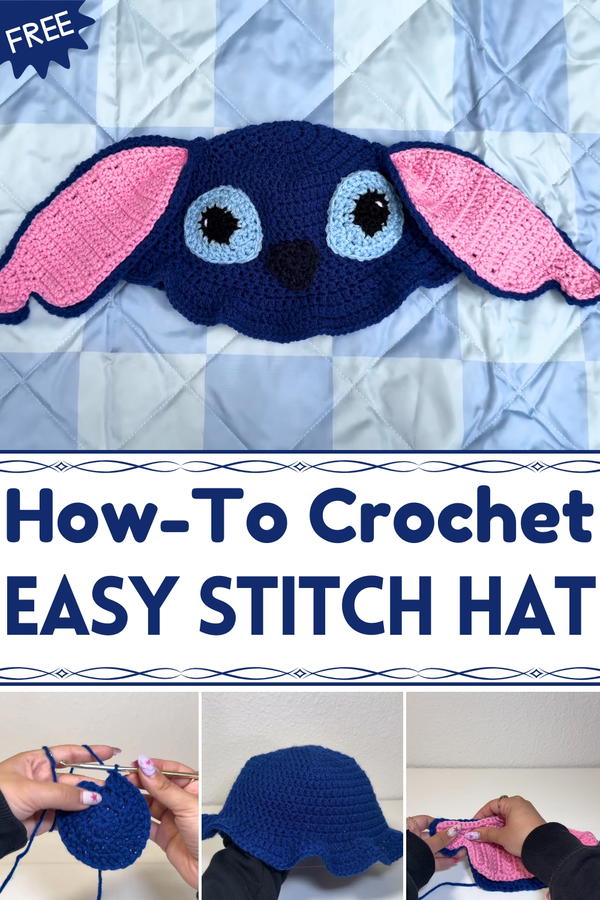
Top your outfit with cozy style using this Free Crochet Stitch Hat Pattern, a handmade accessory that blends warmth, texture, and unique charm effortlessly.
Children laughed as they chased autumn leaves along winding paths, their heads cozy under warm hats that held both comfort and charm. Inspired by that simple joy, the Free Crochet Stitch Hat pattern transforms yarn into a soft, textured accessory that brings warmth and personality to everyday wear. Each stitch adds subtle depth and tactile interest, producing a hat that feels as good as it looks. Its snug fit keeps chill at bay, making it perfect for morning walks, casual outings, or layering under winter coats.
Simple Crochet Stitch Hat Pattern for Stylish Accessories
Lightweight yet resilient, this hat maintains shape and comfort over time, combining practicality with handmade elegance. The rhythmic motion of crocheting each stitch offers a soothing experience for beginners and seasoned crocheters alike, turning crafting into a mindful and rewarding activity. Beyond personal use, this hat makes a thoughtful gift, showing care and creativity with every handcrafted detail.
Its versatile style complements casual attire, outdoor adventures, or cozy indoor moments, seamlessly fitting into daily life. By balancing texture, comfort, and charm, this crochet hat becomes more than a simple accessory, it brings warmth, personality, and the subtle beauty of handmade artistry to every cold-weather moment.

Part 1: Creating the Hat Base
Materials Needed
- Yarn (light blue for the base)
- Crochet hook (size 5 mm)
- Stitch marker
- Scissors
- Measuring tape
Steps
Step 1: Start with a Magic Ring
- Create a magic ring (or chain 4, slip stitch into the first chain to form a ring).
- Make 6 single crochets (SCs) inside the ring.
Step 2: Increase in Subsequent Rounds
- Round 2: Place 2 single crochets in each stitch (total: 12 SCs).
- Round 3: Alternate between 1 SC and 1 increase (2 SCs in one stitch) around. Continue increasing in every round until the hat shape is wide enough to fit the top of the head.

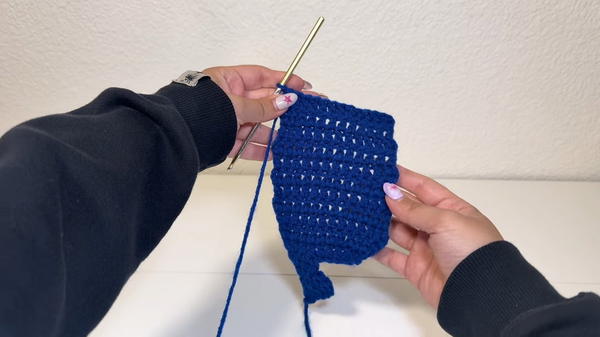
Step 3: Work Evenly
Once the base is complete, continue working evenly (no increases) for the length of the hat to reach the required size. Ensure it fits snugly on your head.
Step 4: Add the Ribbed Brim
- For the brim, switch to a ribbing technique: Alternate between front-post and back-post double crochet to create a stretchy texture for the brim.
- Work 4-6 rounds of ribbing, depending on how long you want the brim to be.

Part 2: Making the Ears
Materials Needed
- Yarn (light blue and dark blue for detailing)
- Crochet hook (size 5 mm)
- Scissors
- Stitch markers
Steps
Step 1: Start with the Magic Ring for the Base
- Begin with the light blue yarn and create a magic ring.
- Inside the ring, make 6 single crochets and pull the loop to tighten.
Step 2: Shape the Ear with Increases
- Round 2: Place 1 SC in the first stitch and 1 increase (2 SCs in the next) around.
- Subsequent Rounds: Continue using a pattern of SCs and increases to widen and shape the ear.
Step 3: Create Tapering
Toward the top of the ear, work evenly without increasing to maintain the rounded shape.
Step 4: Add Contrasting Detail
Switch to dark blue yarn and work the outer edge of the ear. Add a border using single crochet stitches for detailing.
Step 5: Make a Second Ear
Repeat the process for the second ear, ensuring both ears are symmetrical.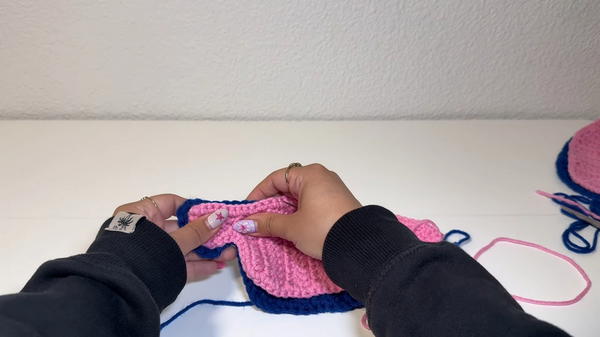
Part 3: Making the Eyes, Nose, and Final Assembly
Materials Needed
- Yarn (black, white, light blue, dark blue)
- Crochet hook (size 5 mm)
- Tapestry needle
- Stitch markers
Steps
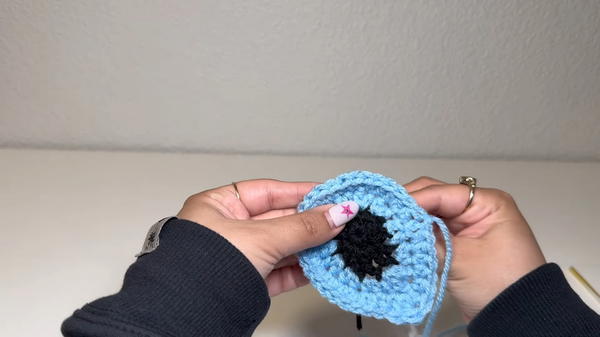
Step 1: Crochet the Eyes
- Using black yarn, create a magic ring and make 6 single crochets inside.
- Slip stitch into the first stitch to close the ring.
- Round 2: Chain 2, work half-double crochet (HDC) increases around.
- Subsequent Rounds: Add a combination of HDC, doubles, and trebles to shape the eye.
- Switch to light blue yarn for the outer edge and follow the stitch pattern provided in the video.
Step 2: Add White Speck
Using a small piece of white yarn, add a tiny "speckle" detail to the eye. Secure in place at the center using a needle.
Step 3: Make the Nose
- Use dark blue yarn and create a magic ring.
- Inside the ring, make a combination of single crochets and double crochets, placing stitch markers at the three corners of the triangle shape.
- Round 2: Work corner increases by placing 3 double crochets in marked spaces.
Step 4: Assemble the Hat
- Attach the Nose: Center it slightly above the brim and sew it in place using a needle.
- Place the Eyes: Position the eyes symmetrically along the sides of the nose, ensuring proper alignment.
- Sew on Ears: Attach the ears to the sides of the hat, leaving enough space for a snug fit.
Tutor’s Suggestions
- Symmetry: Use stitch markers to ensure details like the eyes and ears are aligned correctly.
- Customization: Experiment with different yarn shades to make the perfect Stitch expression.
- Comfort: Ensure proper tension for the brim so the hat fits comfortably.
Tip
Before sewing any pieces, pin them into place temporarily to check alignment. This avoids rework and saves time during assembly!
Conclusion
This Stitch-themed hat is a fun and rewarding project for crocheters looking to create something unique and playful. By combining basic and intermediate crochet techniques, you’ll achieve a charming and detailed final product.


