Create cozy magic with this free crochet shell stitch blanket pattern, perfect for adding texture, warmth, and charm to your home or heartfelt gifts.
Softness and charm come together in a design that feels both comforting and elegant. With its gentle, wave-like texture, the shell stitch blanket pattern offers a timeless appeal that enhances any space it touches. Easy to follow, the free crochet shell stitch blanket pattern creates a beautifully textured piece perfect for curling up on chilly evenings or gifting to a loved one.
Free Shell Stitch Blanket Crochet Pattern Perfect for Beginners
![]()
Its unique appearance adds a touch of sophistication while remaining simple to crochet, making blankets and other accessories from this stitch is a favorite choice for beginners and seasoned crocheters alike. Whether you choose bold colors or softer shades, this pattern delivers versatility and warmth, turning yarn into a piece of art that is as practical as it is beautiful. Perfect for adding a cozy touch to beds, couches, or nurseries, this design ensures that your creativity shines through in every stitch.
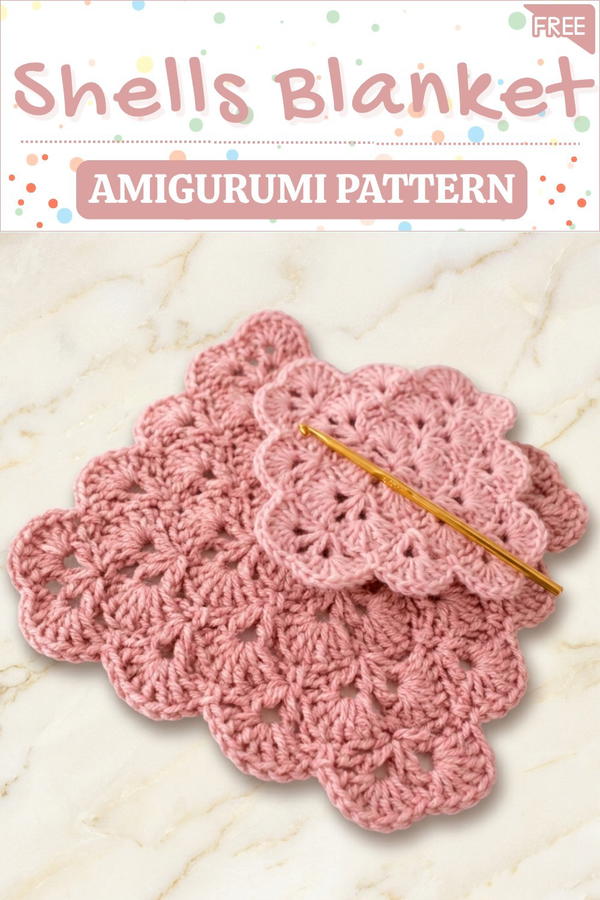
Crochet One-Color Shells Blanket Pattern
Skill Level
Intermediate.
Finished Size
The size of the blanket is fully customizable. Continue the repeating rows until you reach your desired dimensions.
Materials
- Yarn:
- Yarn Weight: Worsted-weight acrylic yarn (e.g., Red Heart) or any yarn of your choice.
- Color: Single color of your preference.
- Hook: 5.0 mm crochet hook (US H/8).
- Other Tools:
- Scissors.
- Darning needle for weaving in ends.
Gauge
Not crucial for this pattern. However, for reference:
10 cm x 10 cm (4 in x 4 in) = 16 double crochets by 8 rows. Adjust hook size if necessary.
Key Abbreviations
(US Terminology)
- ch: Chain
- sl st: Slip Stitch
- sc: Single Crochet
- dc: Double Crochet
- yo: Yarn Over
- sp: Space
- st: Stitch
Special Notes
- The pattern is a two-row repeat:
- Framework Round: Establishes V-stitch structure.
- Shell Round: Creates beautiful shells in the V-stitches.
- Counting: Keep track of your stitches to ensure the blanket remains evenly shaped.
Pattern Instructions
Foundation Round: Center of the Blanket
- Start with a Slip Knot: Create a slip knot and place it on your hook.
- Chain 4: This forms the foundation loop.
- First Double Crochet:
- Work a dc into the first chain (from the hook).
- Ch 1, then work another dc in the same first chain.
- Repeat the following until there are 8 double crochets (posts) in the foundation center:
- Ch 1, dc in the first chain.
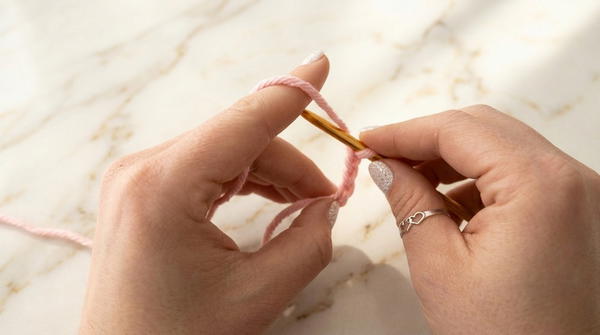
- Ch 1, dc in the first chain.
- Join with a sl st to the top of the starting ch-3 to complete the round.
You should now have 8 posts and 8 ch-1 spaces.
Round 2: First Shell Round
Slip Stitch into the First Chain-1 Space: Insert the hook into the space, yo, and pull through both loops.
Ch 3: Counts as the first dc.
Work 6 More dc in the Same Space: You should now have 7 dc in total.
In the next chain-1 space, work 1 sc.
In the following chain-1 space, work 7 dc.
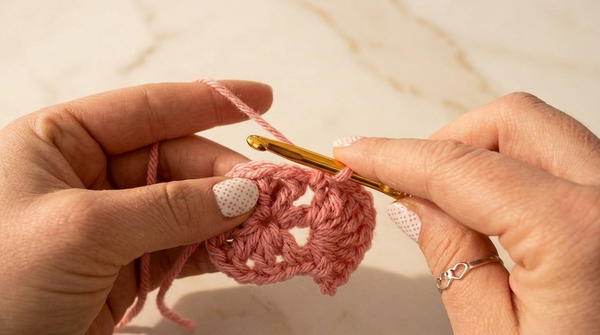
Repeat the pattern:
- 1 sc in the next ch-1 sp.
- 7 dc in the following ch-1 sp.
Continue until you’ve worked 4 shells (7 dc clusters) and 4 single crochets.
At the end of the round, join with a sl st to the top of the starting ch-3.
You now have 4 shells and 4 single crochets.
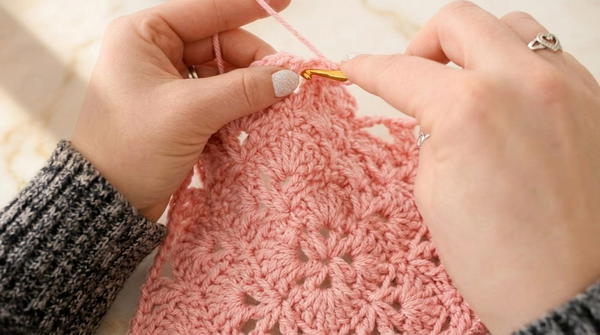
Round 3: First Framework Round
- Ch 4: (Counts as the first dc and ch-1 space.)
- Work a V-stitch:
- In the last sc (from the previous round), work:
- dc, ch 1, dc.
- This forms the first V-stitch.
- In the last sc (from the previous round), work:
- Chain 3: This creates the space between two V-stitches in the corner.
- Work Another V-stitch in the same sc as the prior V-stitch:
- dc, ch 1, dc.
- dc, ch 1, dc.
- Chain 5: Skip the shell and create a gap for the next framework row.
- Repeat the Process for Corners and Sides:
- In the next sc, work:
- V-stitch, chain 3, V-stitch.
- Chain 5, skipping the next shell and jumping to the subsequent sc.
- In the next sc, work:
- At the end of the round, sl st into the top of the starting ch-3.
You should now have 4 corner spaces with two V-stitches separated by ch-3 spaces, and chain-5 gaps along the sides of the blanket.
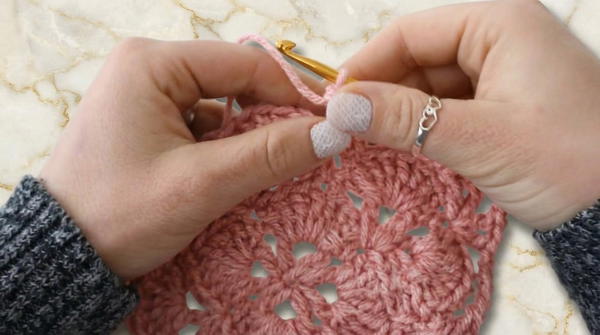
Round 4: Building Shells
- Slip Stitch into the V-Stitch Space: Insert the hook into the center of the first V-stitch, yo, and pull through both loops.
- Ch 3: (Counts as the first dc.)
- Work 6 More dc in the Same V-Stitch Space: This forms the first shell.
- Anchor the Chain-5 Space:
- Locate the 4th dc of the previous shell (from the last Shell Round), insert the hook under the chain-5, yo, and pull through to create a single crochet.
- Work a Shell in the Next V-Stitch Space:
- 7 dc in the V-Stitch space.
- Anchor the Chain-3 Corner Space:
- Single crochet into the ch-3 space.
- Continue the Pattern Around the Blanket:
- Alternate between 7 dc in V-stitches and sc anchors into chain-3 spaces or 4th dc of shells.
- At the end of the round, join with a sl st to the top of the starting ch-3.
Continuing the Pattern
Alternate between Framework Rounds (V-Stitches) and Shell Rounds as follows:
- Framework Round: Chain-5 spaces grow on the sides, and each corner has V-stitch, ch 3, V-stitch.
- Shell Round: Continue building shells in V-stitches and anchoring the sides.
Each repetition will increase the number of shells and V-stitches along the sides while maintaining the corners.
Tips for Sizing
- Measure your blanket as you progress to ensure it meets your desired size.
- Continue the alternating pattern until you’ve achieved the ideal dimensions.
Finishing
- Once your blanket reaches the desired size, complete with a final Shell Round to create a decorative edge.
- Fasten off and weave in all loose ends using a darning needle.
Conclusion
This one-color shells blanket is a timeless and elegant project suitable for gifting or adding charm to your home decor. Its seamless construction allows for easy customization in size, and the alternating rows of shells and V-stitches create stunning texture and visual interest.
Pattern Corrections
No significant corrections noted. Ensure stitch alignment in Framework Rounds for evenly spaced shells.
Tips for Success
- Consistency Matters: Maintain a consistent tension to ensure a uniform blanket shape.
- Check Placement: Ensure that shells are properly aligned with V-stitches from the prior Framework Round.
- Customize Borders: Add a decorative edge after completing the blanket if desired. A scalloped or picot border pairs well with the shell design.


