Grow your collection with the Free Crochet Sprout Hook Pattern that brings playful charm, practical use, and a unique handmade touch to your projects.
Small tools often carry the power to transform simple tasks into smooth, satisfying experiences, especially for those who love hands-on creativity. The Free Crochet Sprout Hook Pattern brings this practicality into the maker’s hands, providing a comfortable, easy-to-use hook that enhances every stitch. Lightweight yet sturdy, it allows crocheters to maintain consistent tension, reduce hand fatigue, and enjoy longer crocheting sessions without discomfort.
Easy Crochet Sprout Hook Pattern That’s Quick to Use

Its ergonomic shape fits naturally in the hand, making it ideal for beginners learning the basics as well as experienced makers tackling intricate projects. Beyond functional use, this sprout hook can become a charming gift for fellow crochet enthusiasts, combining practicality with a personal, handmade touch. Its versatility accommodates a wide range of yarn types and project sizes, whether creating delicate accessories or larger home décor items.
Quick to make and customizable, the Free Crochet Sprout Hook Pattern allows makers to infuse personality into a tool that will be used repeatedly, turning every crochet session into a comfortable and efficient experience. Every stitch worked with this hook benefits from its thoughtful construction, proving that a small, well-crocheted tool can enhance creativity, precision, and enjoyment in meaningful ways, making it an indispensable companion for anyone passionate about crochet.

Materials Needed
- Green Yarn: Used to create the sprout leaves (acrylic yarn recommended, but you can use any type).
- Brown Yarn: Used for the base (soil).
- 2 mm Crochet Hook: Perfect size for this design.
- Wire: Thin enough to manipulate but sturdy enough to hold the sprout.
- Felt Fabric: White, brown, or black to cover the underside.
- Scissors
- Silicone Glue: Used for assembly (optional, can also sew).
- Hair Hooks/Brooch Pin Hardware
Special Features of the Sprout Hair Hooks
- Portable Art: Lightweight and eye-catching, perfect for everyday wear.
- Customizable: Change yarn colors or add creative details to make it unique.
- Beginner-Friendly: Uses basic stitches like single crochet, half double crochet, and double crochet.
- Functional Use: Can be clipped into hair, attached to bags, or used as brooches.
Level of Difficulty
This is an easy-to-intermediate level project, suitable for those familiar with basic crochet stitches. Adding the wire may require extra care but is manageable with practice.
Step-by-Step Instructions
Making the Leaves (Sprout)
Start with Green Yarn:
Create 11 chains with the green yarn.- Chain 11.

- Chain 11.
Work Back Along the Chains (First Side):
- 1st Stitch: In the second chain from the hook, make a single crochet (SC).
- 2nd Stitch: In the next chain, make a half double crochet (HDC).
- 3rd–7th Stitches: In each of the next five chains, crochet 5 double crochets (DC).
- 8th Stitch: Make 1 half double crochet (HDC) in the next chain.
- 9th Stitch: Make 1 single crochet (SC) in the last chain.
Insert Wire to Shape the Leaf:
- Before turning to the other side, insert a piece of wire along the base of the stitches. Bend and shape it as you crochet to hide it within the stitching.
Work Along the Other Side of the Chain:
- Start from the bottom: Follow the same pattern as the first side, working SC, HDC, and DC stitches in reverse order along the chain.
- End: Finish with a single crochet and cut the thread, leaving a tail for assembly.

Repeat to Make Two Leaves:
- Create a second leaf following the same steps. Set both leaves aside.
Making the Base (Soil)
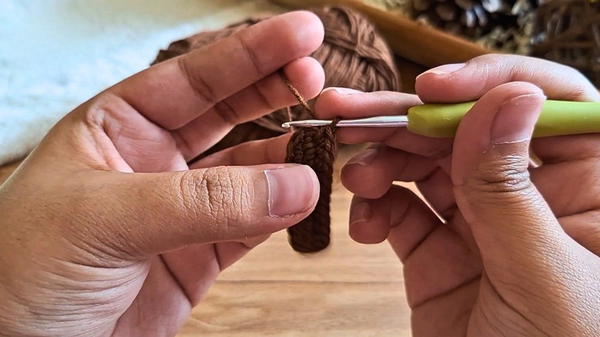
Start with Brown Yarn:
Create 11 chains.Round 1:
- First Side:
- Skip the first chain and work 9 single crochets (9 SC) along the chain.
- Turn Around at the End:
- In the last chain, make 3 single crochets to turn your work.
- Second Side:
- Work 8 single crochets (8 SC) along the other side of the chain.
- At the final stitch, make 2 single crochets to complete the round.
- Join the round with a slip stitch.
- First Side:
Round 2:
- Increase Row:
- Start with 1 SC in the same stitch and make 1 increase (2 SC in the same stitch).
- Work 8 SC, followed by 3 increases in consecutive stitches.
- Continue with 8 SC, then 2 increases to finish the round.
- Total stitches in this round = 28 SC.
- Increase Row:
Round 3:
- Work the pattern: 1 SC, 1 increase (repeat three times), 8 SC, and another round of alternating single crochet and increase.
- Total stitches in this round = 34 SC.
Round 4 (Edge):
- Create the border by alternating 1 chain and 1 slip stitch around the edge of the base.
- Cut the thread and hide the loose ends.
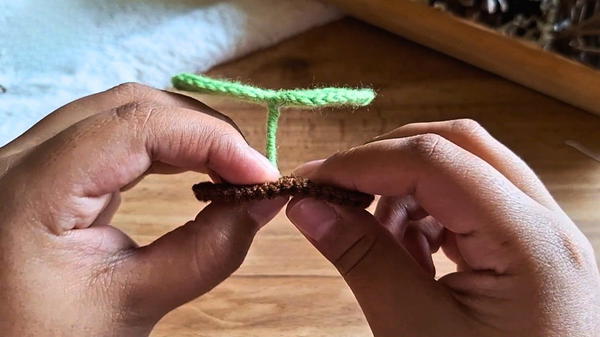
Assembly
Prepare the Leaves:
- Attach the two leaves by twisting their wire stems together. Wrap the leftover thread around the base of the wire and secure with silicone if needed.
Attach Leaves to the Base:
- Poke a hole in the center of the crocheted base and thread the wire stem through.
- Bend the wire on the underside to lock it in place.
Add Felt and Hair Clip:
- Cut a piece of felt to fit the bottom of the base.
- Make a small cut in the felt for the hair hook or brooch clip, then thread the clip through.
- Use silicone glue (or sew) the felt to the bottom of the base to secure everything.
Tutor’s Suggestions
- For Stability: Ensure the wire is well-hidden in the stitches to avoid discomfort.
- Experiment with Colors: Try different yarn shades for a creative twist.
- Alternative to Glue: Stitch the felt securely if you prefer not to use silicone.
Uses of the Crochet Sprouts
- Hair Accessories: Perfect for cute and minimalistic hairstyles.
- Brooches or Pins: Use them as decorations on bags, hats, or clothing.
- Gifts: Handmade accessories always make meaningful gifts.
Tip for Success
- When using wire, work slowly to avoid tangling or misaligning the stitches. Also, ensure the wire ends don’t stick out to prevent injuries.
Conclusion
Congratulations! You’ve crocheted a delightful sprout hair hook using simple crochet techniques. This fun and unique crochet can be adapted for various uses, from hair accessories to brooches. Be sure to experiment with colors and designs to personalize your creation.


