Snuggle up something adorable with this Free Crochet Cat Amigurumi adds playful charm and handmade warmth to any shelf, gift basket, or cozy corner.
A tiny feline stitched with charm, this delightful soft sculpture brings the quiet joy of handmade artistry to life. Inspired by the irresistible personality of real cats, this Free Crochet Cat Amigurumi captures playful spirit in every loop and curve. From the tip of its curled tail to its perked little ears, each part is thoughtfully shaped to mimic a cuddly companion you can hold in your hand. Ideal for gifting, decorating, or even therapeutic fidgeting, it’s more than just a toy, it’s a symbol of comfort, cuteness, and calm.
Kawaii Free Crochet Cat Amigurumi with Simple Yarn & Stitch Combos
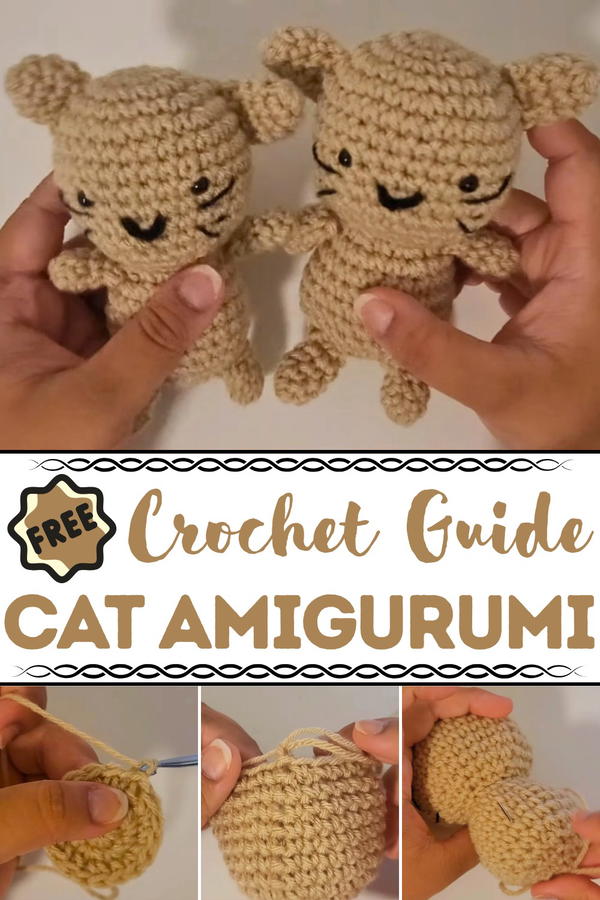
Basic stitches like single crochet, magic ring, and invisible decrease form the foundation of its shape, making it approachable even for beginners with a little patience. The process starts at the head with firm shaping, moves through the plump body and tiny paws, and finishes with whiskers and facial features that give it heart.
Subtle color choices and embroidered details allow for personality in every piece, whether you prefer a sleepy tabby or a curious tuxedo cat. The Free Crochet Cat Amigurumi serves as an adorable shelf sitter, nursery keepsake, or thoughtful handmade gift, offering softness, character, and a whisper of handmade affection in every stitch.
Step-by-Step Guide to Crochet Cat Amigurumi
Materials Needed
To crochet the little cat, you'll need the following materials:
- Yarn:
- Body: Brown or any preferred color.
- Whiskers: Thin black yarn (regular black yarn can be substituted).
- Mouth: Regular black yarn.
- Optional: Use the same yarn type for both whiskers and mouth if you prefer simplicity.
- Safety Eyes: You can substitute black yarn and a darning needle if safety eyes are unavailable.
- Darning Needle: For sewing facial features.
- Scissors: For cutting yarn as needed.
- Stuffing: Polyester filling or similar materials for stuffing the cat.
- Crochet Hook: 3.75 mm crochet hook (adjust size based on yarn weight).
Steps and Special Features
1. Head Construction
- Begin with a magic ring (alternative method: slip knot and chain 2).
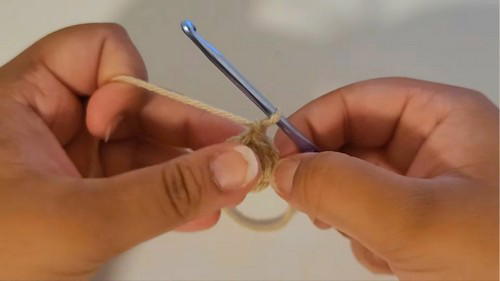
- Round 1: Crochet 6 single crochets into the magic ring and close with a slip stitch.
- Round 2: Increase each stitch to reach 12 stitches.
- Rounds 3-5: Gradually increase in each round:
- Round 3: 1 single crochet, 1 increase (18 stitches).
- Round 4: 2 single crochets, 1 increase (24 stitches).
- Round 5: 3 single crochets, 1 increase (30 stitches).
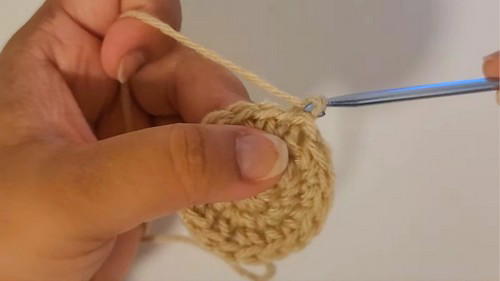
- Rounds 6-11: Single crochets only, maintaining stitch count (30 stitches).
- Round 12: Begin decreases: 3 single crochets, 1 decrease (24 stitches).
- Insert safety eyes (between Rows 8 and 9, 5 stitches apart).
- Sew the mouth using black yarn, and add whiskers in desired locations.
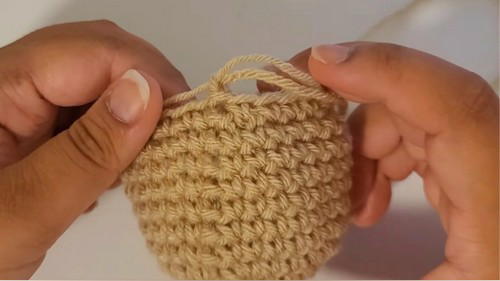
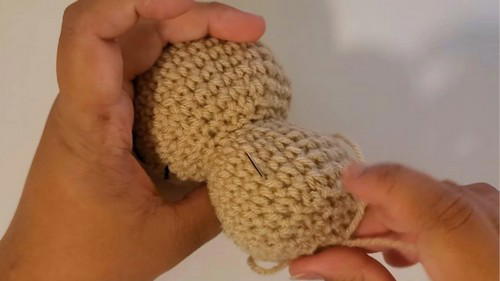
2. Body Construction
- Continue decreases and filling:
- Round 13: 2 single crochets, 1 decrease (18 stitches).
- Round 14: 1 single crochet, 1 decrease (12 stitches).
- Round 15: Switch to increases: 1 single crochet, 1 increase (18 stitches).
- Round 16: 2 single crochets, 1 increase (24 stitches).
- Rounds 17-21: Crochet continuous single crochets around to maintain shape (24 stitches).
- Round 22: Resume decreases: 2 single crochets, 1 decrease (18 stitches).
- Round 23: 1 single crochet, 1 decrease (12 stitches).
- Round 24: Decrease each stitch, reducing to 6 stitches.
Stuff as you crochet to ensure firmness, and sew the hole shut using a drawstring technique.
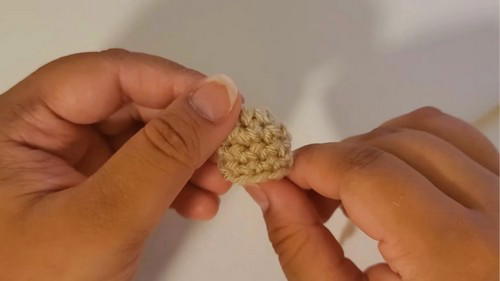
3. Arms, Legs, and Ears
- Arms and Legs:
- Crochet 4 separate pieces using continuous rounds with 6 stitches.
- Attach them to the cat’s torso at desired positions, sewing securely.
- Ears:
- Crochet two pieces with increases to reach 8 stitches.
- Place and sew them onto the sides of the cat’s head.
Tutor's Suggestions
- Customization: Choose any yarn color combination you prefer to add a personal touch.
- Simpler Options: Beginners can skip techniques like thin yarn for whiskers and use one type of yarn for all features.
- Placement Tips: Keep slip stitches hidden at the back of the head to maintain neatness.
Uses
- Gifting: A lovely gift for friends, family, or kids.
- Home Décor: Showcase it as part of your handmade crochet collection.
- Practice: Great project for mastering increases, decreases, and sewing techniques.
Difficulty Level
Beginner to Intermediate: The techniques used are simple yet involve care in placement and sewing to complete the details.
Tip
When sewing small details (like the whiskers and mouth), ensure the knots are secure to avoid loosening over time. For extra durability, pass the darning needle through multiple stitches before cutting the excess yarn.
Conclusion
Crochet Cat Amigurumi is a rewarding and fun project that offers a chance to practice various techniques while creating a cute companion. With helpful suggestions provided in the tutorial, you’ll enjoy crafting this piece regardless of your skill level. So, grab your yarn and hook, and let your creativity shine!


