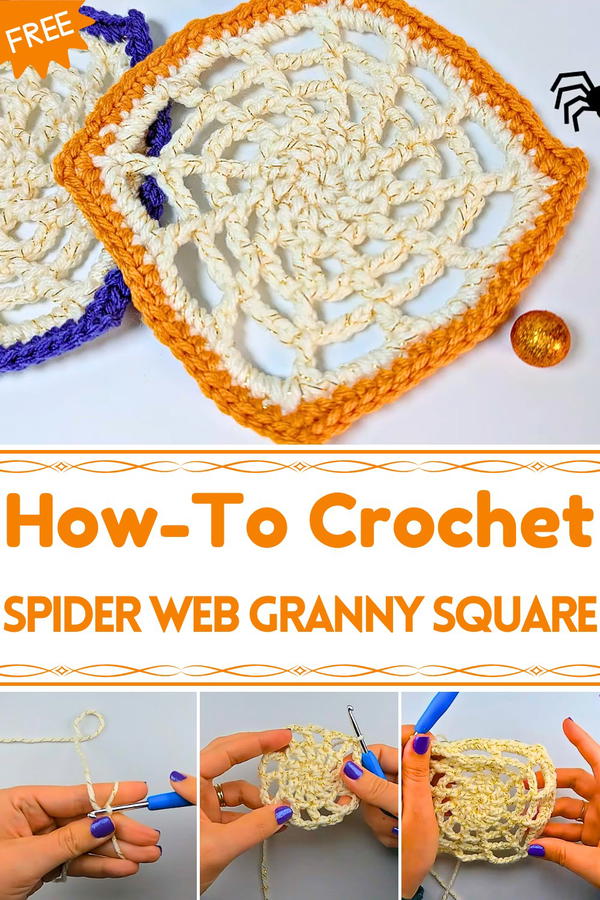
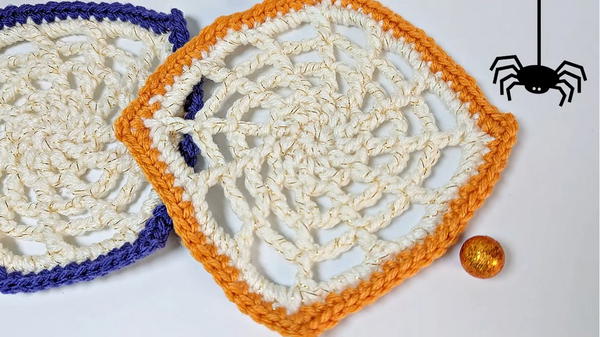
Spin creative charm with this Free Crochet Spider Web Granny Square Pattern, adding unique texture and a spooky yet stylish twist to your projects.
The beauty of this piece lies in its balance of delicacy and boldness, where open spaces form striking symmetry that draws the eye. Its specialty rests in versatility, it can be joined with others to form blankets, table runners, cushion covers, or wall art, offering endless ways to style and personalize. The pattern’s airy layout keeps it lightweight while maintaining durability, ensuring it holds its shape beautifully over time.
It also provides a satisfying creative outlet, as each finished square brings both texture and visual interest. Beyond aesthetics, it’s practical, adaptable, and a wonderful use of leftover yarns. The result is a statement piece that feels both timeless and modern, carrying a hint of mystery and elegance that suits every season. This square transforms ordinary décor into something striking, expressive, and full of handmade character.
Materials You Will Need
Yarn: Worsted weight yarn in two colors.
- Color 1: Light-colored yarn with metallic gold for the web design.
- Color 2: A dark or solid-colored yarn for the border (e.g., green in the tutorial).
Hook Size: 4.0mm (US crochet hook).
Additional Tools:
- Scissors
- Yarn needle (for weaving in ends)
Special Features of the Spiderweb Granny Square
- Dynamic Design: Incorporates layers that transform the classic granny square into an eye-catching spiderweb shape.
- Customizable Size: Ideal for creativity—crochet additional rows or adjust the web design to fit your project needs.
- Versatile for Projects: Use the square as part of a blanket, pillow, bag, or even a decorative item for Halloween.
- Beginner-Friendly: Easy-to-learn stitches and basic techniques make it a great choice for new crocheters.
Step-by-Step Instructions
1: Starting with the Magic Ring (Round 1)
Create the Magic Ring:
- Lay the end of your yarn over 3 fingers and wrap it around, crossing the yarn on top.
- Slip the hook under the yarn, grab the top piece, pull up a loop, and chain 1.
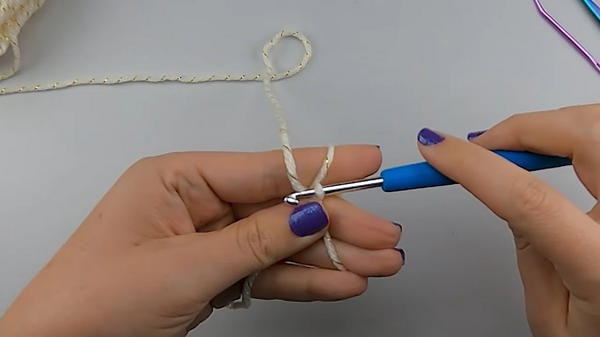
Make 12 Single Crochets Inside the Ring:
- Insert the hook into the ring, grab the yarn, pull up a loop, yarn over, and pull through both loops on the hook to complete a single crochet.
- Repeat for a total of 12 single crochets.
Close the Ring:
- Pull the starting tail to tighten the ring and close the center.
- Join the round with a slip stitch to the first single crochet.
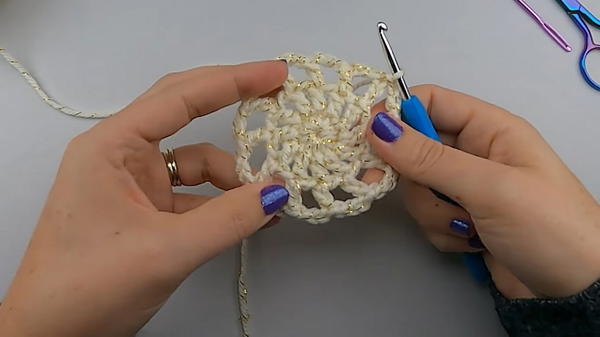
2: Begin the Spiderweb Pattern (Round 2)
Chain 4:
- The first 3 chains count as a double crochet, while the fourth chain creates a chain-1 space.
Double Crochet and Chain 1:
- Yarn over, insert into the next stitch, make a double crochet (dc), and chain 1.
- Repeat the pattern (double crochet, chain 1) all the way around.
Close the Round: Slip stitch into the third chain of your starting chain.
3: Expanding the Web (Round 3)
Chain 6:
- The first three chains count as a double crochet, and the next three chains create a chain-3 space.
Double Crochet and Chain 3:
- Yarn over, insert into the top of the previous double crochet, make a double crochet, and chain 3.
- Repeat this pattern (double crochet, chain 3) all the way around.
Close the Round:
- Slip stitch into the third chain of your starting chain.
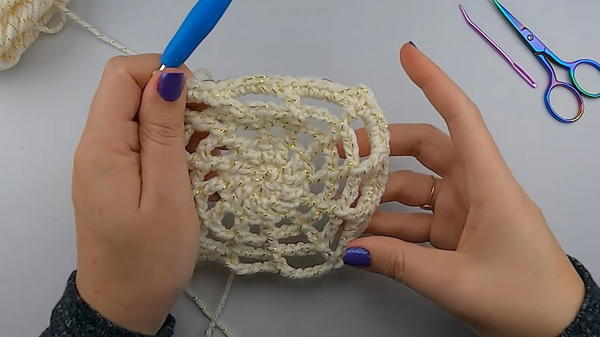
4: Adding the Spiderweb Structure (Round 4)
Chain 7:
- The first three chains count as a double crochet, while the next four chains create a chain-4 space.
Double Crochet and Chain 4:
- Yarn over, insert into the double crochet from the previous round, and make a double crochet. Then chain 4.
- Repeat this pattern (double crochet, chain 4) all the way around.
Close the Round:
- Slip stitch into the third chain of your starting chain.
- Slip stitch into the third chain of your starting chain.
5: Finish the Spiderweb Pattern (Round 5)
Chain 8:
- The first three chains count as a double crochet, while the next five chains create a chain-5 space.
Double Crochet and Chain 5:
- Yarn over, double crochet into the previous round's double crochet, and chain 5.
- Repeat this pattern (double crochet, chain 5) all the way around.
Close the Round:
- Slip stitch into the third chain.
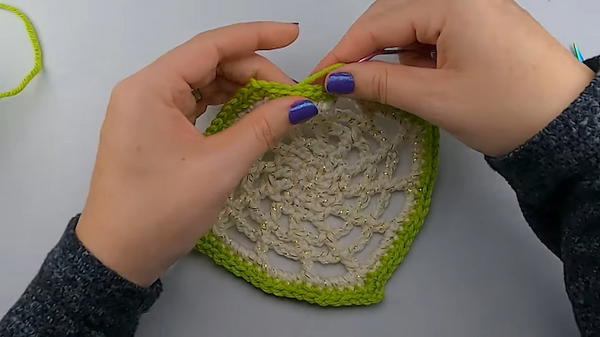
6: Squaring Off the Spiderweb (Round 6)
Create Corners:
- Chain 1, single crochet in the starting stitch, chain 2, and single crochet again in the same stitch.
Create Sides:
- In each chain space, make 4 single crochets.
- Single crochet into the top of the double crochet.
- Repeat across the side.
Repeat to Complete the Square:
- Alternate corners and sides as described until the square is finished.
7: Adding the Border (Round 7)
Switch Colors:
- Seamlessly join the second (border) color by pulling the new yarn through and making a slip stitch.
Create a Border:
- Chain 1, single crochet into the same stitch as the chain.
- Follow the same corner pattern: single crochet, chain 2, single crochet within the corner spaces.
- For the sides, make 16 single crochets, working evenly across.
Seamless Join:
- Pull the yarn tail through a yarn needle, insert into the second stitch, then back-loop only on the last stitch to create an evenly spaced “seamless” finish.
Tutor’s Suggestions
Blocking:
- Block your granny square for a polished look. Pin it to a foam mat, spray with water, and let it dry. This ensures perfect alignment of the spiderweb and borders.
Joining Squares:
- If making a larger project, explore different joining techniques to combine multiple squares (tutorials for this are widely available).
Yarn Choices:
- Experiment with colors—white and black for a Halloween look, or glitter yarn for a more decorative effect.
Level of Difficulty
Beginner-Friendly: Although it involves multiple rounds, the steps are simple and repeatable, making it a great project for beginners. Clear explanations help with creating new stitches or tricks like the slip knot and magic circle.
Uses of the Spiderweb Granny Square
- Perfect for Halloween-themed projects.
- Suitable for blankets, throw pillows, handbags, or DIY home décor (e.g., coasters or wall hangings).
- Enhances any project needing a unique, web-pattern element.
Tip for Success
Take your time with the magic ring and the seamless join, as these techniques significantly impact the overall finish of the project. Practice them separately if needed.
Conclusion
The Spiderweb Granny Square is a fun, creative project that’s quick to crochet and easy to customize. Whether you’re crafting for Halloween or adding a whimsical touch to a larger project, this design is sure to stand out. With basic stitches and clear repetitions, this project is a beginner-friendly way to practice new techniques and create something visually stunning.