Adorn your hair with softness using the Free Crochet Velvet Scrunchie Pattern, a plush and stylish accessory that adds comfort, charm, and shine.
Long before the modern hair tie became a staple, women turned to soft fabric bands to protect their hair and add charm to their style, today, that timeless idea takes on new elegance through velvet yarn. This luxurious material, known for its rich texture and sheen, finds a modern revival in this Crochet Velvet Scrunchie Pattern, turning a simple accessory into a statement of sophistication.
Glam Up Your Hair Days with Crochet Velvet Scrunchie Pattern
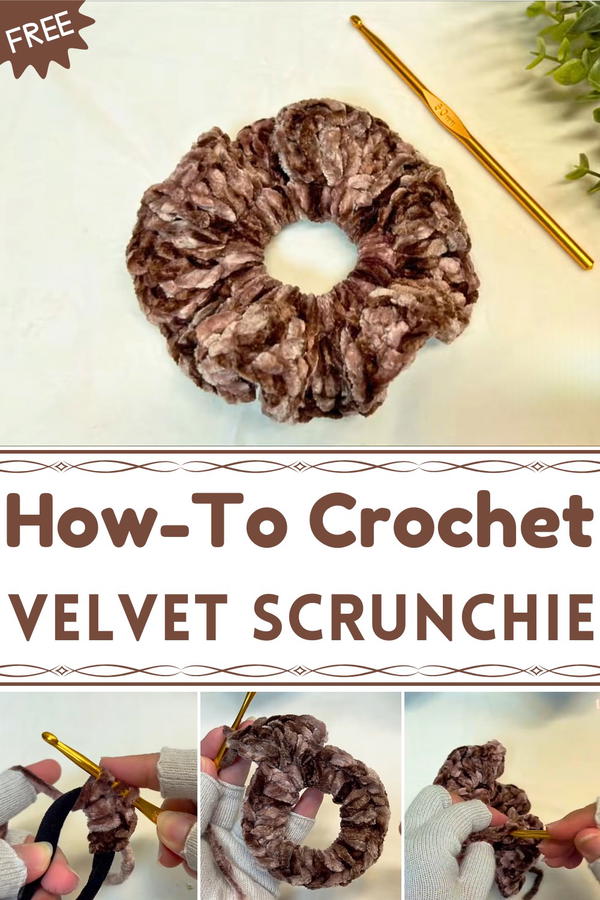
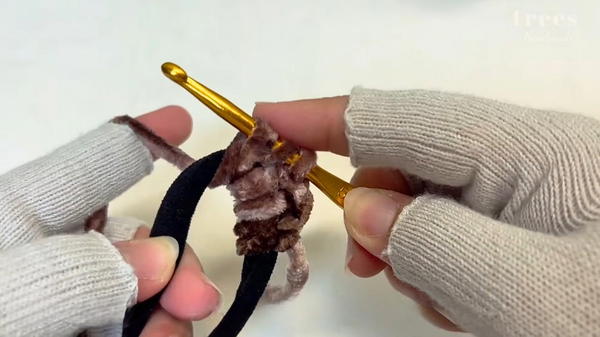
The process begins by working a chain around the elastic, forming a soft foundation before layering half-double or single crochets to build fullness. As you continue, the velvet loops expand to create a rich, voluminous texture that feels soft to the touch and looks effortlessly stylish.
Perfect for both casual days and special occasions, this plush scrunchie offers a gentle grip that prevents hair breakage while adding a subtle glow to every hairstyle.
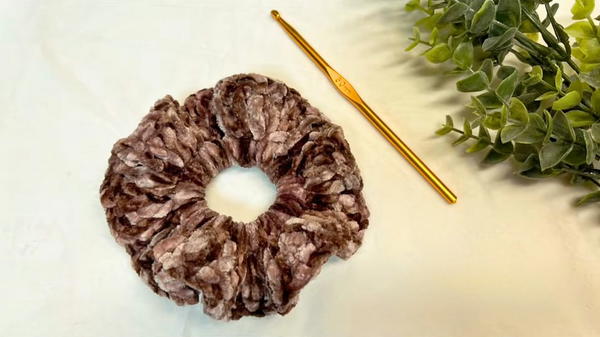
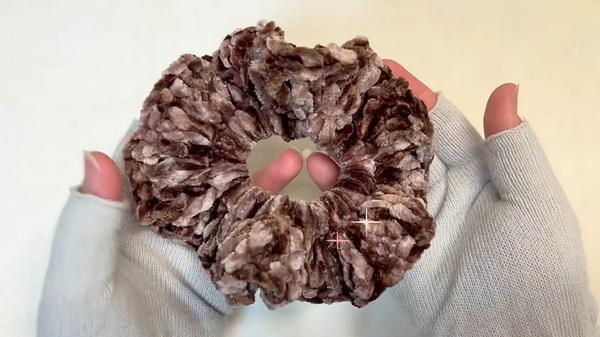
Its smooth surface and full, ruffled design make it both functional and beautiful—ideal for ponytails, messy buns, or as a wrist accent.
The pattern uses just a small amount of velvet yarn, a hair elastic, and a basic crochet hook, making it a quick yet rewarding project for all skill levels. Finished with a neat slip stitch and tucked ends, this scrunchie radiates comfort and polish in one perfect loop, proof that even the smallest crochet pieces can carry timeless charm and everyday utility.
Materials and Tools
Yarn: Bulky Weight Velvet Yarn (Weight 5 or 6 is often ideal). The velvet texture is crucial for the scrunchie's plush, signature look.
Elastic Hair Tie: One basic elastic hair tie is needed as the base around which the yarn is crocheted.
Crochet Hook: A large hook size, likely 5.0 mm to 6.5 mm (I/9 to K/10.5), to accommodate the bulky yarn and ensure a loose, voluminous stitch.
Tools:
Tapestry Needle (Yarn Needle): For weaving in the yarn tails securely.
Scissors: For cutting the yarn.
Level of Difficulty: Beginner
This is an excellent beginner project because:
It uses only one very simple stitch (Double Crochet is the most common for scrunchies).
It does not require counting rows or complex shaping.
The entire project is finished in less than 30 minutes.
Special Features and Uses
Special Features
Velvet Texture: The use of velvet yarn creates a unique, incredibly soft feel and a gentle shimmer that standard yarn cannot replicate.
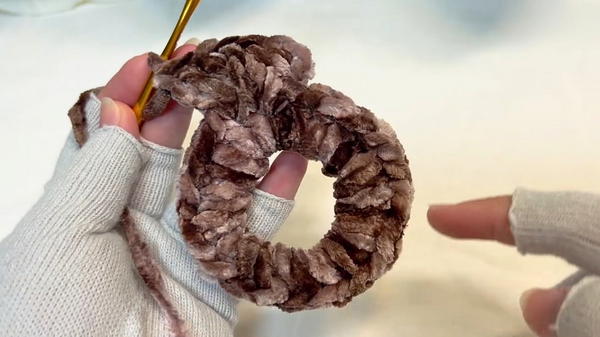
High Volume: The technique involves crowding a large number of stitches around the elastic, giving the scrunchie maximum "fluff" and bulk.
Quick Project: Due to the simple stitch pattern and bulky yarn, the scrunchie works up very quickly.
Uses
Hair Accessory: Designed to secure a ponytail or bun while adding a stylish accent.
Wrist Accessory: Can be worn on the wrist when not in use.
Gift Idea: Makes a great small, personalized gift item.
Tutor's Suggestions
A good crochet tutor would offer the following advice for this specific project:
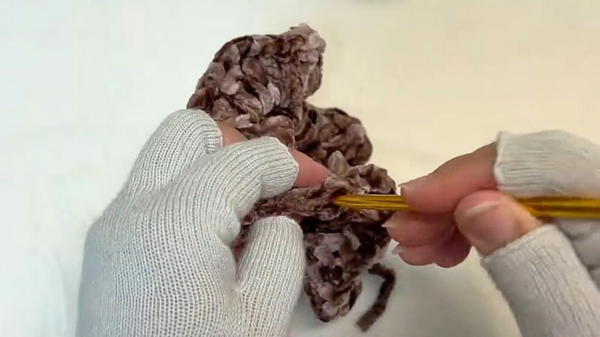
Work Around the Elastic: Unlike regular crochet, you wrap the stitch around the elastic hair tie itself, not into previous stitches. This secures the yarn directly to the elastic.
Stitch Density: The key to a fluffy scrunchie is overcrowding the stitches. You must continue making double crochet stitches until the entire elastic is densely packed and completely covered, with the fabric slightly wavy.
Velvet Yarn Handling: Velvet yarn can be slippery. Work with a relaxed tension and ensure your final slip stitch to join the round is secure to prevent the yarn from unraveling.
Step-by-Step Breakdown
This tutorial guides you through creating a luxuriously soft and bulky Velvet Scrunchie. This is a fast project, perfect for using up yarn scraps or making last-minute gifts. The resulting scrunchie has a desirable, fluffy volume thanks to the combination of high-density velvet yarn and a simple, repetitive stitching technique.
Conclusion
By utilizing simple double crochet stitches and plush velvet yarn around an elastic band, this tutorial successfully delivers a trendy, soft, and quick-to-make hair accessory. It's an ideal project for practicing basic crochet stitches while achieving a highly stylish result.
Tip
Before you cut the yarn, stretch the scrunchie wide after you finish stitching the round. If you can still see the elastic band peeking through, go back and add more double crochet stitches until the elastic is completely obscured, ensuring maximum fluffiness.


