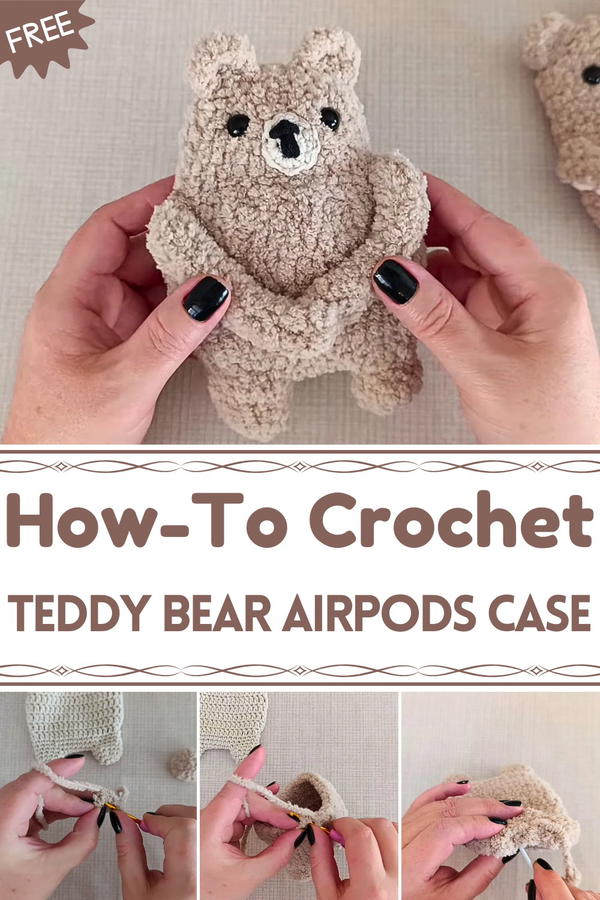
Cuddle up with this Free Crochet Teddy Bear AirPods Pattern, offering cute protection, playful charm, and a delightful accessory for your tech essentials.
Small handmade accessories have long held a special place in daily life, turning ordinary items into objects of charm and personality. The Free Crochet Teddy Bear AirPods pattern transforms this idea into a playful and functional piece, giving AirPods a cozy, protective cover with an adorable twist. Its soft, durable texture safeguards devices from scratches and minor bumps while adding a cheerful accent that reflects individuality.
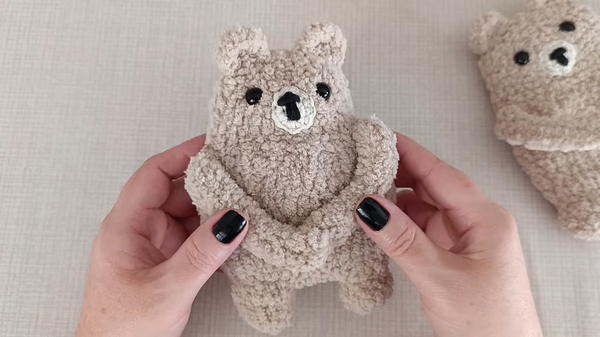
Cozy Crochet Teddy Bear AirPods Great for Protection
Beyond practical use, this project provides a calming and satisfying experience, allowing makers to focus, relax, and refine fine motor skills with each careful stitch. The teddy bear motif makes it a delightful gift for friends, family, or loved ones, combining utility with thoughtful, handcrafted charm. Its lightweight and portable design ensures it can be carried anywhere, fitting easily into pockets, bags, or backpacks without compromising convenience.
The Free Crochet Teddy Bear AirPods pattern also encourages creativity, offering opportunities to experiment with colors, small embellishments, or personalized touches to suit any style. More than a protective accessory, it becomes a playful statement that brightens everyday life, offering both functional value and a small dose of joy whenever AirPods are used or displayed.
Materials Needed
- Feathery or cotton thread (1 ball can make two teddy bears)
- Crochet hook (appropriate for your yarn size)
- Stitch markers (to track your rows)
- Needle (for sewing parts together)
- Snap closures (for securing the teddy bear’s hands and pocket)
- Silicone safety eyes (optional)
- Black cotton thread (for creating the nose)
Step-by-Step Guide
1. Making the Feet (Start Here)
- Row 1: Create a magic ring and make 6 single crochets into it.
- Row 2: Add 2 single crochets in each stitch to increase the count to 12.
- Rows 3–4: Work 12 single crochets in each row to form the feet.
- Make two feet. Cut the thread after making the first foot, but do not cut the thread for the second foot—this will be used to join them and create the body.
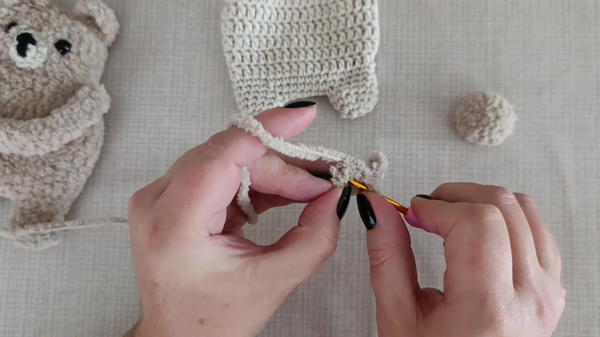
2. Joining the Feet and Forming the Body
- Attach the two feet by creating 6 chain stitches in between and crocheting around them.
- Work 12 single crochets in each foot and 6 single crochets along the chain, forming a continuous circular shape of 36 stitches per round.
- Gradually build the body by crocheting rows of single and double crochets, increasing and decreasing stitches as necessary to shape it.
Key Details:
- At Row 5, continue crocheting single stitches (36 in total).
- At Row 7, switch to double crochet for shaping.
- Rows 8–12 involve slight decreases to taper the body, bringing the total down to 30 stitches.
3. Creating the Pocket
- The pocket is attached to the body for functionality.
- Starting where the feet join, create 12 chain stitches. This serves as the base for the pocket. Attach the chain to the body and build rows of single crochet, working until there are 32 total stitches in the pocket.
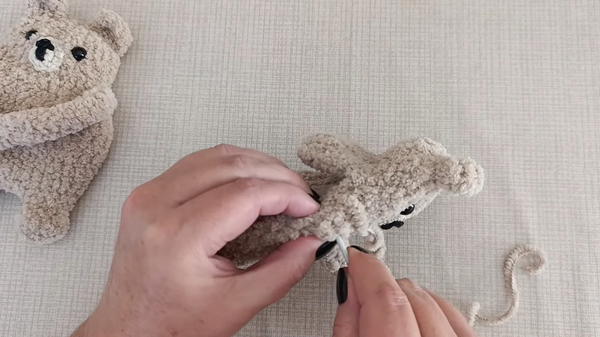
4. Making the Head and Ears
- Crochet the head as a sphere by increasing stitches in the initial rows, maintaining the count in the middle rows, and decreasing to close the sphere.
- For ears: Using a circle pattern, create small, round ear shapes.
- Securely sew the ears to the top of the head, ensuring symmetry for a balanced appearance.
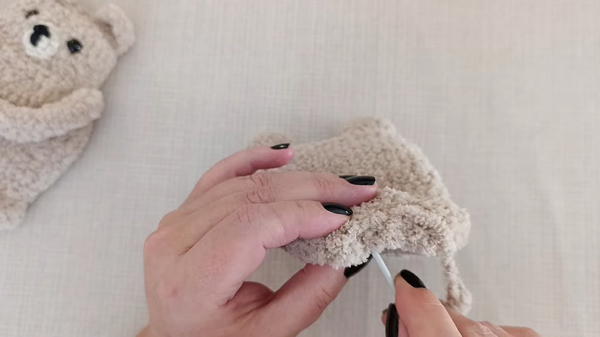
5. Facial Features and Finishing Touches
- Nose: Use black cotton thread and the magic ring technique to craft a nose. Sew it to face-level rows.
- Eyes: Insert silicone safety eyes, ensuring even placement between stitches for a clean look.
- Assemble the head onto the body using a needle, ensuring it is firmly secured.
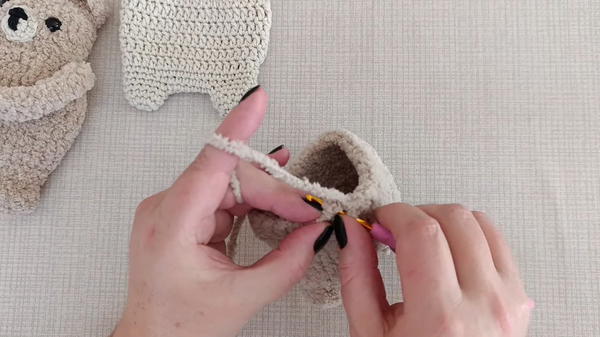
6. Attaching the Arms, Snaps, and Adding a Lid
- Create arms separately and sew them onto the body just below the head.
- Use snaps on the teddy bear’s hands and the edge of the pocket to make it functional as a locking AirPods holder.
- Finally, create a lid using straight and double crochets to ensure the items placed inside the pocket remain protected.
Final Assembly
- Assemble all components (head, body, arms, and pocket) together.
- Clean up and hide any loose ends inside the body using a needle for a professional look.
- Test the functionality of the pocket by placing small items inside, like AirPods or lipstick.
Special Features
- Dual Functionality: Serves as both a cute teddy bear and a storage pouch for small items such as AirPods, lip balm, or moisturizer.
- Soft and Versatile: Use feathery or standard cotton yarn for a soft and lightweight design.
- Child-Friendly: Can also be used as a toy.
- Customizable: Experiment with colors and yarn materials for a variety of appearances.
Tutor’s Suggestions
- Use Stitch Markers: Track the beginning of your rows to ensure accuracy.
- Don’t Crochet Too Tightly: Keep your stitches light and flexible for ease of assembly.
- Test Different Yarns: The teddy bear looks great in feathery threads but also works beautifully with other yarns.
- Practice the Basics First: If you are new to the magic ring technique, practice it separately first.
Level of Difficulty
This project is Intermediate. While the individual steps involve basic crochet stitches such as single and double crochets, the process also includes shaping, assembly of multiple parts, and adding finishing details, which requires some prior experience.
Uses
- AirPods Holder: Protects and stores wireless headphones.
- Gift Idea: Ideal for birthdays, baby showers, or other occasions.
- Decorative Item: Adds charm to a desk or shelf.
- Storage: Suitable for small items, such as lip balms, moisturizers, or small trinkets.
- Toy for Kids: Soft and safe for children.
Tip for Success
When assembling the teddy bear, ensure you leave long tails on each piece—these will be helpful for sewing the parts securely together.
Conclusion
This cute crochet teddy bear AirPods holder is a perfect combination of style and functionality. With its soft, sweet design, it makes a great gift, a charming decorative item, or a practical storage pouch.


