Feel effortlessly stylish with a design that turns heads wherever you go! A crochet top is not just clothing; it’s wearable art bursting with beauty and charm. Perfect for warm days or layered for a chic look, this unique creation comes in endless patterns and colors to match every mood and moment.
Fresh & Flirty Crochet Top Styles That Feel Magical
Its intricate details and airy texture make it both fashionable and comfortable, offering a balance of elegance and practicality. Whether you’re heading to the beach, a casual outing, or a fun gathering, the crochet top blends versatility with creativity.
Each piece is a masterpiece, combining soft yarn and delicate designs for a look that’s as special as you are. The beauty of this top lies in its ability to brighten any outfit, making you feel confident and classy with minimal effort. It’s more than just a top—it’s a statement!
Materials Needed
- Yarn: 4mm (medium weight) yarn of your choice
- Hook: Size 4.25mm crochet hook
- Additional Items: Yarn needle for weaving in ends, scissors
Key Abbreviations
- ch: Chain
- sc: Single crochet
- dc: Double crochet
- sl st: Slip stitch
Special Notes
- Adjust the starting chain to fit your preferred size.
- Ensure you measure your fabric to achieve a snug yet comfortable fit.
Skill Level: Intermediate to Advanced
Step-by-Step Pattern
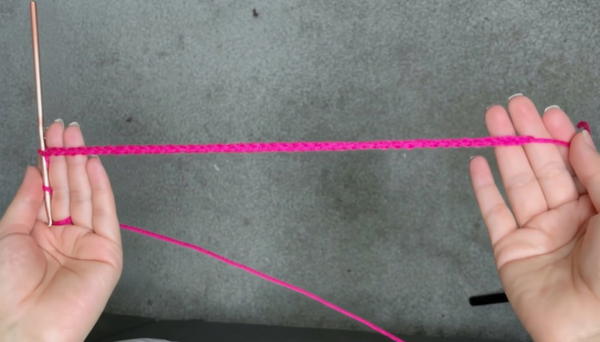
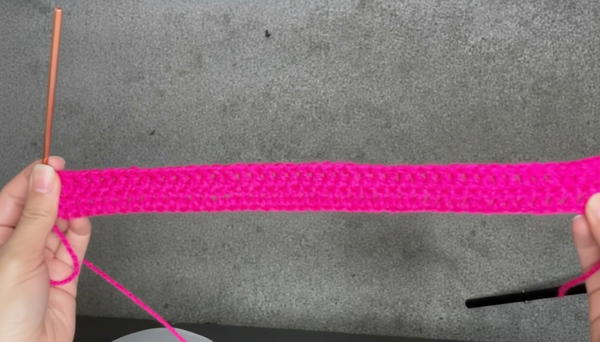
Step 1: Starting Chain
- Begin with a slip knot.
- Make 45 chains for a small size. Adjust to 50 chains for a medium size, or measure yourself for a customized fit.
Step 2: Foundation Row
- Add 2 extra chains for height.
- Starting from the 3rd chain, make dc across the entire chain.
Step 3: Build Your Rows
- Turn the work and ch 2 for height.
- Continue with dc across the row, ensuring the last stitch is worked into the second chain of the height stitch.
- Repeat this step for 10 rows (or more for larger sizes).
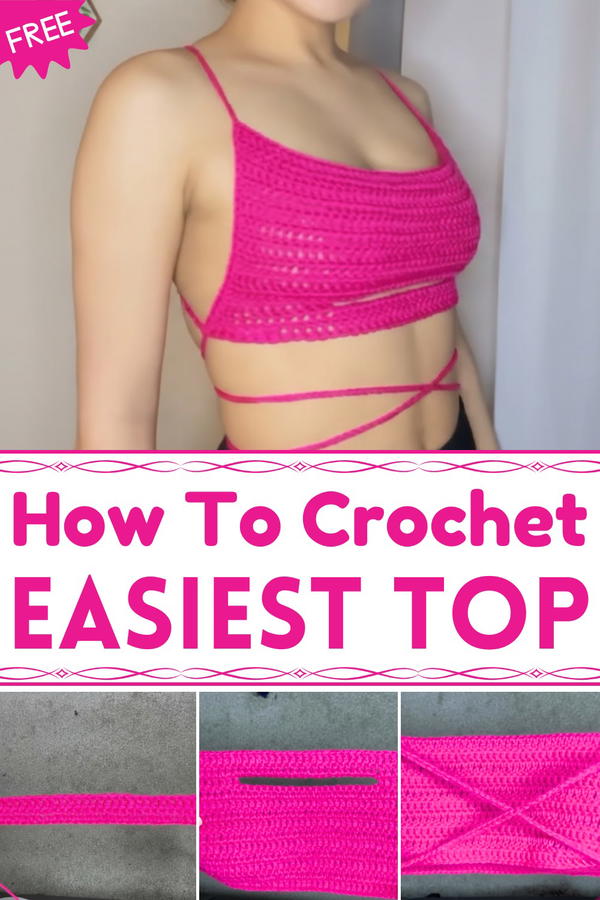
Step 4: Create Straps
- On row 11, work 12 dc stitches.
- After the 12th stitch, chain 22 sts (adjust chains for larger sizes).
- Go directly to the other side of the top, skipping the fabric below the chain, and continue working 12 dc stitches across.
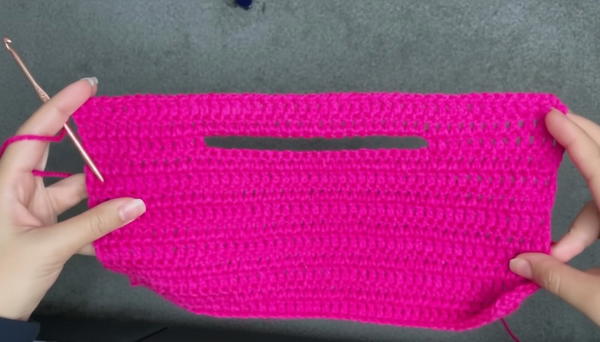
Step 5: Build Strap Height
- Following the chain row, add 2 rows in dc, working dc into chains and across the fabric.
- Add more rows if you prefer longer coverage.
Step 6: Add Edging
- Work sc along the edges of your fabric to enhance the finish.
- When you reach the corners, create chains to make ties.
- For waist ties, chain a length equal to 4x the width of the top.
- Repeat this for both corners so ties are symmetrical.
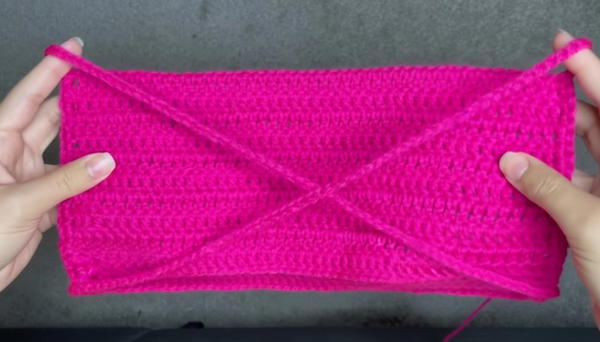
Step 7: Finish and Assemble
- Fasten off your yarn with a simple chain and trim excess.
- Use a yarn needle to weave loose threads into the fabric for a clean finish.
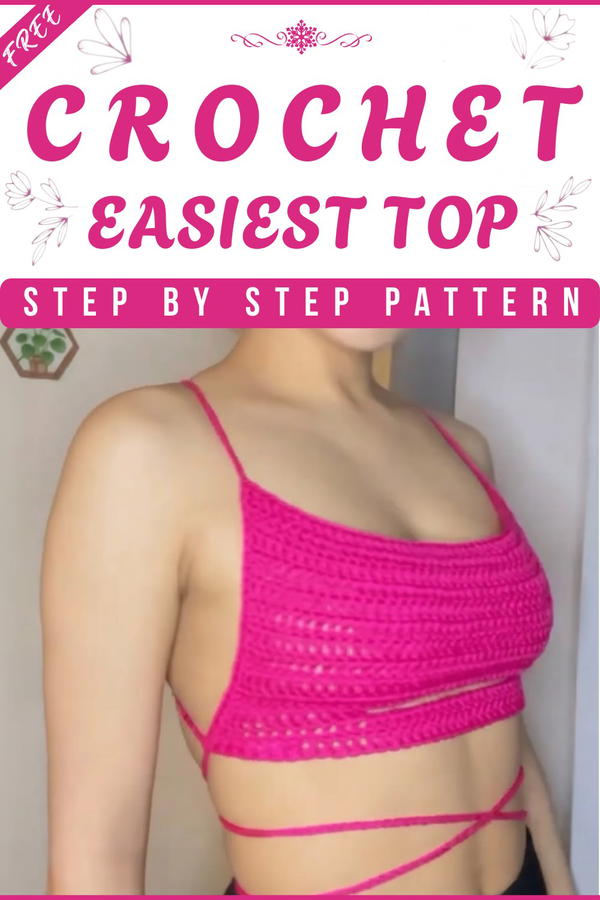
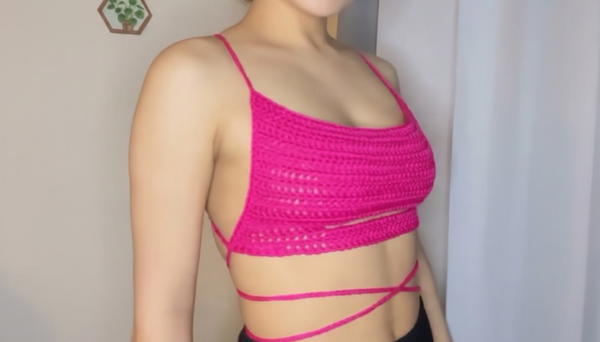
- Position it on your body with ties crossed at the back for an elegant X-band effect.
Conclusion
This timeless crochet top design is perfect for summer outfits or layering in cooler months. Its adjustable straps and waist ties give it versatility, both in sizing and styling.
Pattern Correction & Tip
- Correction: If the fabric edges curve or are uneven, block your top using water and pins to straighten it.
- Tip: For added durability, secure your waist ties with a slip stitch at the corners. This will prevent stretching.