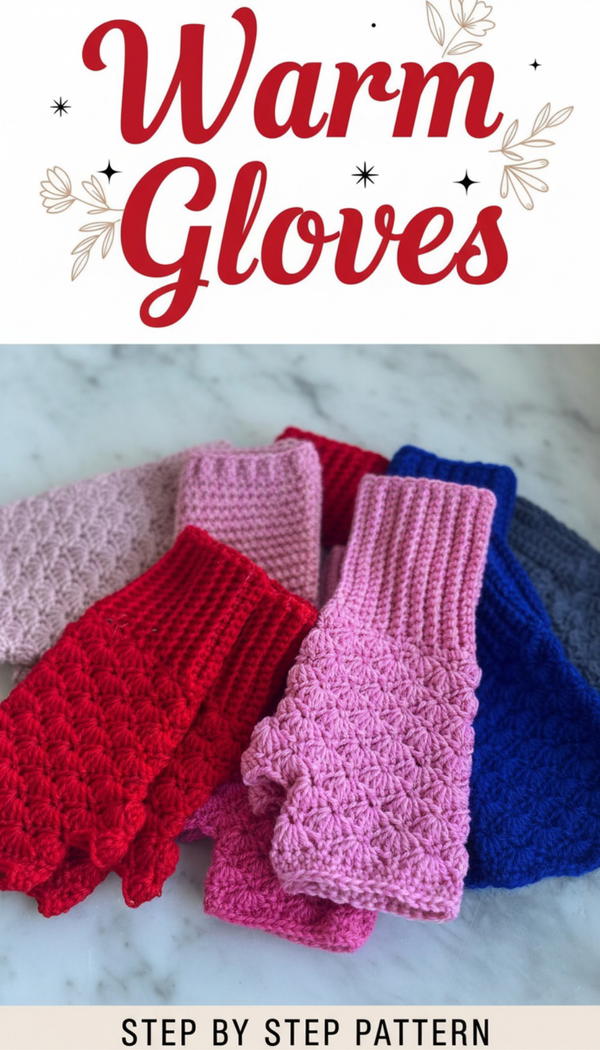
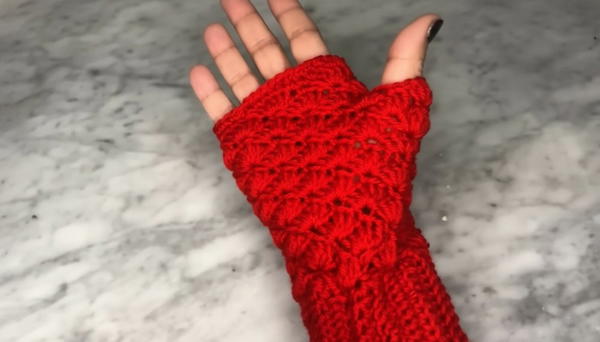
Stay cozy and stylish with this easy crochet wrist warmers gloves pattern that lets your fingers move freely while keeping chilly winds at bay.
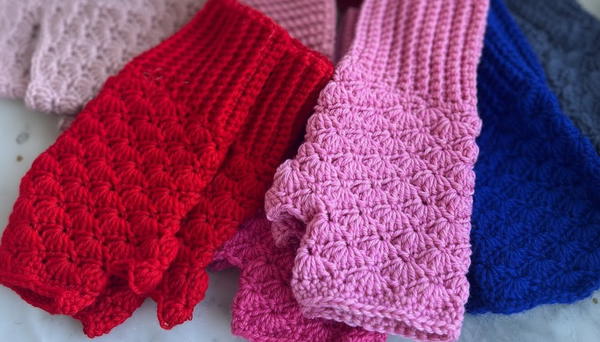
Wrist warmers are small, cozy accessories that keep your hands warm while still letting your fingers move freely. These gloves hug your wrists snugly, adding a touch of style and comfort to chilly days. Their beautiful knitted or crocheted designs come in many colors and patterns, making them perfect for both casual and dressy looks. They are great for outdoor walks, working at the computer, or simply relaxing at home without feeling cold.
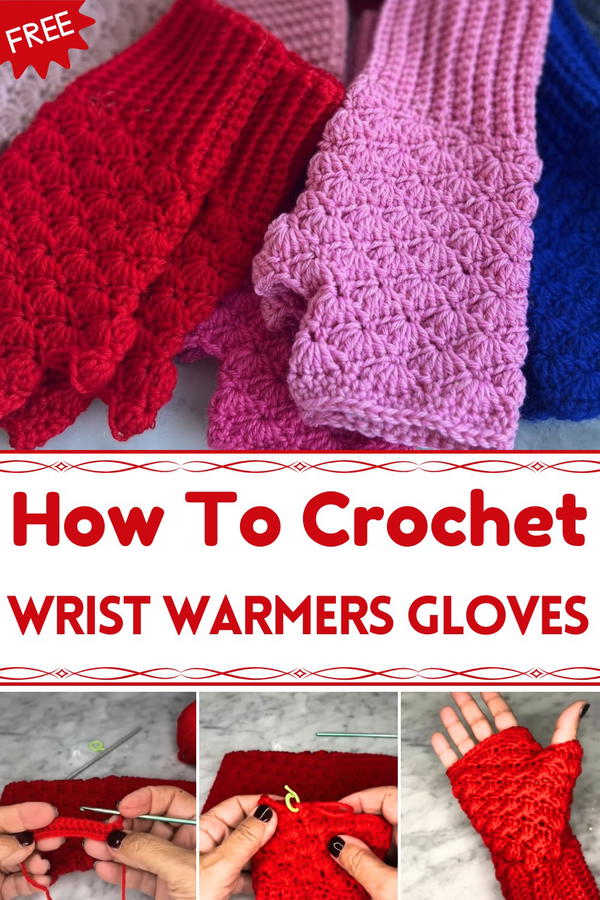
Charming Crochet Wrist Warmers Gloves for Cozy Comfort
Lightweight and easy to wear, wrist warmers fit all sizes and can be worn under jackets or alone as a fun fashion statement. Plus, they allow you to use your phone, type, or hold things without taking them off. Whether you want to add a handmade touch to your outfit or need something practical against the cold, these charming wrist warmers are a wonderful choice that blends warmth and style effortlessly. Everyone will love the cozy feeling and lovely look!
Crochet Fingerless Gloves Pattern
Skill Level: Intermediate
Special Features:
- Elastic ribbed cuff made with slip stitches for ease of wear
- Beautiful shell stitch pattern throughout the glove
- Thumb gusset constructed with carefully placed increases
- Fingerless style for versatility
- Different seam placements for right and left hand for better fit
Materials Needed:
- 100% wool yarn, 2 balls of 50g each
- Crochet hooks size 3 (for cuff) and 4 (for glove body)
- Stitch marker
- Yarn needle
- Scissors
Pattern Steps
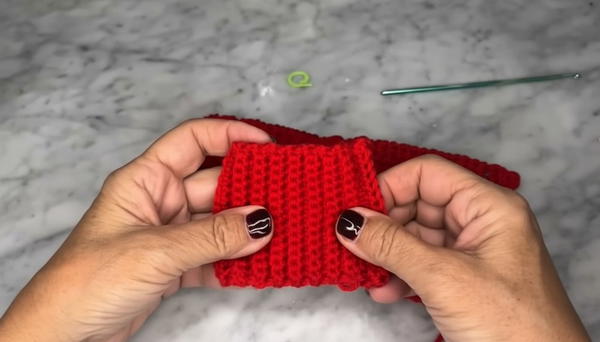
Step 1: Make the Cuff with Size 3 Hook
- Chain 16.
- Insert hook into second chain from hook, make 1 single crochet (sc), then 1 sc in each chain to end (15 sc total).
- Chain 1, turn.
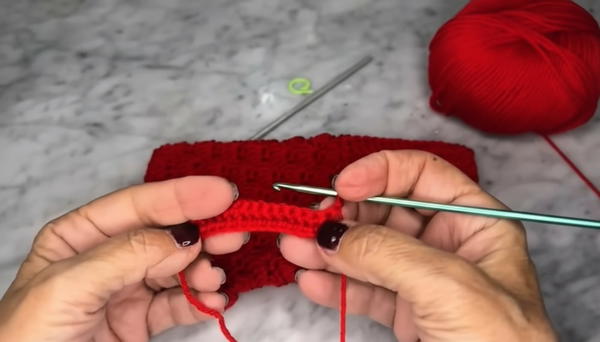
Step 2: Work Back Loop Slip Stitch Ribbing – 35 Rows
- Work 15 sc in back loops only along the row (this creates an elastic band).
- Chain 1, turn.
- Repeat this row 35 times to form cuff length.
- After 35 rows, fold cuff in half.
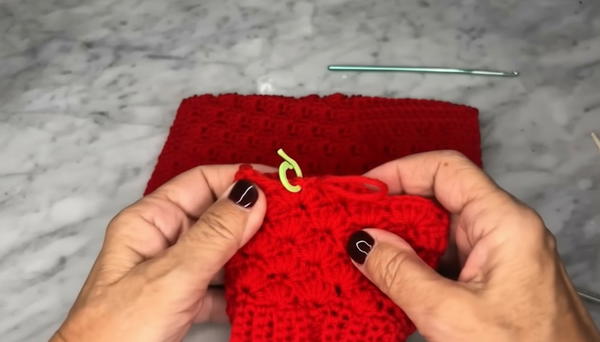
Step 3: Close the Cuff Seam
- Using hook, fold cuff and work half single crochet (hsc) through matching stitches from edge and base to close the cuff.
- Continue around cuff edge to join seam securely. Keep using size 3 hook.
- Turn cuff right side out.
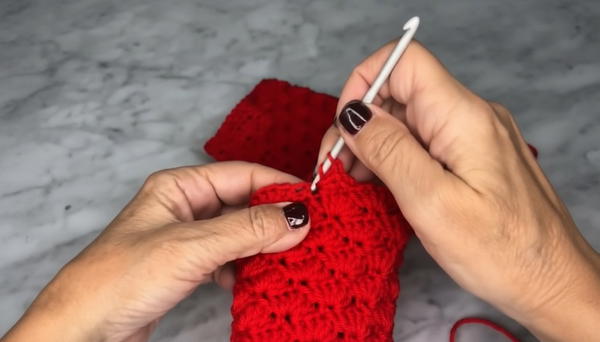
Step 4: Switch to Size 4 Hook for Glove Body
- To start glove body on cuff edge, work 37 single crochet stitches evenly around (35 cuff rows plus 2 increases for stitch count to match shell stitch pattern: multiple of 3 + 2).
- Make 2 increases spaced evenly during this round to get 37 sts total.
Step 5: Round 1 – Begin Shell Stitch Pattern
- Shell stitch: (1 sc, skip 2 sts, 5 double crochet (dc) in next st, skip 2 sts) around.
- Finish with 1 sc for a total of 7 shell groups around the cuff.
- Place stitch marker at the beginning of round.
Step 6: Shell Stitch Rounds 2 to 7
- Continue working shell stitch rounds in spiral, alternating placements so single crochets are centered over shells below, and vice versa.
- Work 7 rounds total of shell stitch to form glove body before thumb shaping.
Step 7: Round 8 – Begin Thumb Gusset
- Work shell stitch pattern normally until reaching thumb position (count seam and decide thumb location for left or right hand accordingly).
- At thumb gusset spot, work shell stitch plus an additional single crochet and a shell in same stitch to start increasing for thumb.
- Place stitch marker after this increase to mark start of thumb section.
Step 8: Rounds 9 and Beyond – Continue Thumb Shaping
- Work shell stitch around including thumb increases as you round the glove, placing extra shells and increases grouped around thumb gusset to widen thumb area.
- Skip stitches as per shell stitch, and continue placing single crochet between shell groups.
- Continue until thumb gusset fits comfortably (follow video for specific rounds 9 to 26 increases).
Step 9: Closing Thumb and Continuing Glove Body
- On rounds after thumb gusset completion, join thumb increases together by working shells that connect thumb section closed.
- Continue shell stitch pattern uninterrupted around remaining glove body.
Step 10: Finishing and Finger Opening
- After finishing main hand section, close off with 2 rounds of single crochet around top edge for clean finish.
- Use invisible join for seamless finish.
- Cut yarn and weave in all ends.
Step 11: Make Second Glove Adjustments (Right vs Left Hand)
- For left glove, start thumb increases after 2 shell groups.
- For right glove, start thumb increases after 5 shell groups—this keeps seam at the back of the hand for best fit.
- Follow same thumb shaping instructions with correct adjustment.
Tutor’s Suggestions:
- The 3-hook cuff gives more elasticity for easy wearable gloves.
- Use stitch markers to keep track of thumb increases.
- Wool yarn is recommended for warmth and stretch.
- Adjust cuff length by changing the number of rows in Step 2.
- Customize yarn colors for personal style.
Uses:
- Perfect for chilly weather while allowing finger flexibility for texting, driving, or crafting.
- Stylish enough for casual or outdoor wear.
- Makes a wonderful handmade gift.
Final Tip:
Keep your tension consistent, especially during cuff and thumb gusset increases, to ensure a comfortable and snug fit. If cuff feels too tight, try going up a hook size for cuff only.
Conclusion:
This detailed fingerless glove pattern combines functionality and beauty with a stretchy cuff and intricate shell stitch design. Whether for yourself or as a gift, mastering this pattern gives you cozy, charming gloves with the perfect thumb fit.