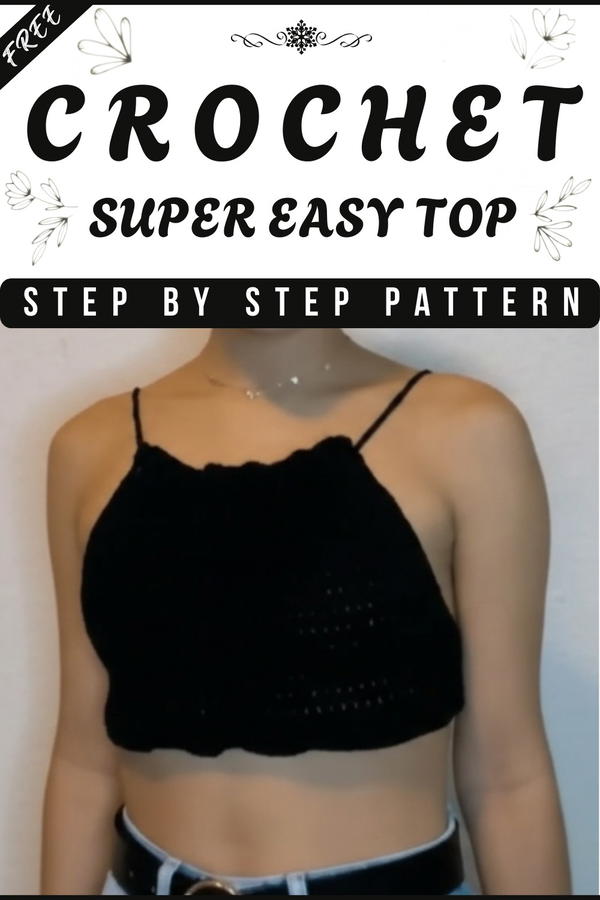
Think about wearing something unique that makes you stand out and feel special. Crochet tops are amazing pieces of clothing that blend beauty and creativity. With their delicate designs, these tops bring flair and personality to every outfit, no matter the season. They’re perfect for casual days, outings with friends, or even dressing up for a party.
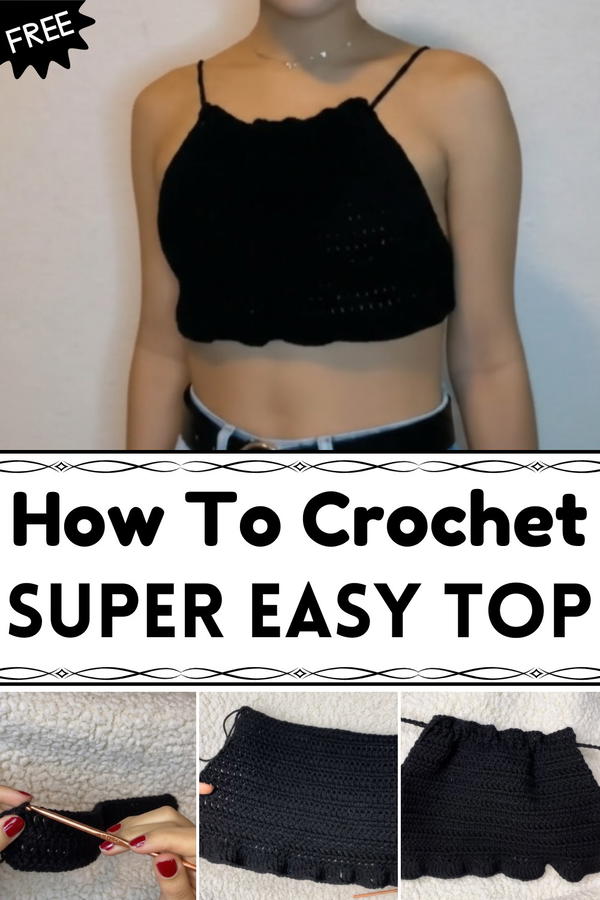
Quick-to-Make Crochet Tops That Look Perfect
The patterns often feature intricate details, from floral motifs to geometric shapes, making each top look like a piece of art. What’s even better is how lightweight and soft they feel, providing comfort and style in one go. Whether paired with jeans, skirts, or shorts, crochet tops offer endless versatility. Choose from colorful options for a fun vibe or stick with neutral tones for elegance. Handmade and full of charm, crochet tops are a must-have for those who love effortless, eye-catching looks that never go out of fashion.
Materials Needed
- Yarn: 4mm medium-weight yarn (Color of your choice)
- Hook: 4.25mm crochet hook
- Other Items: Measuring tape, tapestry needle, scissors
Key Abbreviations
- ch: Chain
- dc: Double crochet
- sl st: Slip stitch
Special Notes
- This pattern can be customized to your preferred size. Use your measurements and adjust the starting chain and strap length accordingly.
- Increases are added to create shape and structure.
Skill Level: Intermediate
Step-by-Step Pattern
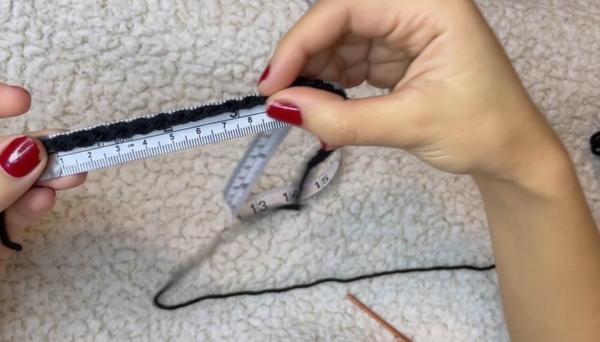
Step 1: Foundation Chain
- Make a slip knot and create a starting chain based on your measurement.
- Formula: Your measurement (cm) ÷ 2 - 10 cm.
- For example, for an 80cm measurement: 80 ÷ 2 - 10 = 30cm. Measure the chains until they equal 30cm in length. For reference, a 30cm chain size was approximately 29 chains.
- Check the length of your chain with a measuring tape to ensure accuracy.
Step 2: First Row of Double Crochets (Foundation Row)
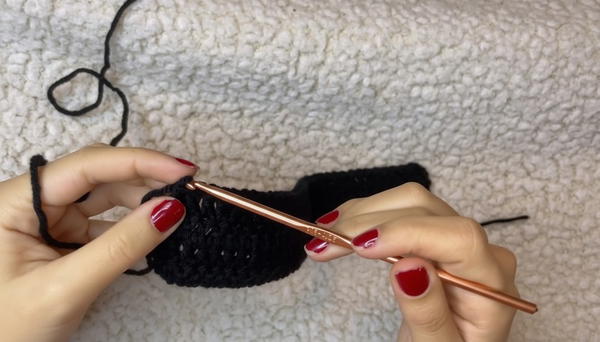
- Starting in the third chain from the hook, work dc across the row in every chain.
- Turn your work and chain 2 for a new row.
Step 3: Build the Base of the Top
- Continue working dc across each row and turning your work.
- Work a total of 4 rows of dc without any increases.
Step 4: Begin Rows with Increases
- Starting from Row 5, begin adding small increases to make the fabric grow in width. At the beginning of each row, insert an additional dc in the first stitch. The rest of the row is worked in regular dc stitches.
- Continue this pattern for 11 rows with increases (total 15 rows: 4 without increases and 11 with increases).
- The increases are used to account for the 10cm removed when calculating the starting chain length.
Step 5: Final Regular Row
- Work one more row of regular dc stitches starting from the first stitch without any increases. Turn your work at the end of the row.
Step 6: Final Row of Double Increases for the Hem
- Begin the final row by chaining 3.
- Work 2 dc stitches in every stitch across the row. To do this:
- Yarn over and insert the hook into the same stitch, pull up a loop (3 loops on hook).
- Yarn over, pull through 2 loops, and yarn over, pull through the remaining 2 loops to create the first dc.
- Repeat in the same stitch to add the second dc.
- Continue this pattern across.
- This will create a slightly flared effect at the hem.
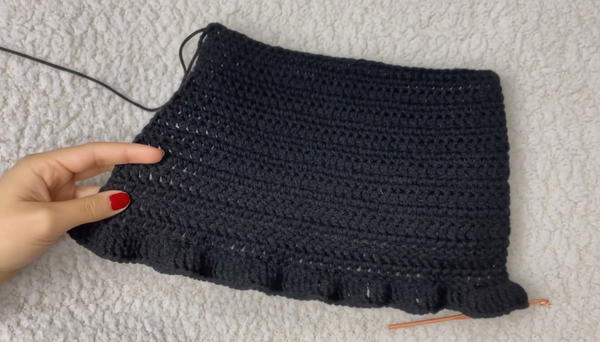
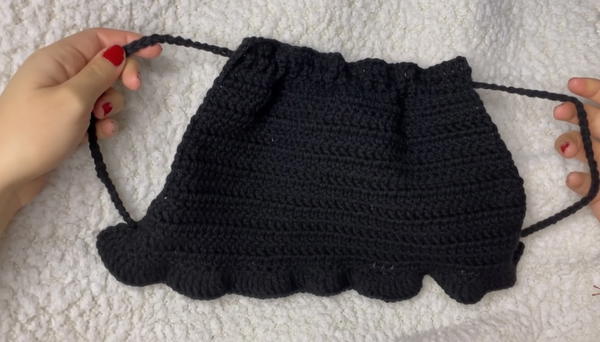
Step 7: Add the Straps
- Create a long chain strap to thread through the top. For reference: the strap used was 180cm long, with an additional 10cm for larger sizes.
- Use a tapestry needle to weave the strap:
- Thread the chain strap through the second row of dc stitches (about 2 rows from the top).
- After weaving it through, cross the strap ends and thread them through the final row at the bottom.
- This creates a neat, adjustable strap system.
Step 8: Finishing Touches
- Use a tapestry needle to hide all loose yarn ends for a cleaner finish.
- Adjust the strap length for your fit, and make sure it is secure.
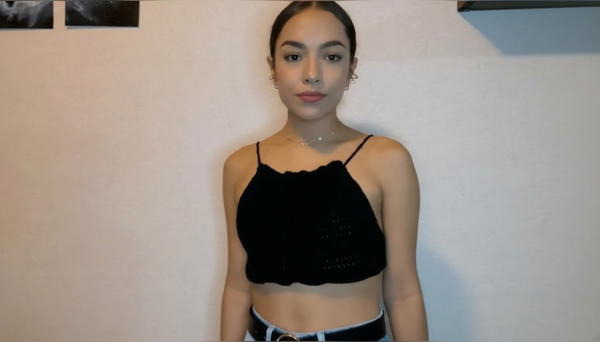
Conclusion
This crochet top is quick, easy, and stylish, ideal for summer or casual outfits. Its adjustable straps and customizable width make it versatile and flattering. The flared hem is a simple yet elegant detail that enhances the design.
Pattern Corrections & Tips
- Correction: Ensure each row matches the stitch count to avoid size inconsistencies. Double-check increase rows for even width expansion.
- Tip: For larger sizes or variations, add more rows of dc or increase the length of the starting chain.