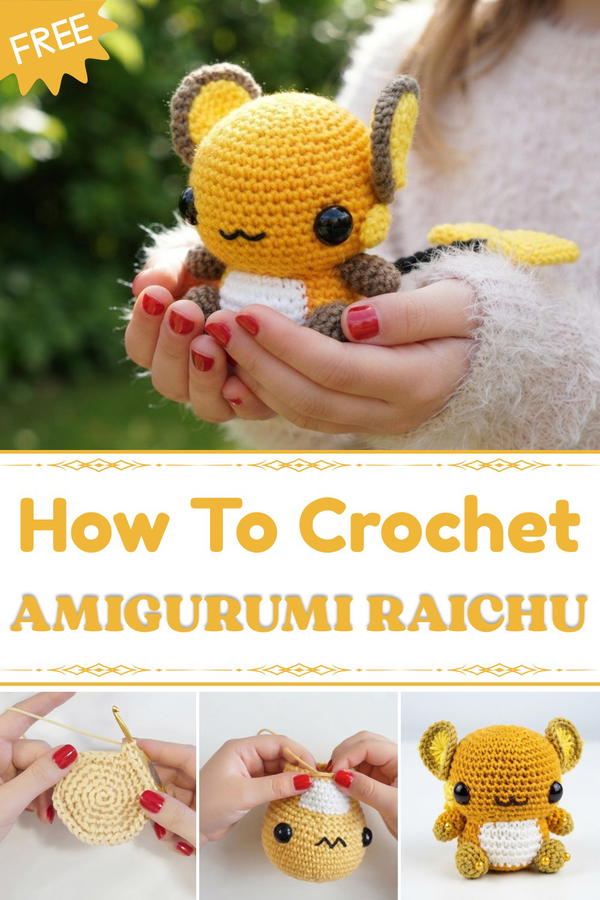
Enjoy making your own Raichu with this free crochet amigurumi pattern, designed to be easy and fun for creating the cutest Pokémon friend ever.
For fans of Pokémon and amigurumi alike, there’s something truly special about bringing characters to life through crochet. The Free Crochet Raichu Amigurumi pattern offers a wonderful way to craft the evolved, electrifying version of Pikachu in a charming and tactile form. This project results in a small, stuffed toy that showcases Raichu’s lively personality with a soft but defined texture, making it both adorable and delightfully touchable.
Free Crochet Raichu Amigurumi – Unique Gift Idea for Fans
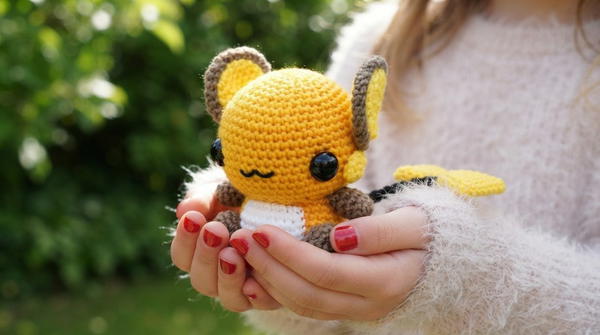
This amigurumi piece captures Raichu’s distinctive rounded body, large ears, and long, lightning bolt-shaped tail with an elegant curve. The style leans towards a cute and slightly chubby aesthetic, which really emphasizes its huggable appeal. The stitch texture is smooth yet dense, providing durability without sacrificing the soft feel that’s so important for stuffed toys. Multiple sizes can be achieved by using different yarn weights or adjusting your hook size, allowing you to customize your Raichu to fit anywhere from a handbag charm to a cuddly bedside companion.
Creating this pattern involves classic amigurumi methods such as crocheting in continuous rounds, using increases and decreases cleverly to shape the contours, and carefully changing colors to bring out Raichu’s signature markings. Choosing a yarn that strikes a balance between softness and structure like a medium-weight acrylic or cotton blend, helps maintain the toy’s shape and highlights the neatness of each stitch.
The design draws inspiration from childhood nostalgia and the joy of crocheting meaningful keepsakes for Pokémon fans. This free pattern is perfect for birthdays, holiday gifts, or simply as a cheerful addition to your amigurumi collection. Don’t hesitate to get creative, perhaps add a tiny scarf or experiment with expression to make your Raichu truly one of a kind. It’s a fun and rewarding project that invites both beginners and seasoned crocheters to dive in.
Raichu Amigurumi Crochet Pattern
This pattern details the full, seamless construction of Raichu—Pikachu’s evolved form—in amigurumi, faithfully following the video step-by-step sequence. You’ll crochet the head and body as one piece, incorporate the signature belly color changes, and finish with distinctive curled ears, lightning tail, feet, and arms, assembling all parts into an expressive finished plush.
Quick Overview of Pattern
- Work the head and body as a seamless amigurumi sphere, using established increases and decreases.
- Incorporate white yarn at the neck for an accurate color transition and change colors for the belly as you crochet down the body.
- Construct limbs, curled ears, tail, and signature side spots individually.
- Attach all features symmetrically, maintaining character accuracy.
- Add safety eyes and embroider facial details before final closing and assembly.
Notes
- Pattern uses US crochet terms.
- All rounds are worked continuously (spiral); use a stitch marker to track rounds.
- Work with a tight gauge to avoid showing stuffing.
- Color changes for Raichu’s unique belly are essential—refer to video for stripe/patch sequence or substitute with your preferred method.
- Use invisible decrease for smooth shaping.
Skill Level
Intermediate
Familiarity with amigurumi shaping, color changes, and assembling 3D forms recommended. Curling ear tip and shaping tail require some dexterity.
Materials
- Worsted or DK acrylic yarn:
- Orange (main color)
- White (belly)
- Brown (tail)
- Black (ear and tail details)
- Small quantities yellow for accent if desired
- Crochet hook: 2.5 mm or appropriate for yarn and tension
- Yarn needle
- Stitch marker
- Polyester stuffing
- Safety eyes (12 mm recommended) or black yarn for embroidered eyes
- Black embroidery thread for mouth/nose
- Scissors
Measurements / Sizing
- Finished Raichu stands approximately 5–6 inches (13–15 cm), depending on yarn and hook.
- Design features a larger head for expressive, cartoon-like proportions.
Gauge
- Gauge is not critical but aim for tight, even stitches.
- After Round 7, head width should be about 2 inches (5 cm).
Stitch Abbreviations
- ch = chain
- sc = single crochet
- inc = increase (2 sc in same st)
- dec = single crochet decrease (invisible preferred)
- sl st = slip stitch
- FLO = front loop only
- st(s) = stitch(es)
Special Stitches
- Invisible decrease (dec): Insert hook in front loops of next 2 sts, yarn over, pull through, yarn over and pull through two loops.
- Ear curl: Crochet a chain and single crochet back up, then pivot back into the round.
- Color Change: Pull new color through last yarn-over of previous sc to switch seamlessly.
Raichu Amigurumi Crochet Pattern
Head and Body (Worked as one piece)
- Foundation: Make a slip knot. Chain 4. Slip stitch into first chain to form a ring.
- Round 1: Single crochet (sc) 6 into center of ring.
- Round 2: Work 2 sc in each stitch around. (12 stitches)
- Round 3: 1 sc, increase; repeat 6 times. (18 stitches)
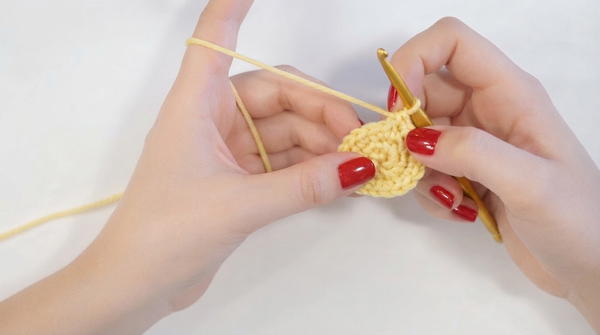
- Round 4: 2 sc, increase; repeat 6 times. (24 stitches)
- Round 5: 3 sc, increase; repeat 6 times. (30 stitches)
- Round 6: 4 sc, increase; repeat 6 times. (36 stitches)
- Round 7: 5 sc, increase; repeat 6 times. (42 stitches)
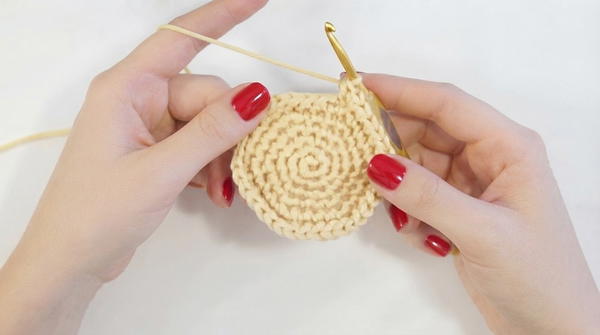
- Round 8: Sc 42 in every stitch around.
- Round 9: Sc 42 in every stitch around.
- Round 10: Sc 42 in every stitch around.
- Round 11: Sc 42 in every stitch around.
- Round 12: Sc 42 in every stitch around.
- Round 13: Sc 42 in every stitch around.
- Round 14: Sc 42 in every stitch around.
- Round 15: 5 sc, invisible decrease; repeat 6 times. (36 stitches)
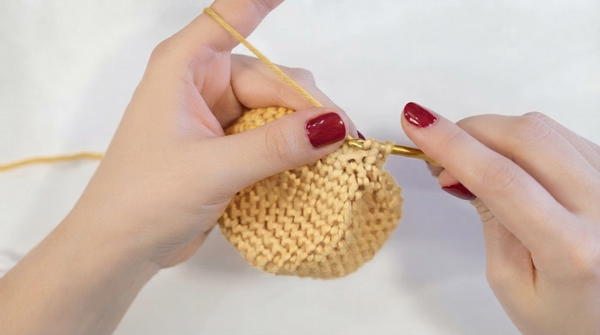
- Round 16: 4 sc, invisible decrease; repeat 6 times. (30 stitches)
- Round 17: 3 sc, invisible decrease; repeat 6 times. (24 stitches)
- Round 18: 2 sc, invisible decrease; repeat 6 times. (18 stitches) — Incorporate white yarn here.
- Round 19: Work 2 sc in the front loop only (FLO) of every stitch. (36 stitches)
Body
- Round 20: Change colors as needed to create Raichu’s belly pattern and color transitions:
Sc in each st around for 10 rounds (36 sts each). - Round 21: Sc in each st (36 sts each).
- Round 22: Sc in each st (36 sts each).
- Round 23: Sc in each st (36 sts each).
- Round 24: Sc in each st (36 sts each).
- Round 25: Sc in each st (36 sts each).
- Round 26: Sc in each st (36 sts each).
- Round 27: Sc in each st (36 sts each).
- Round 28: Sc in each st (36 sts each).
- Round 29: Sc in each st (36 sts each).
- Round 30: 4 sc, decrease; repeat 6 times. (30 stitches)
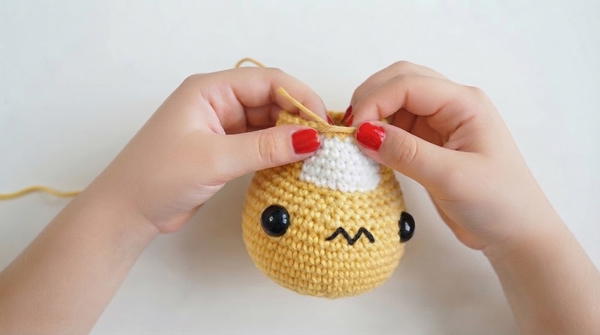
- Round 31: 3 sc, decrease; repeat 6 times. (24 stitches)
- Round 32: 2 sc, decrease; repeat 6 times. (18 stitches)
- Round 33: 1 sc, decrease; repeat 6 times. (12 stitches)
- Round 34: Stuff firmly; sew through front loops of remaining 12 stitches and pull tight to close.
Spots
- Foundation: Chain 4, slip stitch to form a ring.
- Round 1: Sc 6 into center.
- Round 2: Work 2 sc in each stitch around. (12 stitches)
- Slip stitch to finish.
Feet (Make 2)
- Foundation: Chain 4, slip stitch to form a ring.
- Round 1: Sc 5 into center.
- Round 2: Work 2 sc in each stitch around. (10 stitches)
- Round 3: Sc 10 around.
- Round 4: Sc 10 around.
Arms (Make 2)
- Foundation: Chain 4, slip stitch to form a ring.
- Round 1: Sc 6 into center.
- Round 2: 1 sc, increase; repeat 3 times. (9 stitches)
- Round 3: Sc 9 around.
- Round 4: Sc 9 around.
- Round 5: Sc 9 around.
- Round 6: Sc 9 around.
Ears (Make 2)
- Foundation: Chain 4, slip stitch to form a ring.
- Round 1: Sc 6 into center.
- Row 1: Chain 1, turn. Work 2 sc in each stitch. (12 stitches)
- Row 2: Chain 1, turn. 1 sc, increase; repeat 6 times. (18 stitches)
- Row 3: Work the curl by chaining 10, then sc 9 back up the chain.
- Row 4: Increase to 24 stitches. Finish with slip stitch.
Tail
- Foundation: Chain 4, slip stitch to form a ring.
- Round 1: Sc 6 in ring.
- Round 2: Increase to 8 stitches.
- Round 3: Sc 8 around.
- Round 4: Increase to 10 stitches.
- Round 5: Sc 10 around.
- Round 6: Increase to 12 stitches.
- Round 7: Chain 4 and work into both sides, skipping 6 stitches, creating lightning bolt shape.
- Round 8: Sc 12 around.
- Round 9: Decrease to 10 stitches.
- Round 10: Sc 10 around.
- Round 11: Decrease to 8 stitches.
- Round 12: Sc 8 around.
- Round 13: Decrease to 6 stitches.
Assembly & Finished Size
- Secure facial features first: attach safety eyes and sew mouth with black yarn.
- Stuff head firmly before closing final round to keep shape.
- When attaching limbs, ears, and spots, sew using back loop only technique to avoid puckering and achieve a clean finish.
- Position legs parallel to eyes so Raichu sits upright and balanced.
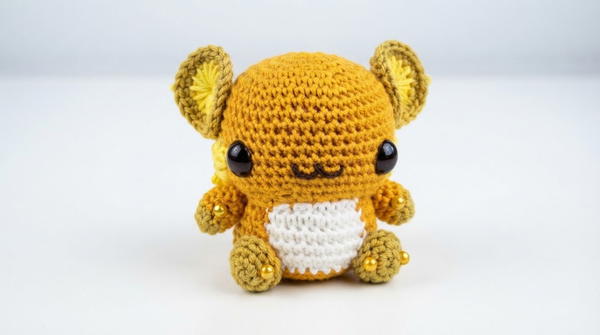
- Sew arms and tail carefully in designated spots.
- Finished size varies depending on yarn weight and hook size, with proportions designed for a larger head to emphasize facial details.
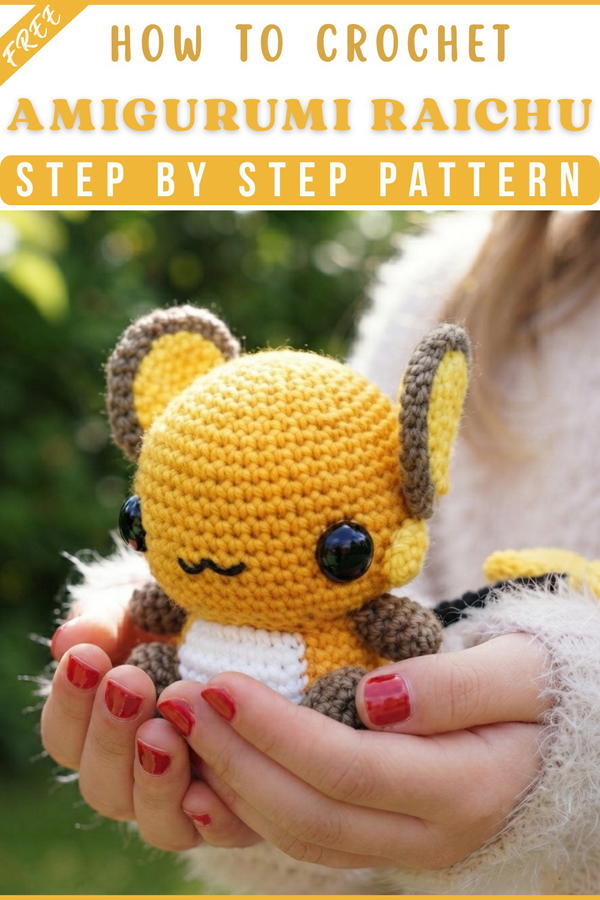
Assembly & Finished Size
- Attach safety eyes and embroider mouth with black thread before closing head.
- Stuff head firmly to keep its shape.
- Pin feet parallel under eyes so Raichu sits upright; sew in place.
- Sew arms and tail carefully to sides and lower back.
- Attach cheeks and spots symmetrically with whipstitch in back loops for a neat seam.
- Ears curve upward; secure curl at tip for signature look.
- Hide yarn tails inside via a yarn needle for a clean finish.
- Finished size is ~5–6 inches tall, dependent on yarn and hook.
Conclusion
Your Raichu Amigurumi is complete—a plush, detailed recreation of this beloved Pokémon. Take care in assembling and sewing features for the best result, and enjoy showcasing Raichu on your desk, shelf, or as a heartfelt handmade gift. With every round and seam, you’ve brought Raichu to life in true amigurumi style.