Celebrate your love for flowers through this free crochet bracelet pattern that’s lightweight, stylish, and ideal for showing off your unique flair.
Adding a touch of handmade charm to your outfit is always a joy, especially with accessories that feel personal and unique. The Free crochet Flower Bracelet pattern offers a beautiful way to create a delicate floral bracelet that brightens any look. This lovely design is shared by Quiereme Mucho crochet y amigurumis, bringing together the elegance of crochet flowers with the ease of a wearable piece.
Easy Crochet Flower Bracelet Pattern – Free Jewelry
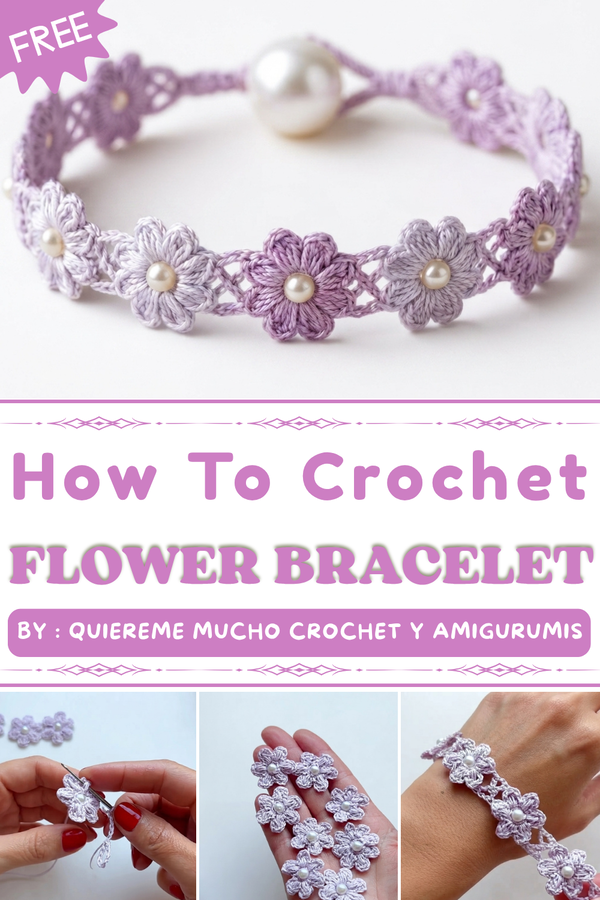
This flower bracelet serves as more than just an accessory, it’s a small work of art that adds softness and femininity to your style. With its gentle petals and graceful curves, it’s perfect for gifting on special occasions like birthdays, valentine's day or Mother’s Day, or even as a thoughtful surprise for a friend. Lightweight and comfortable, it enhances both casual and dressy outfits with subtle elegance.
The design features charming blooms arranged in a neat, repeating pattern that fits comfortably around the wrist. Beyond being a lovely bracelet, it can double as an anklet or a decorative accent on gift wraps. Each flower brings a sense of happiness and handcrafted beauty, making every wear feel special.
For anyone eager to create a meaningful and stylish accessory quickly, this Free crochet Flower Bracelet pattern is a wonderful choice. Have a look at the pattern and enjoy making your own unique floral piece.
Crochet Flower Bracelet Pattern
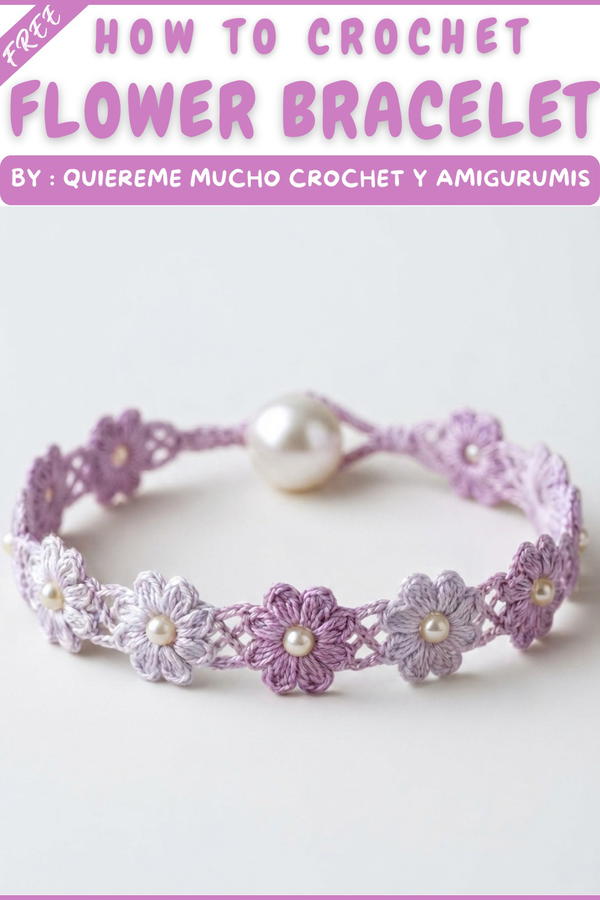
Delicate, textured, and beautifully unique, this crochet flower bracelet is an excellent project for those who enjoy adding a personal, handmade touch to their accessories. Each component, from the three-dimensional beaded flowers to the elegant X-stitch joining, is designed to give a refined and professional finish. The pattern makes use of mercerized macramé thread, small beads, and a miniature hook for precision work, resulting in a bracelet that is lightweight, playful, and brimming with detail. The bead and petal construction, paired with lacy joining's and cross-stitch embellishments, yields a piece that works well both for casual outfits and as a statement accessory.
Pattern Basic Points
Construction Overview:
- Flowers are created individually with a single bead at the center of each.
- Each flower features six textured petals surrounding the bead.
- Flowers are joined together using chain stitches and slip stitches at the petals’ backs.
- An X-stitch detail is added between the flowers for a refined lace finish.
- The bracelet is finished with a simple crochet fastener and adjustable chains.
Features:
- Small bead centers in each flower
- Layered, textured petals
- X-stitch chaining for lacy structure
- Adjustable clasp for custom fit
Applications:
- Perfect for jewelry or as a decorative accessory on bags, hats, or gifts.
Special Notes
- Because this pattern uses very thin thread and small beads, ensure that your crochet hook will fit easily through the bead hole.
- Keep your tension relaxed when working around beads and joinings for smooth, flat results.
- Securely fasten off and weave in any ends using a wool needle to ensure durability.
- The number of flowers and length of joining chains can be adjusted to suit wrist size or design preferences.
- For best appearance, block the bracelet gently after finishing.
Skill Level
Intermediate Crocheter – This project requires familiarity with basic stitches and pattern following, as well as comfort handling small hooks and thread, beaded crochet, and cross-stitching techniques.
Materials
- Mercerized macramé thread (less than 1 mm thick)
- 1.5 mm crochet hook
- Small beads (ensure holes accommodate 1.5 mm hook)
- Wool needle for finishing and threading ends
- Scissors
- Ruler or tape measure (for sizing)
Measurements / Sizing
- Each flower (including petals): ~1.5–2 cm diameter (depends on tension and bead size)
- Recommended finished bracelet length: 15–18 cm (adjustable)
- This pattern is easily customized for wrist size by adjusting the number of flowers and chain lengths.
Gauge
Gauge is not essential for this accessory, but as a reference:
- 6 sc in a ring with mercerized thread, 1.5 mm hook = ~0.8 cm diameter circle.
- Finished flowers and joining may slightly vary depending on tension and materials.
Stitch Pattern: The bracelet uses basic crochet stitches (chain, single crochet, slip stitch) and double treble for decorative joining. No swatch is required.
Stitch Abbreviations
- ch — chain
- sc — single crochet
- sl st — slip stitch
- yo — yarn over
- dtr — double treble crochet (yo three times, draw up loop, draw through two loops four times)
Special Stitches
- Cluster Petal: [yo, insert hook and draw up a loop] three times in the same stitch; yo, draw through all loops on hook except the last, making a puff petal.
- Cross (X) Stitch: Work a dtr in chain space ahead, skip chains, then cross back and work dtr into a prior chain space, creating a crisscrossed look.
Detailed Step-by-Step Pattern
Flower Motif (With Bead Center)
Round 1: Bead Foundation and Center
- Preparation:
- Thread a bead onto your working thread (ensure bead is within crochet hook’s reach).
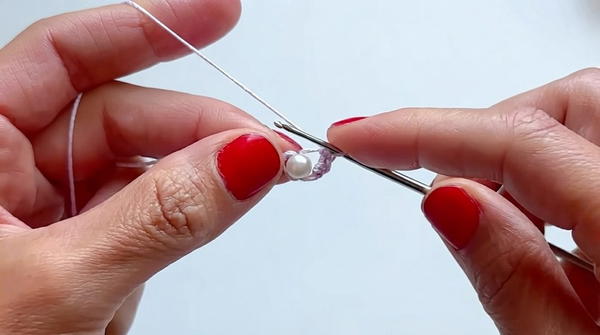
- Make a loose slip knot. Insert the hook through the bead hole, yarn over, and pull up a loop through the bead.
- Thread a bead onto your working thread (ensure bead is within crochet hook’s reach).
- ch 1 to secure the bead in place at the center.
- Base Around Bead:
- Work 3 sc on one side of the bead, then rotate,
- Work 3 sc on the opposite side of the bead.
[You should have a ring of 6 single crochet surrounding the bead center.]
Round 2: Forming Petals
- For each of the 6 sc from Round 1:
- ch 3,
- [yo, insert into same base sc, pull up a loop] three times (you will have several loops on the hook),
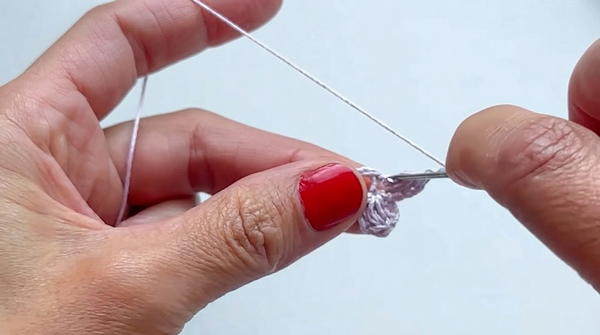
- yo, pull through all loops except the very last one to make a puff/cluster.
- sl st into the same sc to secure the petal.
- ch 3,
- sl st back into same base sc.
- Repeat this process in every sc around the bead (total 6 petals).
- After all petals are formed, ch 1, cut thread, and use a wool needle to weave in the starting and ending tail at the back of the flower for a neat finish.
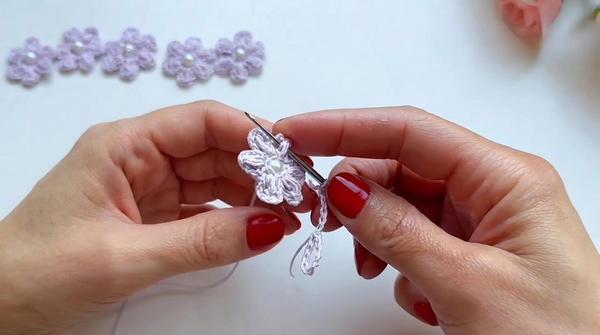
Tip: Keep petals even by maintaining consistent tension. The bead should remain secure but not too tight for a clean, domed flower center.
Bracelet Assembly
Step 1: Fastener Loop
- Make a slip knot and ch 10 (or as many chains as needed to fit over your chosen bead clasp).
- Sl st to the first chain to form a ring.
- This forms the button loop for fastening the bracelet.
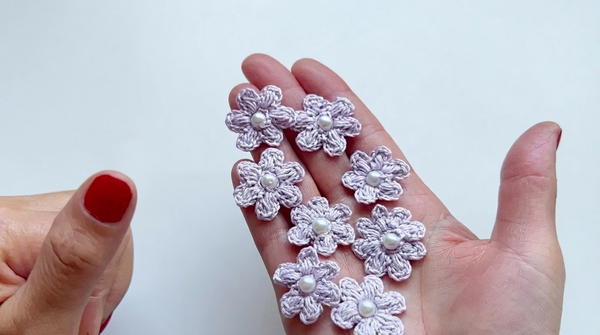
Step 2: Starting the First Bridge
- ch 6,
- Join the first flower by passing your hook through the back loop of one petal, and make a sl st.
(This anchors your first flower to the starting chain.)
Step 3: Connecting Within Flower
- ch 5,
- Skip the next petal, insert the hook into the following petal’s back loop, and work a sl st.
- This continues around the flower, helping keep it in position.
Step 4: Joining Additional Flowers
- ch 6 between flowers.
- For each new flower:
- Pass the hook through a back petal of the next flower.
- Attach with a sl st.
- To continue, ch 5, skip one petal, and slip stitch to the next petal of this flower.
- Repeat for every flower added, maintaining the separation chains and joining points consistently for even spacing.
Repeat the process until all flowers are attached and the length nearly matches your wrist circumference, leaving a small gap for the fastener loop.
Adding the X-Stitch (Cross Detail underneath Flowers)
Step 1: Setting Up Cross Chains
- After joining all flowers, work 5-ch spaces along the bottom side of the flowers. This creates a base for the decorative X stitches.
Step 2: Cross Stitching
- Into each chain space between flowers:
- Work a double treble (dtr) crochet (yo three times, insert into chain space, draw up a loop, draw off two loops at a time four times).
- Leave this stitch incomplete.
- Cross back over to the previous flower's chain space:
- Work another dtr, but this time insert into the front loop of the previous chain space.
- The two dtrs will cross, creating a visible “X” effect.
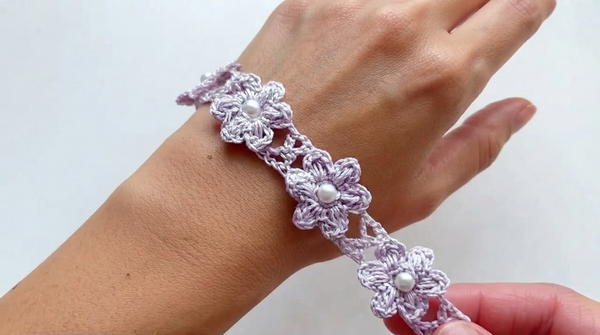
Step 3: Continue X Joining Pattern
- Continue working this cross X-stitch and chaining (as established) between each flower, all along the bracelet’s length, until the last flower is joined.
- This adds both structure and an elegant design underneath the floral motifs.
Final Touches and Fastening
Step 1: Join End of Bracelet
- Join the last cross chain with a sl st into the base of the flower motif or into the last chain.
- For extra security or detail, reinforce the center area with a few slip stitches if desired.
Step 2: Balancing the Design
- At the end (opposite the fastener loop), work 6 chains and secure with a slip stitch.
(This mirrors the start of the bracelet, giving a balanced appearance.)
Step 3: Finishing
- Use your wool needle to neatly hide all remaining thread ends into the crochet work.
- Securely weave in both starting and finishing tails, trimming any excess to keep the bracelet neat.
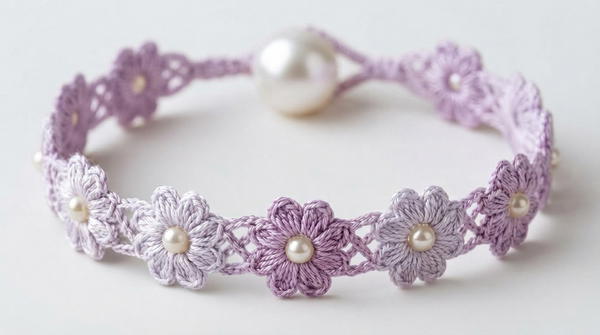
- Securely weave in both starting and finishing tails, trimming any excess to keep the bracelet neat.
Assembly
- Buttoning: Use a single large bead as the clasp; simply insert it into the chain loop created at the starting edge for an adjustable closure.
- Fitting: The bracelet should be slightly flexible, draping gently along the wrist. Adjust by adding or subtracting flower motifs and chains as necessary.
- Lay the bracelet flat and, if needed, gently block with a damp cloth to set the shape.
- No additional assembly is required beyond fastening the thread ends and adjusting for wrist fit.
Conclusion
The flower bracelet showcases refined techniques that combine the intricacy of beaded crochet and lace work with the geometric visual of the X-stitch. The motif construction, sequential flower joining, and cross-chaining process ensure a strong yet delicate piece, ideal for adding handmade charm to personal accessories. The bracelet’s ability to be customized in length, color, and even with the addition of more floral elements allows for creativity and adaptation for different preferences or purposes. By following the outlined steps and ensuring neat finishing, a jewelry-quality final result is achievable, blending function and artistry in a seamless, wearable form. The versatility of the pattern makes it apt not only for wrist adornment but also for use as an embellishment on other craft projects, providing ample opportunities for both practice and creative exploration.