Create an adorable Bulbasaur with this free crochet amigurumi pattern, complete with easy-to-follow instructions for a fun and satisfying project.
There is something super fun about bringing your favorite characters to life with yarn and a hook. When I made my first tiny Pokémon friend, I couldn’t stop smiling. The free crochet Bulbasaur amigurumi pattern lets you create a cute and cuddly version of this beloved Pokémon. This little handmade toy is perfect for anyone who loves soft, charming creatures and wants to add a bit of magic to their collection.
Crochet Baby Bulbasaur – Free Amigurumi Pattern to Try
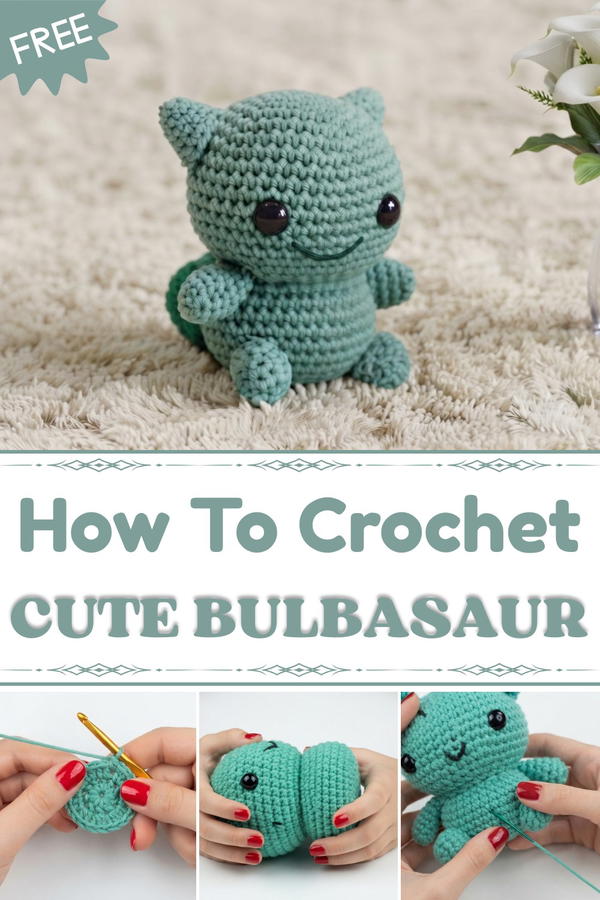
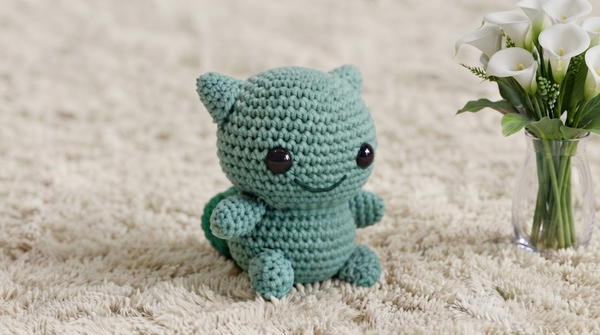
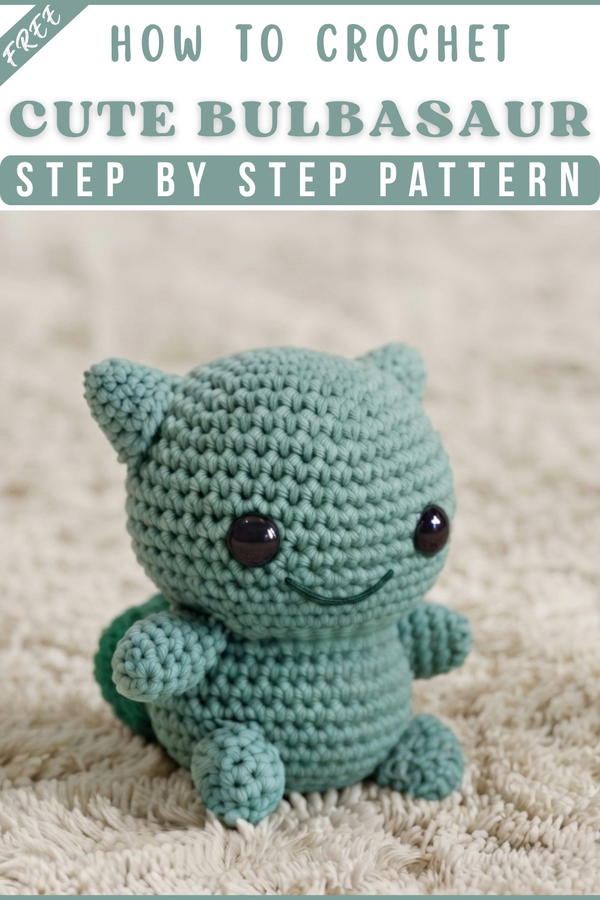
This Bulbasaur looks just like the one from the games and shows. It has a round, soft body in bright green shades and the famous bulb on its back. The texture is smooth and squishy because of the tight and neat stitches, making it both sturdy and huggable. Its big, friendly eyes and the little details in its face give it lots of character. You can keep it on your shelf, use it as a fun decoration, or gift it to a Pokémon fan who would adore having their own Bulbasaur friend.
If you know the basics or want to learn, this project is great. The main stitch is the simple single crochet, which helps give the toy a firm shape while keeping it soft and cuddly. The pattern takes you step by step, so it is easy to follow even if you are still getting the hang of things. Because it is small, you can finish it quickly and enjoy your new Pokémon buddy in no time.
The free crochet Bulbasaur amigurumi pattern is more than just a project; it is a fun and thoughtful gift idea, a cute decoration, and a wonderful collectible for any fan. If you like playful projects that bring joy and a sense of pride, this Bulbasaur is just right for you. Give it a try and watch as your very own little Pokémon comes to life through your hands.
Bulbasaur Amigurumi Crochet Pattern
Quick Overview Of Pattern
- Work in joined rounds, increasing and decreasing as instructed.
- Create the body (head and lower body together), arms, legs, and ears separately.
- The bulb is crocheted and attached to the body.
- Add facial embroidery and sew on safety eyes.
- Sew all pieces together securely and embroider spots for the final touch.
Notes
- Use color-coordinated yarns: light blue-green for the body, dark green for the bulb, and dark blue-green for the spots.
- Mark your starting stitch for rounds—use a yarn scrap or stitch marker.
- Consistency in stitch count is more important than absolute precision.
- Leave long yarn tails for sewing parts onto the main body.
- Stuffing: Use polyester toy stuffing or scrap yarn. Lighter colors prevent show-through.
Skill Level
Intermediate: Experience with working in the round, invisible decreases, and basic embroidery is recommended.
Materials
- Worsted weight yarn:
- Sea Turtle Green for full body
- Black (for smile embroidery)
- Crochet hook (size appropriate for your yarn, e.g., 2.5–3.5mm)
- Yarn needle for sewing and embroidery
- Polyester stuffing or yarn scraps
- 2 safety eyes (size according to preference)
- Scissors
- Stitch marker or yarn scrap
Measurements / Sizing
- Finished Bulbasaur is typically about 5–6 inches tall.
- Proportion and sizing may vary based on yarn choice and hook.
Gauge
Not critical for this project. Consistent tension throughout ensures a neat result. Count stitches carefully after each round.
Stitch Abbreviations
- ch: chain
- sl st: slip stitch
- sc: single crochet
- inc: increase (2 sc in one stitch)
- dec: decrease (invisible, unless noted)
Special Stitches
- Invisible Decrease: Insert hook through the front loop of two stitches, yarn over, pull through both front loops, yarn over, pull through both loops on the hook.
- Foundation Ring: Ch 4, join with sl st to first ch to form a loop, work subsequent stitches into the ring.
- Marking Rounds: Use yarn scrap or stitch marker to keep track of the start.
Bulbasaur Amigurumi Crochet Pattern
Head and Body (Worked as One Piece)
- Foundation: Make a slip knot. Chain 4. Slip stitch into the first chain to join and form a ring.
- Round 1: Single crochet (sc) 6 into center of ring.
- Round 2: Work 2 single crochets (2 sc) in each stitch around. (12 stitches total)
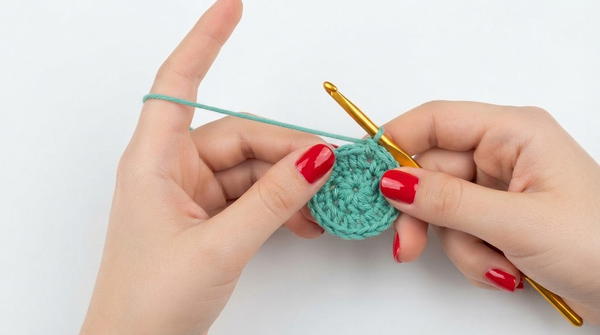
- Round 3: 1 sc, increase (inc); repeat 6 times. (18 stitches)
- Round 4: 2 sc, inc; repeat 6 times. (24 stitches)
- Round 5: 3 sc, inc; repeat 6 times. (30 stitches)
- Round 6: 4 sc, inc; repeat 6 times. (36 stitches)
- Round 7: 5 sc, inc; repeat 6 times. (42 stitches)
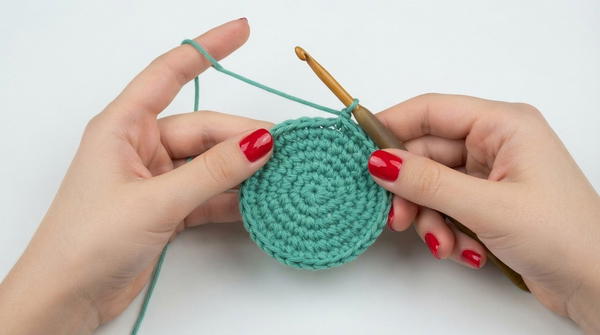
- Round 8: Single crochet (sc) 42 in every stitch.
- Round 9: Single crochet (sc) 42 in every stitch.
- Round 10: Single crochet (sc) 42 in every stitch.
- Round 11: Single crochet (sc) 42 in every stitch.
- Round 12: Single crochet (sc) 42 in every stitch.
- Round 13: Single crochet (sc) 42 in every stitch.
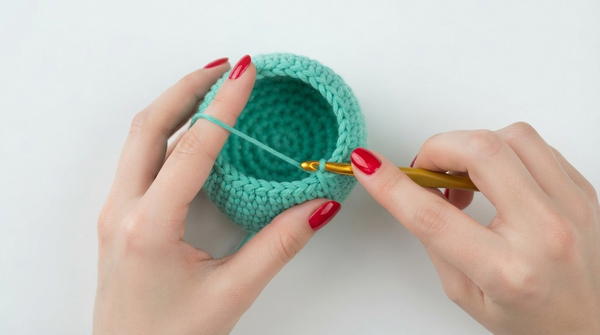
- Round 14: Single crochet (sc) 42 in every stitch.
Face Embroidery & Eye Placement
- Locate the area between Rounds 13 and 14 from the top.
- Using black yarn, embroider a "V" or "U" shaped mouth with one stitch spacing between the start and end of the smile; the bottom of the "V" should be centered at the lowest point.
- Avoid pulling yarn too tightly to prevent puckering.
- Place the safety eyes in the row directly above the smile, five stitches away from each corner of the mouth.
- Ensure the area is clear of yarn tails before locking the safety backs securely.
- Round 15: 5 sc, invisible decrease (inv dec); repeat 6 times. (36 stitches)
- Round 16: 4 sc, inv dec; repeat 6 times. (30 stitches)
- Round 17: 3 sc, inv dec; repeat 6 times. (24 stitches)
- Round 18: 2 sc, inv dec; repeat 6 times. (18 stitches)
- Round 19: Work 2 sc in front loop only (FLO) of every stitch. (36 stitches)
- Round 20: Single crochet (sc) 36 in every stitch.
- Round 21: Single crochet (sc) 36 in every stitch.
- Round 22: Single crochet (sc) 36 in every stitch.
- Round 23: Single crochet (sc) 36 in every stitch.
- Round 24: Single crochet (sc) 36 in every stitch.
- Round 25: 4 sc, decrease (dec); repeat 6 times. (30 stitches)
- Round 26: 3 sc, dec; repeat 6 times. (24 stitches)
- Round 27: 2 sc, dec; repeat 6 times. (18 stitches)
- Round 28: 1 sc, dec; repeat 6 times. (12 stitches)
- Closing: Stuff firmly. Thread yarn tail through needle, weave through front loops of remaining 12 stitches, then pull tightly to close.
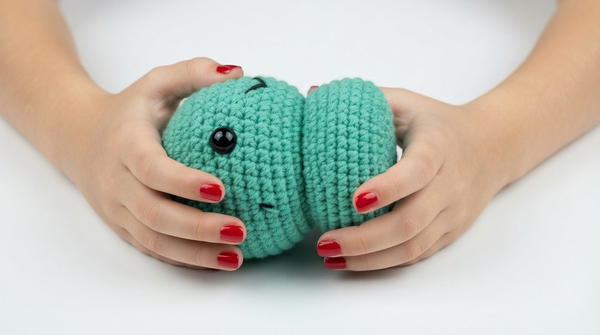
Arms (Make 2)
- Foundation: Chain 4, slip stitch to form a ring.
- Round 1: Single crochet (sc) 6 into center of ring.
- Round 2: 1 sc, increase (inc); repeat 3 times. (9 stitches)
- Round 3: Single crochet (sc) 9 in every stitch.
- Round 4: Single crochet (sc) 9 in every stitch.
- Round 5: Single crochet (sc) 9 in every stitch.
- Round 6: Single crochet (sc) 9 in every stitch.
- Finish: Slip stitch, leave yarn tail for sewing and pull through. Stuff arm.
Feet (Make 2)
- Foundation: Chain 4, slip stitch to form a ring.
- Round 1: Single crochet (sc) 5 into center of ring.
- Round 2: Work 2 single crochets (2 sc) in each stitch around. (10 stitches)
- Round 3: Single crochet (sc) 10 in every stitch.
- Round 4: Single crochet (sc) 10 in every stitch.
- Finish: Slip stitch, leave yarn tail for sewing and pull through. Stuff foot.
Ears (Make 2)
- Foundation: Chain 4, slip stitch to form a ring.
- Round 1: Single crochet (sc) 6 into center of ring.
- Round 2: 1 sc, increase (inc); repeat 3 times. (9 stitches)
- Round 3: Single crochet (sc) 9 in every stitch.
- Round 4: 2 sc, increase (inc); repeat 3 times. (12 stitches)
- Round 5: 3 sc, increase (inc); repeat 3 times. (15 stitches)
- Finish: Slip stitch, leave tail, stuff lightly.
The Bulb
- Foundation: Chain 4, slip stitch to form a ring.
- Round 1: 1 sc, increase (inc); repeat 3 times. (9 stitches)
- Round 2: Single crochet (sc) 9 in every stitch.
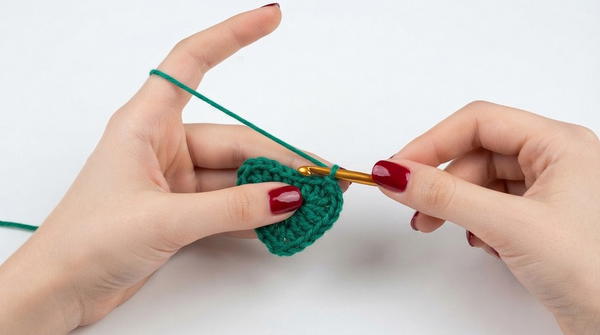
- Round 3: 2 sc, increase (inc); repeat 3 times. (12 stitches)
- Round 4: 2 sc, increase (inc); repeat 4 times. (18 stitches)
- Round 5: Single crochet (sc) 18 in every stitch.
- Round 6: 1 sc, decrease (dec); repeat 6 times. (12 stitches)
- Finish: Slip stitch, leave a long tail, stuff firmly.
Assembly & Finished Size
- Embroider smile using black yarn between rows 13 and 14 on head.
- Attach safety eyes 5 stitches away from smile, one row above.
- Stuff head thoroughly before assembling body.
- Attach ears, arms, feet, and bulb with back loop only sewing technique to prevent puckering and to achieve a clean seam.
- Pin parts in place before sewing for symmetrical positioning.
- Position the bulb centered on the back, secure well to keep Bulbasaur upright.
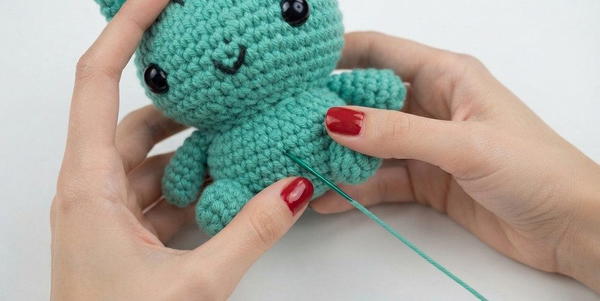
- Finished size: compact, perfect for desktop display.
Assembly & Finished Size
- Pin all parts in place before sewing.
- Sew ears slightly toward the back of the head, arms at neck groove (through both top stitches), and legs using back loops for smooth joining.
- Use a back-loop-only technique for all sewn joins to avoid puckering.
- Attach the bulb to the top of the body, adjusting so Bulbasaur sits upright.
- Embroider all spots.
- Weave in all yarn tails neatly for a tidy finish.
- Finished Bulbasaur stands about 5–6 inches tall and sits upright.
Conclusion
Your handmade Bulbasaur is now ready! This charming amigurumi makes a perfect gift, display piece, or addition to your Pokémon collection. With its expressive face, plump bulb, and adorable spots, it is sure to bring a smile.