Turn fabric scraps into fashion with this free crochet t-shirt yarn mini bag pattern and create trendy handmade bags ideal for practical or decorative use.
Making a small, stylish bag from T-shirt yarn is a fun and easy way to create something useful and beautiful. Thanks to a helpful video from U R Unik, you can follow an easy step-by-step guide to crochet a mini bag that is perfect for carrying essentials or giving as a thoughtful gift.
Trendy T-shirt Yarn Mini Bag – Free Crochet Pattern for All Skill Levels
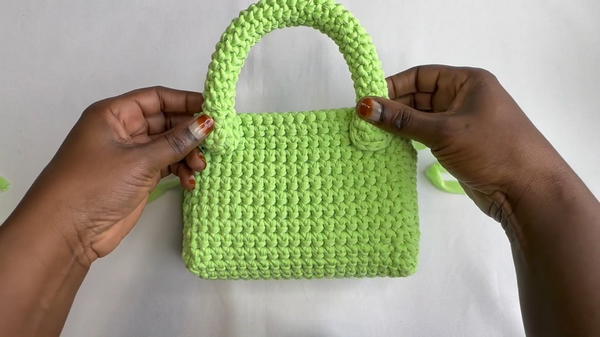
This mini bag has a soft but sturdy texture because of the thick T-shirt yarn used. Its simple rectangular shape is made with tight stitches, giving it strength and a neat appearance. The comfortable handles and zipper closure add to its practical design, making it both fashionable and secure for everyday use.
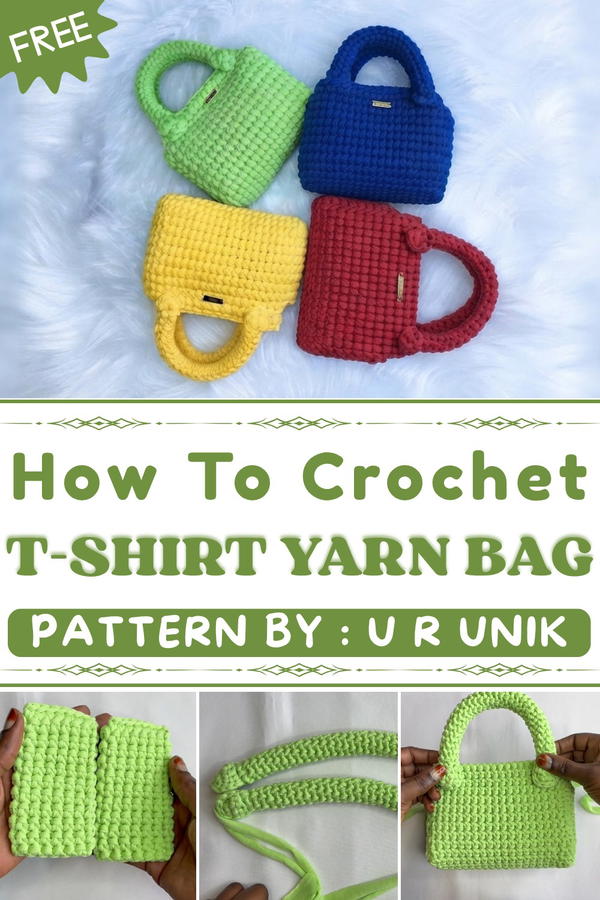
The bag’s casual yet neat style makes it a charming accessory to pair with many outfits. The pattern highlights the yarn’s softness, while the strong stitches help the bag keep its shape. You can choose your favorite colors to make the bag truly your own.
This Free crochet T-shirt yarn Mini Bag Pattern is great for beginners and experienced crocheters who want a quick and satisfying project. It’s a wonderful way to add a handmade touch to your style or create a special gift full of heart.
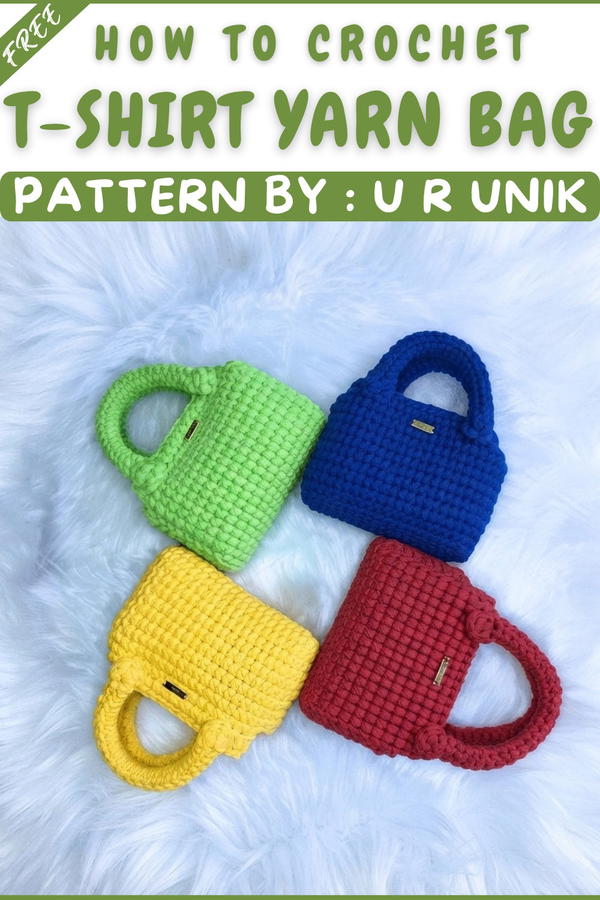
T-Shirt Yarn Bag with Handles and Zipper Pattern
This pattern guides you step by step to create a sturdy and stylish bag using t-shirt yarn, completed with a zipper, handles, and a handmade tag. The project’s dense fabric, neat structure, and practical touches make it excellent for everyday use or as a thoughtful handmade gift.
Pattern Important Tips
Construction & Technique
- Crochet with a firm tension for a structured, durable bag.
- Always work into both loops (unless specified) for a consistent stitch appearance.
- Count rows using visible “line” markers for accuracy; each visible edge line counts as 2 rows.
- When joining new yarn or closing rows, weave in ends securely to prevent unraveling.
- Use a large-eyed needle for weaving in yarn ends and for sewing the bag and handles, and a smaller needle for attaching the zipper.
- Measure carefully for handle placement and alignment for a symmetrical result.
- When sewing the zipper, keep the zipper tape close to the crocheted edge for a professional finish.
Skill Level
Beginner to Intermediate: This pattern uses basic crochet stitches and simple assembly. Knowledge of sewing (for zipper installation) is helpful, but clear instructions accommodate those learning this skill.
Materials
- T-shirt yarn (2 mm width recommended)
- Approximately 150 meters total
- Size 5 crochet hook
- Zipper (length matches bag opening, about 10–12 inches)
- Large yarn needle and small sewing needle
- Scissors
- Handmade tag or label for finishing (optional)
- Stitch markers
Gauge and Stitch Pattern
No strict gauge required. Aim for a tight, robust fabric—too loose fabric will cause the bag to lose shape.
Main stitch: single crochet (sc) worked flat and in rows, plus slip stitch for finishing.
Stitch Abbreviations
- ch: chain
- sc: single crochet
- sl st: slip stitch
Special Stitches
- Joining 2 or 3 loops at once: To create a reinforced edge or for closing, you work through multiple loops or stitches as specified, pulling the yarn through all at once before completing your stitch.
Notes for Starting
- Use a fresh ball/roll of yarn for each major section to avoid knots partway through.
- Leave long tails when starting and ending sections to facilitate sewing and weaving in ends.
- Take the time to check right side/wrong side placement before sewing parts together.
- Handles are made and attached before final bag assembly for ease.
Crochet Bag Pattern
Bag Body
- Foundation:
- Make a slip knot and ch 20 for the foundation chain.
- Row 1:
- Flip your work and, skipping the first chain, work 1 sc in each of the next 19 chains, crocheting into the back loop only for a neat edge.
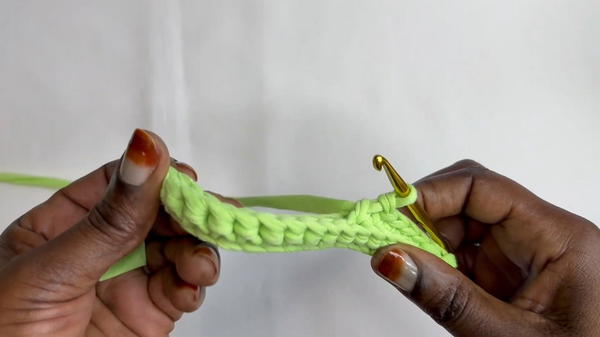
- Flip your work and, skipping the first chain, work 1 sc in each of the next 19 chains, crocheting into the back loop only for a neat edge.
- Row 2:
- Ch 1, turn.
- Working into both the top loop and the corresponding bottom loop together each time (the “two at a time”), sc in each stitch across the row.
- Rows 3–56:
- Repeat Row 2: ch 1, turn, sc in both loops together across. Continue until you have 56 rows total (count 28 “line” ridges visible on one side; each line = 2 rows).
Counting Rows:
Check progress by counting the vertical “lines” visible along the side; 28 lines mean 56 rows.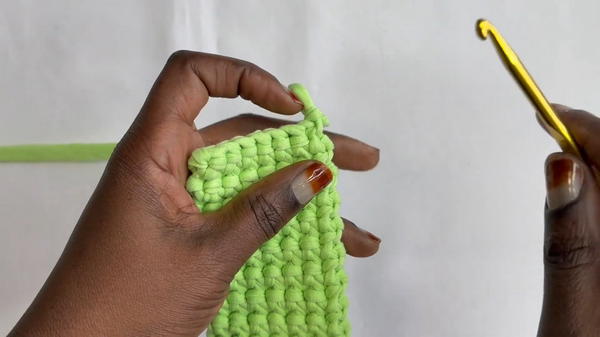
- Final Row (to close body):
- With the bag body flat in front of you, ch 1.
- Working through three loops at once (top two on current row, and back loop of opposite edge), work sc across to join and close this edge.
- Finish off, pull yarn through, and weave in the end securely.
- Weave in tails:
Hide starting and finishing yarn tails inside the seams for a neat look.
Bag Sides (Make 2)
- Foundation:
- Ch 8.
- Row 1:
- Starting in the second ch from hook, work 1 sc in each ch (7 sc).
- Row 2:
- Ch 1, turn.
- As for the bag body, work sc through both top loop and matching loop below (two at a time) for each stitch across.
- Rows 3–20:
- Continue as for Row 2 until you have 20 rows (count 10 line ridges—each ridge is 2 rows).
- Final Row:
- Ch 1.
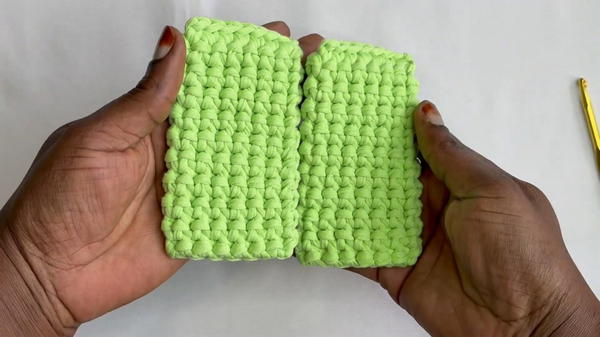
- Close the side piece as for the main body: working through three loops at once, sc across to seal the side.
- Finish off and weave in ends.
- Ch 1.
Bag Handles (Make 2)
- Foundation:
- Leave a long starting tail (for sewing).
- Ch 4.
- Row 1:
- Starting in the second ch from hook, sc in each ch (3 sc).
- Row 2:
- Ch 1, turn, sc in each st (3 sc).
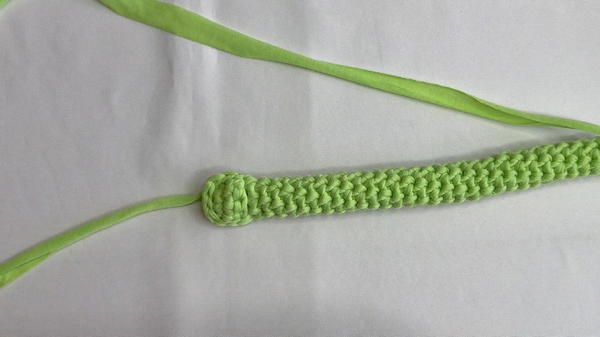
- Ch 1, turn, sc in each st (3 sc).
- Row 3 (slip stitch around):
- Do not cut yarn. Turn and sl st around entire handle as follows:
- Sl st along the short end, up the side, across the opposite end, and down the other side to the start—one sl st in each “corner” and side loop to create a rounded/edged look.
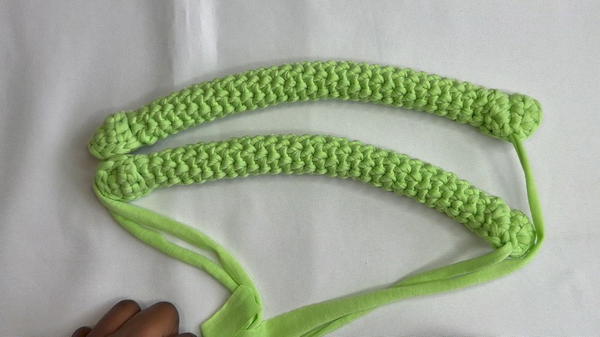
- Sl st along the short end, up the side, across the opposite end, and down the other side to the start—one sl st in each “corner” and side loop to create a rounded/edged look.
- Do not cut yarn. Turn and sl st around entire handle as follows:
- Attachment Loops:
- Ch 3 to create a connector.
- Count three stitches from starting edge, sc into third st to form a circle loop at end of handle.
- Ch 1, turn, sc 3 on loop.
- Repeat two more rows (for 3 rows total of 3 sc on loop), always ch 1 and turn between rows.
- Final Edge (sl st to complete circle):
- Sl st around the edges of handle and loop for a neat edge.
- Cut yarn, leave a tail for sewing.
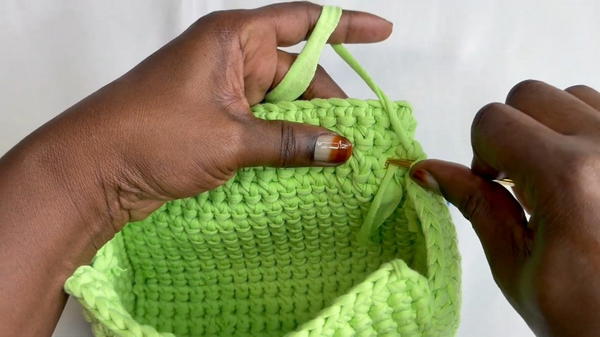
Note: Measure around the bag opening to estimate handle placement; handles should span 7 in (approx. 17–18 cm) along the top edge.
Assembly
- Mark Handle Placement:
- From side seam, count 12 line ridges on both front and back panel; place stitch markers at each twelfth line (both sides). This defines handle position for symmetry.
- Sew Sides to Bag Body:
- With right sides facing out and using the tail, sew each side piece between the stitch markers on the main body. Sew both sides.
- Sew Handles:
- Sew both ends of each handle securely to the marked locations using long tails or extra yarn for reinforcement.
Zipper and Top Section
- Crochet Upper Edge for Zipper:
- On the bag opening (front and back sides), count three line ridges down from the edge and insert hook above third ridge.
- Attach yarn, ch 1.
- Work sc evenly across above third line—take care to only go through one or both loops for desired finish.
- Ch 1, turn.
- Work two more rows of sc for a sturdy edge for sewing zipper.
- Fasten off and weave in tails.
- Sew Zipper:
- Using small needle and matching thread, sew zipper into top edge, folding or trimming zip tape at ends as needed.
- Ensure zipper opens and closes smoothly, with tape flush to sc edge for neatness.
- Sew Handles Last (if not already done):
- Place and sew handles as marked, stitching securely.
- Add Tag:
- Sew or attach handmade tag to exterior as a finishing detail.

- Sew or attach handmade tag to exterior as a finishing detail.
Sizing
- Finished bag measures approximately 10 inches wide by 5.5 inches tall (excluding handles).
- Handle length: spans about 7 inches along top, giving good grip room.
- Adjust measurements by working more or fewer rows/chains for custom sizing.
Final Thoughts
This t-shirt yarn bag pattern demonstrates the utility and beauty of simple stitches combined with sturdy materials. The reinforced edges, crisply defined sides, and tailored handles produce a reliable and attractive accessory. The pattern allows for sizing adjustments and personalization, making it adaptable for everyday style or thoughtful handmade gifting. With attention to detail in assembly and finishing, the result is a bag that’s as functional as it is unique.