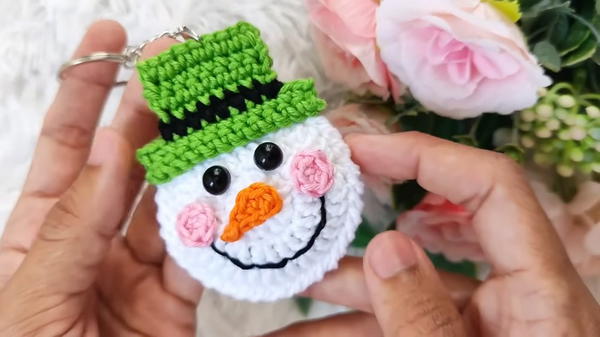
Jingle with joy using this Free Crochet Christmas Keychain Pattern, brimming with handmade charm that makes holiday accessories delightful and unique.
During the holiday season, even the smallest details can bring a sense of joy and festivity to everyday life. The Free Crochet Christmas Keychain captures that spirit, turning simple yarn into a charming, handheld accessory that spreads seasonal cheer. Each piece features neat, intricate stitches that create a soft yet sturdy structure, making it both decorative and durable for daily use.
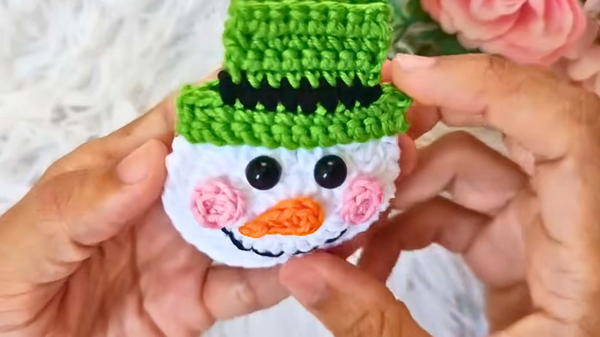
Glow Crochet Christmas Keychain That Feels Handmade
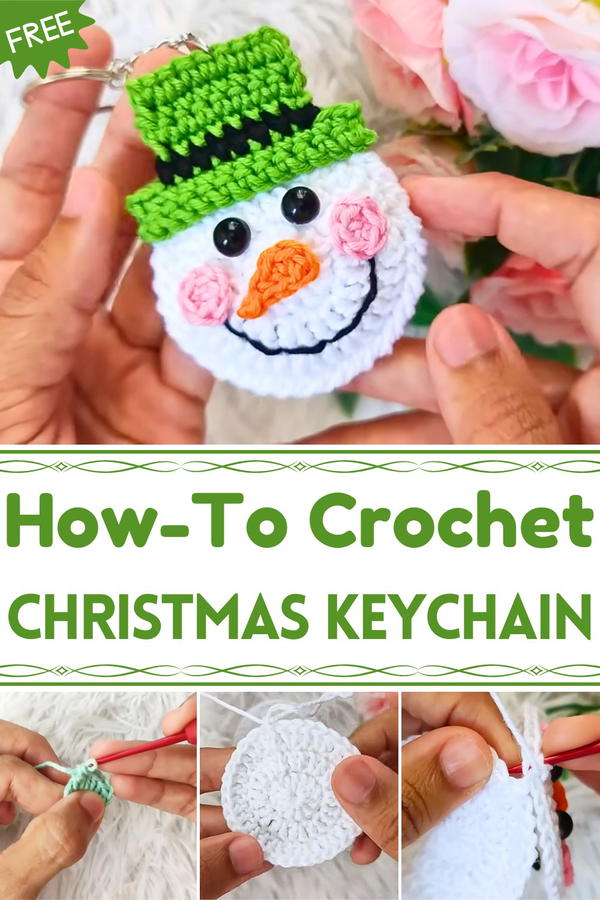
Its compact size makes it perfect for holding keys, attaching to bags, or hanging as a miniature ornament, adding a festive touch wherever it goes. Vibrant colors or traditional holiday shades enhance its visual appeal, while the soft texture gives a handmade, thoughtful feel. Beyond its playful charm, the keychain carries a personal touch that makes it an ideal gift for friends, family, or colleagues, reflecting care and attention in every stitch.
It is practical for everyday life without sacrificing style, offering a small but meaningful way to celebrate the season. With its cheerful design, functional versatility, and durable construction, this crochet Christmas keychain turns ordinary accessories into festive delights, bringing warmth, charm, and personality to daily routines while keeping the holiday spirit close at hand.
Materials Needed
- Yarn: 2 mm thick Amigurumi yarn in white, orange, pink (for blush), and embroidery floss for the mouth.
- Hook: 2.2 mm crochet hook.
- Accessories: Scissors, synthetic fiber for stuffing, tapestry needle, half pearls for eyes, and optional keychain rings.
- Extra: Glue for attaching components or an alternative sewing option.
Step-by-Step Instructions
1. Create the Snowman’s Head and Body:
- Start with a Magic Ring: Begin with a magic ring and chain two (count the initial chain as one).
- Round 1: Make 12 double crochets inside the magic ring. Close the ring and slip stitch into the first double crochet.
- Round 2: Chain two, make two double crochets in each stitch (total of 24 stitches). Close the round with a slip stitch.
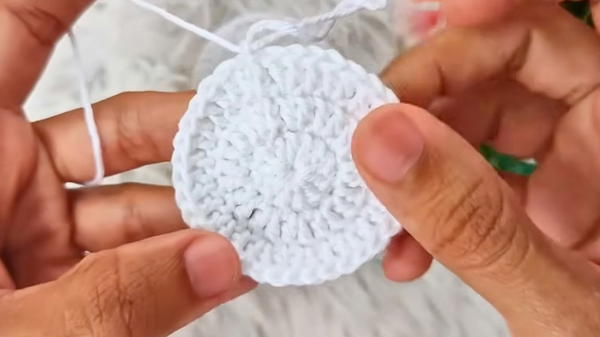
- Round 3: Chain two, make one double crochet in the first stitch, and an increase (two double crochets in the same stitch) in the next (total of 36 stitches). Close with a slip stitch.

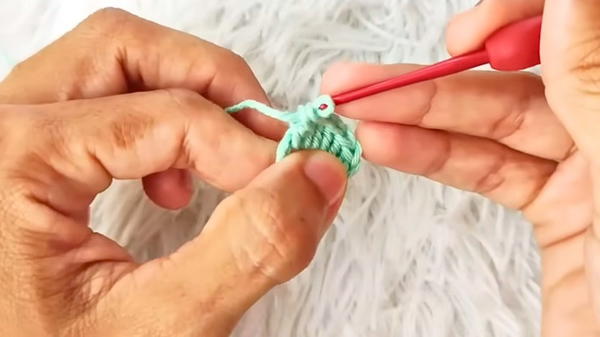
2. Make the Snowman’s Arms:
- Chain and Crochet: Create a cord with 13 chains, skip the first chain, then single crochet in each chain (total of 12 single crochets).
- Row 1-4: Continue making single crochets for four rows, changing colors midway for a striped effect.
- Finish: Chain, cut the yarn, and leave a tail for finishing.
3. Crochet the Nose:
- Magic Ring: Using orange yarn, make a magic ring and work three single crochet stitches.
- Chains and Slip Stitches: Create three chains, slip stitch into the second chain, make a single crochet, and finish with a slip stitch inside the magic ring. Cut the yarn, leaving a tail.
4. Assemble Facial Features:
- Eyes and Mouth: Attach half pearls for eyes. Embroider the mouth with floss.
- Blush: With pink yarn, make a magic ring and five single crochets. Use tapestry needle to secure.
5. Join and Stuff the Snowman:
- Join Pieces: Make two identical pieces for the front and back. Use reverse single crochet stitches to join them back-to-back.
- Stuffing: Before you completely join them, stuff the piece with synthetic fiber for a plush effect.
6. Finish and Accessorize:
- Complete Join: Finish stitching around, cut the excess yarn.
- Hat and Accessories: Glue the hat parts together or sew them. Add optional keychain rings if desired.
Special Features and General Uses
- Versatility: Can be used as a souvenir, decoration, or keychain.
- Easy Customization: Change colors or add more features to personalize your snowman.
- Beginner-Friendly: Simple stitches and rounds make it ideal for crochet newbies.
Tutor’s Suggestions
- Yarn Thickness: The tutor suggests using 2 mm yarn for a neat finish but encourages experimenting with other thicknesses.
- Joining Method Options: Either glue or sew for a more secure attachment.
Tip
- Avoid Tension Issues: Keep your tension consistent, and if needed, use a slightly larger hook to prevent the piece from becoming too tight.
Conclusion
Crocheting a snowman keychain or decoration embodies the spirit of the festive season and offers a gratifying project that combines creativity and practicality. This step-by-step guide ensures a delightful outcome, resulting in an adorable snowman that can adorn Christmas trees, gifts, or serve as a charming keychain.


