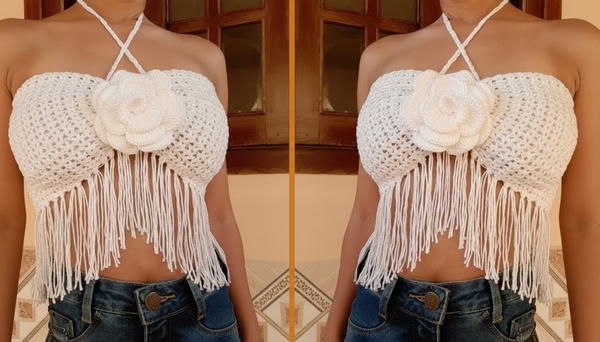
Flirt with style using a Crochet Top with Fringe Pattern that dances with every step, looks vibrant, and adds playful charm to parties, festivals, or sunny days.
This stylish top shines with playful dangling fringe that moves beautifully with every step you take. Lightweight and breezy, it’s perfect for warm days and adds a touch of fun to any outfit. The delicate stitches create a soft fabric that hugs your body just right, while the fringe gives it a cool, boho vibe that’s both casual and chic. Whether heading to the beach, a summer festival, or just enjoying a sunny day out, this top blends comfort with eye-catching style.

Trendy Crochet Top with Fringe Pattern to Pair with Jeans
Its design lets you stay cool and look amazing without any effort. The colorful fringe catches the light and swings gently, making every movement lively and joyful. Easy to wear and easy to pair with jeans, shorts, or skirts, it quickly becomes a favorite in your wardrobe. Fun, fashionable, and full of personality—this top turns simple crochet into a stunning, carefree statement piece.
Crochet top with fringe Pattern
Difficulty Level
Intermediate Beginner — Basic knowledge of crochet stitches like chain and double crochet is necessary; attention to measuring and assembling fringes is important.
Materials
- Barroco Maxcolor yarn, size 4 (colors: yellow for demo, white for finishing)
- Crochet hook size 3 or 3.5 mm
- Scissors
- Needle for assembly
- Optional: universal or fabric glue for finishing fringes
- Optional: pin for attaching decorative rose
Special Features
- Adjustable sizing through direct measuring
- "V over V" stitch pattern creating delicate loops
- Decorative fringe addition for a trendy look
- Drawstring ribbon to gather and adjust fit
- Optional crochet rose embellishment
Pattern Instructions
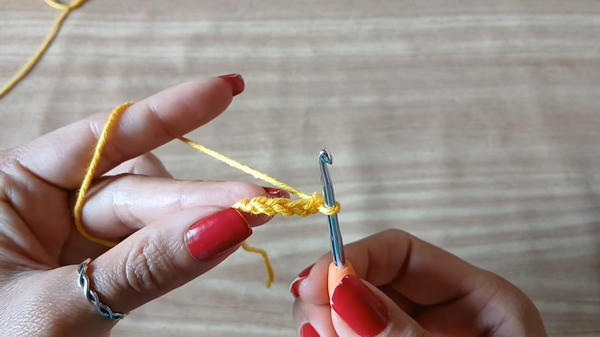
Step 1: Start the Base Chain
- Make a slip knot.
- Chain 4 stitches to form the starting point.
- Yarn over, insert into the first chain of the 4 and make 1 double crochet (dc) stitch.
Step 2: Begin First Row
- Chain 3 stitches, turn your work.
- Yarn over, insert into the chain space you just created, then make 1 double crochet stitch.
- Chain 3 stitches, turn the work.
- Repeat this sequence: double crochet in space → chain 3 → turn work.
- This creates a series of little loops along the strip.
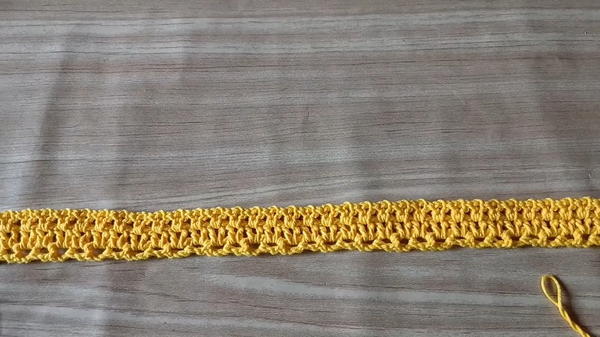
Step 3: Complete Base Strap Length
- For size M (medium), make 54 little loops total; adjust the number to fit your chest width by measuring yourself.
- The strap should wrap from side to side, roughly the middle of your chest.
- The fit should be snug but comfortable, not too tight or loose.
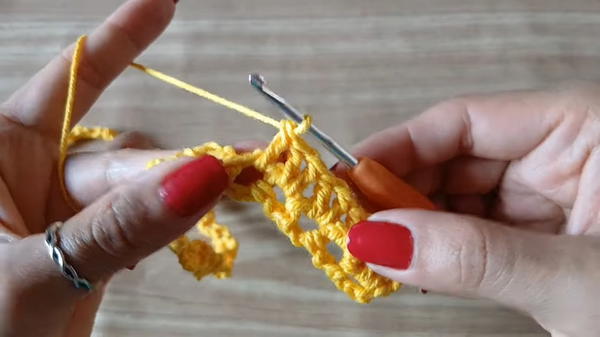
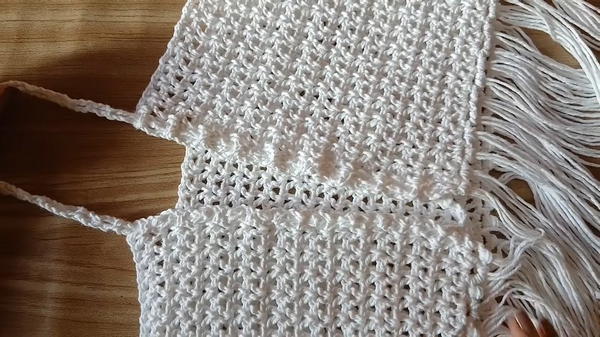
Step 4: Prepare to Build Rows
- Once your initial strap is done, chain 3 stitches and turn your work.
- Yarn over, return to the last loop; make 1 double crochet, chain 1, and make another double crochet in the same stitch.
- Repeat across each loop: in each loop space, make 1 double crochet, chain 1, 1 double crochet.
- This creates a V over V stitch pattern.
Step 5: Continue Building Rows
- Repeat step 4 for about 20 to 22 rows, depending on desired length.
- Turn the work at the end of each row and maintain the V over V stitch.
- The top gradually becomes wider with this stitch pattern.
Step 6: Adding Fringes
- Cut two 30 cm lengths of yarn for each fringe.
- Fold the two strands in half.
- Insert the fold into the spaces at the edges of the top (starting from the side opposite where you finished crocheting).
- Pull the loose yarn ends through the folded loop to secure the fringe.
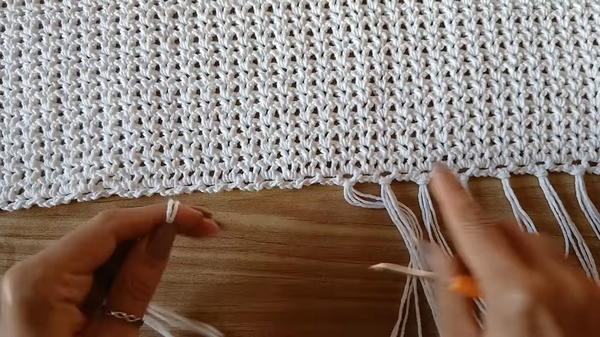
- Place fringes in alternate spaces or every space according to your preference (the instructor suggests all spaces for a fuller look).
- Trim fringes if needed for even length.
Step 7: Create the Drawstring Ribbon
- Chain 4, join into a ring with a slip stitch.
- Chain 3 stitches, turn the work.
- Work rows of double crochet separated by chains 3 (similar to the base strap technique but narrower) to form a long ribbon.
- Ribbon length: about 1.5 to 1.7 meters or adjusted to your preference or the size of the wearer.
Step 8: Thread the Ribbon
- Fold the bandeau top widthwise.
- Use a needle (or fingers) to thread the ribbon from bottom to top through the middle of the loops on both sides of the top.
- Pull to gather the fabric in the center, creating a ruched look.
- Tie the ends behind the neck or front as desired.
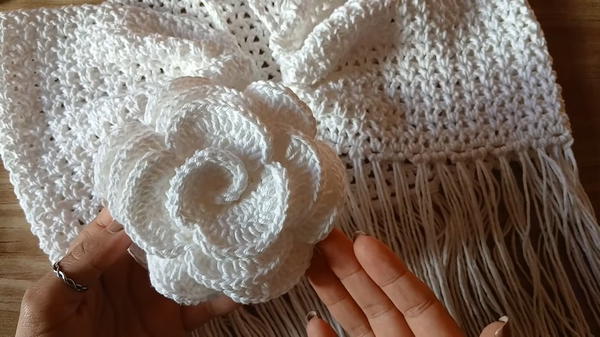
Step 9: Optional - Crochet Rose Embellishment
- For extra decoration, attach a crochet rose on the front.
- This is not included in this pattern but a tutorial is available on the Arte Handmade channel (link in description).
- Attach the rose using a pin or by sewing.
- The rose can be made with Barroco 4 yarn or amigurumi yarn, larger or smaller depending on choice.
Tips & Tutor’s Suggestions
- Always measure the base strap on yourself as you crochet to ensure the perfect fit instead of relying on standard size charts.
- Place fringes according to your style preferences—either every space or alternating spaces.
- Use a needle to help thread the ribbon for ease, especially if the spaces are tight.
- To secure fringes and ribbon ends, you may optionally apply fabric glue.
- For a removable rose embellishment, use a pin instead of glue for adjustable styling.
- Rewind and re-watch parts of the tutorial if stitches or placement are unclear. Close-up shots are available for better visualization.
- Keep your stitches even and tension consistent for the best-looking top.
Uses
- Perfect for summer wear, beach outings, or festive celebrations like New Year's Eve.
- Stylish and handmade, it pairs well with skirts, shorts, or layered over dresses.
- The adjustable fit and drawstring make it versatile for many body types.
Conclusion
This crochet bandeau top is a wonderful project that balances ease and elegance. Following these clear steps will allow you to create a comfortable, fashionable piece with interchangeable colors and customizable fringes. Whether worn casually or for celebrations, this top makes a lovely handmade gift or a stylish addition to your wardrobe.


