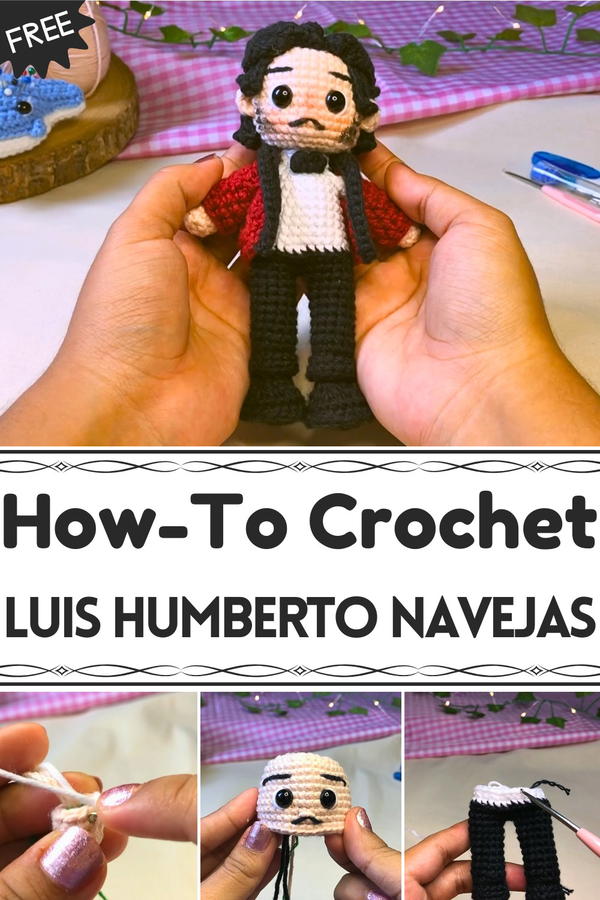
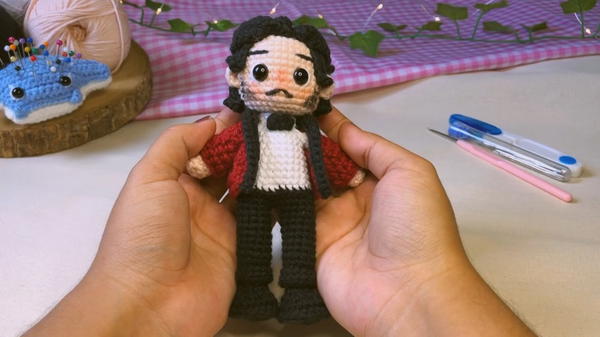
Celebrate artistic flair with the Free Crochet Luis Humberto Navejas Pattern, a unique creation for adding vibrant style and creativity to any project.
Art and tradition often converge in unexpected ways, where careful hands transform simple materials into objects that speak of personality and heritage. The Free Crochet Luis Humberto Navejas Pattern brings that harmony to life, offering a unique way to combine texture, color, and structure into a piece that is both visually engaging and highly functional. Each stitch carries intention, forming motifs that balance intricacy with approachability, making it suitable for makers of varying skill levels.
Beautiful Crochet Luis Humberto Navejas that Inspires Creativity
Beyond its visual appeal, this pattern results in items that serve multiple purposes, whether as home accents, gifts, or wearable pieces. The thoughtful construction ensures durability and versatility, allowing the finished creation to be used regularly while maintaining its charm. Lightweight yet substantial, it moves gracefully from casual use to a statement in decorative spaces, demonstrating the power of handmade work to enhance everyday life.
Every element of this pattern reflects a quiet sophistication, encouraging creativity and personal expression through yarn and technique. By following its steps, makers can produce pieces that feel meaningful and distinctive, showcasing the connection between patience, skill, and artistry. This crochet work embodies both utility and elegance, offering a memorable experience for the hands that crochet it and the eyes that appreciate it.
Materials Needed
- Yarn: Flesh color (panda's base), black, white, and wine or burgundy.
- Crochet Hook: Recommended size to suit your yarn, typically 2.0mm–3.5mm for amigurumi.
- Darning Needle: For sewing together pieces and adding embroidery.
- Polyfill Stuffing: To shape the head, body, arms, and legs.
- Scissors: For cutting yarn.
- Stitch Markers: To keep track of rounds.
- Safety Eyes: For the panda's face.
- Black Fabric Paint: For beard detailing.
- Blush or Makeup: For adding rosy cheeks.
Step-by-Step Instructions
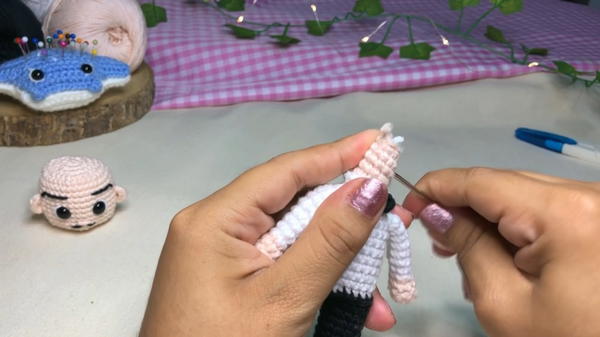
1. Crocheting the Arms
Round 1: Magic Ring
- Begin with flesh-colored yarn.
- Create a magic ring using the "X method" and crochet 6 single crochets (SC) into the ring.
Round 2: Increase
- Crochet 2 SC in one stitch (increase), followed by 1 SC in the next stitch. Repeat this sequence 2 more times to end with 9 SC in this round.
Rounds 3–4: Regular Stitches
- Crochet 9 SC in each round (stitch-over-stitch).
Round 5: Color Change
- Switch to a white yarn by pulling it through the final stitch of round 4.
- Crochet 7 SC in each round from Round 5 to Round 12 (7 total rounds). Hide the color-change threads inside the arm as you go.
Final Step: Close the Arm
- Flatten the arm and make a slip stitch across to close the opening.
- Left your first arm completed; repeat to make a second arm.
2. Crocheting the Bow
Round 1: Magic Ring
- Use black yarn to create a magic ring, then follow these steps:
- Chain 4.
- Slip stitch into the ring.
- Repeat to create a symmetrical bow shape (two loops).
Close the Magic Ring
- Carefully tighten the ring to close it. Leave a long tail for sewing later.
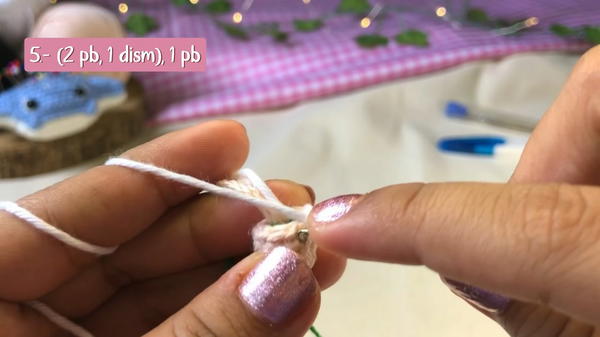
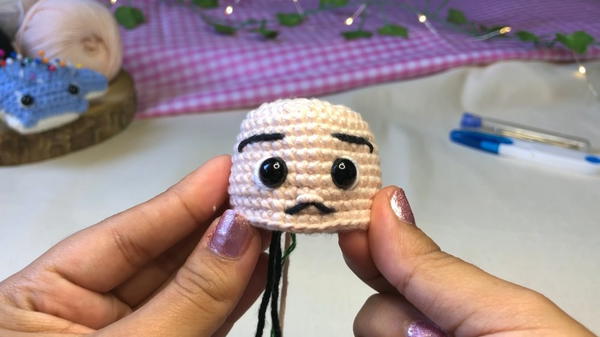
3. Crocheting the Head
Round 1: Magic Ring
- Begin with 8 single crochets (SC) in the magic ring.
Round 2: Increase
- Crochet 8 increases (2 SC in each stitch) to finish with 16 stitches.
Round 3: Standard Progression
- Follow the pattern that involves one SC and one increase, then develop the template to larger rounds while maintaining the appropriate shape.
Rounds 6–14: Add Details
- Position the safety eyes between rounds 10 and 11 with four stitches of separation.
- Sew black yarn to create eyebrows at the correct placement.
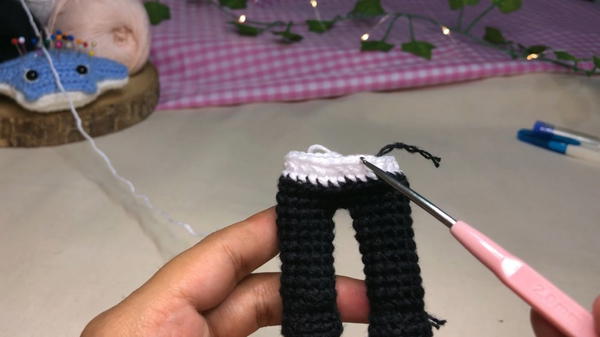
4. Crocheting the Body and Legs
Joining the Legs to the Body
- Use the black yarn to crochet two legs. When finishing the second leg, don’t cut the yarn.
- Connect the two legs by creating a chain that joins them.
- Work around both legs in the round to build up the body.
5. Crocheting the Hair
Magic Ring and Base
- Use black yarn to make a magic ring with 8 SC.
- Gradually increase to 24 SC.
Adding Strands
- Crochet chains of varying lengths (e.g., 8, 9, 11 stitches long) for the "locks of hair." Repeat the process to create multiple strands, always securing them at the base.
6. Crocheting the Jacket
Body
- Start with 17 chains of wine-colored yarn.
- Work in half-double crochets across the foundation chain for a fabric-like texture.
Sleeves
- Create each sleeve by working around the armholes, making 11 half-double crochets per round.
Special Features
- Layered Details: This design includes charming details like embroidered eyebrows, glitter in the eyes, and cheek blush.
- Beard and Hair Texture: The curly locks and painted beard add personality.
- Removable Accessories: The panda’s jacket adds a unique layer of customization.
Level of Difficulty
The project is suitable for intermediate-level crafters due to its variety of shapes, parts, and details. However, beginners with determination and patience can still achieve great results.
Tutor’s Suggestions
- Use stiff bristle brushes for painting the beard with perfect triangular strokes.
- Tighten all loose threads and knots to ensure durability.
- Stuff the head and body in stages to distribute the fill evenly.
Uses of the Panda Amigurumi
- Decorative Toy: Perfect for nursery decor or a shelf ornament.
- Gift: Great for birthdays, holidays, or baby showers.
- Amigurumi Practice: A fun challenge to improve shaping and detailing skills.
Bonus Tip!
Check thread tension frequently. Avoid crocheting too tight, as it could distort the panda's features, or too loose, which creates gaps between stitches.
Conclusion
Congratulations! You’ve completed the Luis Humberto Panda Amigurumi along with its bowtie, jacket, and unique curly hairstyle. This project teaches a variety of techniques, from sculpting shapes to painting textile features, making it a rewarding accomplishment for any project.


