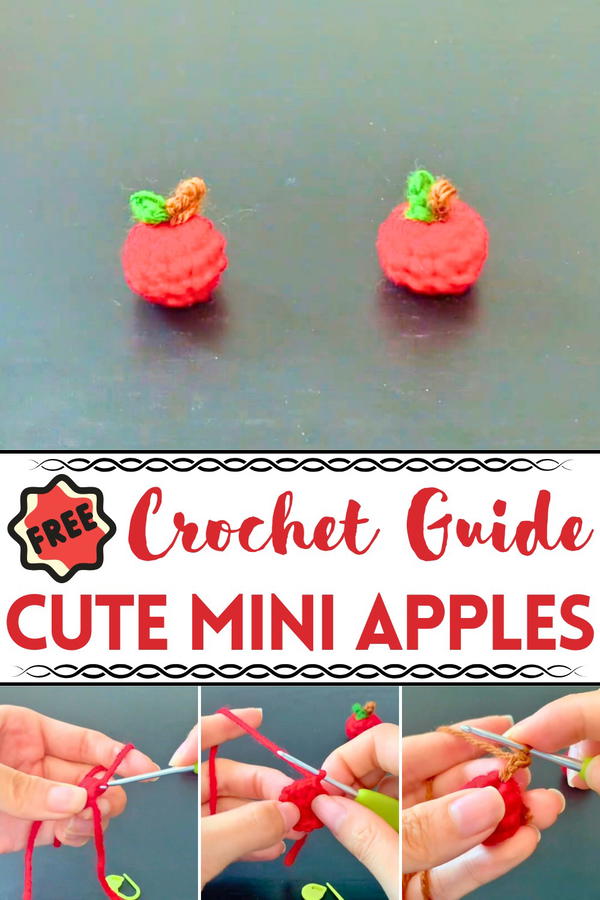
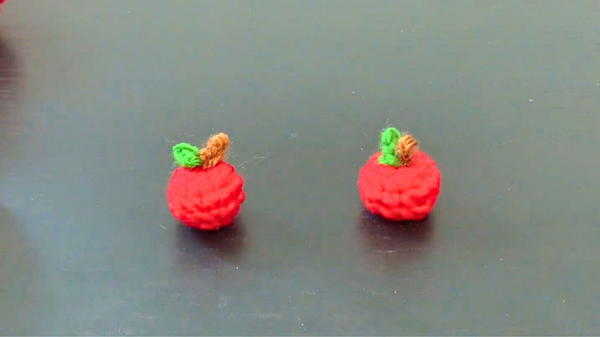
Delight in the charm of Crochet Mini Apple Pattern that's perfect for decoration, gifts, or accents that bring warmth, creativity, and color to any space.
It’s incredible how something as simple as yarn can take the shape of a delightful miniature apple, evoking the charm of an orchard in bloom. Crochet Mini Apple is more than just a display of artistic skill; they carry functional benefits that make them cherished additions to any space. Perfect as decorative table accents, unique keychains, or thoughtful gifts, their utility is as versatile as their aesthetic appeal. With soft textures and vibrant hues, these miniature apples radiate a sense of homeliness and warmth, breathing life into everyday surroundings.
Vibrant Crochet Mini Apple Pattern To Add a Cozy Flair
Whether perched in a basket to mimic a harvest scene or adorning your workspace to add a splash of whimsy, they tell stories of creativity and attention to detail. Moreover, crocheting apples encourages mindfulness and embodies sustainability, using minimal materials to achieve maximal beauty.
The intricate stitching and colorful finishes make mini apple delightful for children and adults alike, sparking joy wherever they appear. Their charm lies not just in their petite size but in their potential to transform even the simplest corners into cheerful pockets of art. A testament to how small gestures can leave large impressions, Crochet Mini Apple redefine decorative expressions with a playful yet elegant touch.
Step-by-Step Guide
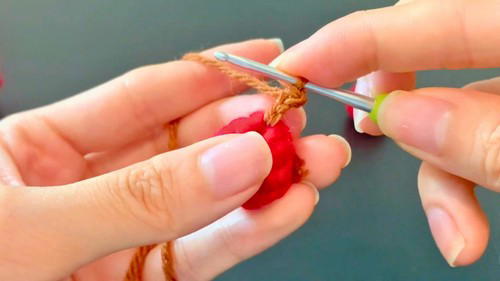
1. Starting with the Magic Ring
- Begin with a magic ring: Wrap the yarn as shown in the video, then insert the hook and do a yarn over.
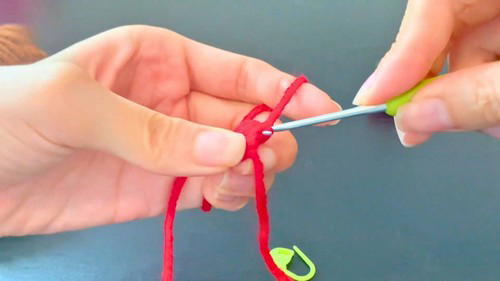
- Pull through the loop and chain one to secure the ring.
- Round 1: Work six single crochets (SC) into the magic ring. Remember to place a stitch marker in the first stitch to track your rounds.
- Pull the end of the magic ring to tighten the center and close it into a circle.
2. Building the Apple Shape
- Round 2: Work single crochet increases (SC INC) in every stitch. This means you crochet two SCs into each stitch. By the end of this round, you'll have 12 stitches.
- Rounds 3-4: Work one SC into each stitch, completing two rounds of even stitching. Be sure to place the stitch marker in the first SC of each round.
3. Shaping the Apple’s Curve
- Round 5: Work single crochet decreases (SC DEC) to narrow the apple. For SC DEC, insert the hook into the first stitch, pull up a loop halfway, then insert the hook into the next stitch and pull up another loop. Yarn over and pull through all loops.
- Repeat SC DEC around the round to continue creating the apple’s shape.
4. Finishing the Apple
- Cut the yarn, leaving enough length to close the circle and weave in ends. Use a yarn needle to weave through every other stitch at the top of the apple and gently pull to close the remaining gap. Secure the ends to finalize the apple base.
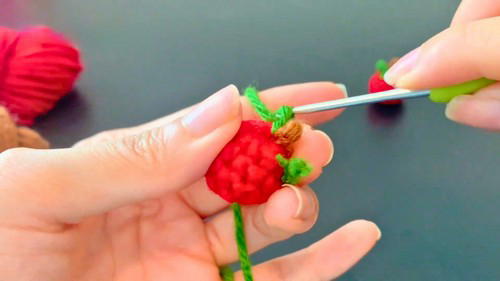
Adding the Details
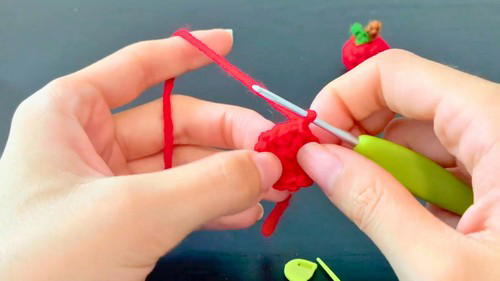
1. Creating the Stem (Brown Yarn)
- Insert the hook into the center of the closed top of the apple. Pull a small piece of brown yarn through.
- Create a chain of three stitches to make a stem. In the second chain and third chain, work slip stitches to complete the stem.
- Secure the yarn tail by weaving it through the apple.
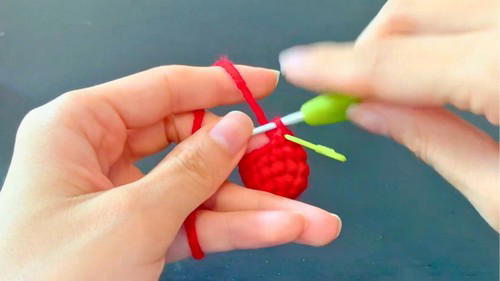
2. Adding the Leaf (Green Yarn)
- Insert the hook into the top (near the stem) and pull through green yarn.
- Chain three stitches to form the leaf.
- Add slip stitches into the second and third chains from the hook to give the leaf a neat shape.
- Weave in the yarn ends and secure them.
Special Features of This Project
- The mini apple design is simple and minimalistic, making it perfect for crochet beginners.
- Its small size makes it versatile for uses like keychains, bag charms, or toy decorations.
- This project works up quickly, making it great for quick handmade gifts.
Level of Difficulty
This project is rated as beginner-friendly. It uses foundational crochet techniques such as:
- Magic ring,
- Single Crochet (SC),
- Single Crochet Increase (SC INC),
- Single Crochet Decrease (SC DEC),
- Slip Stitch (SS), and
- Chain Stitch (CH).
Tutor's Suggestions
- Mark the first stitch of each round with a stitch marker to avoid confusion.
- Ensure your tension is even to create a smooth and consistent shape.
- Stuff the apple with fiberfill or leftover yarn scraps before closing the top to give it a firm and plump appearance.
Uses and Materials
Uses:
- Keychains, home décor, children's toys, or as a part of a crochet fruit set.
Materials Needed:
- Red yarn for the apple body.
- Brown yarn for the stem.
- Green yarn for the leaf.
- Crochet hook (size suitable for your yarn).
- Fiberfill for stuffing.
- Yarn needle for sewing and weaving in ends.
- Scissors.
Conclusion
This mini crochet apple is the perfect project for beginners to practice their skills while creating something delightful. With its simple shape and charming details, it’s a versatile piece that can brighten up any space. Nam’s instructions and tips make it easy to follow along and achieve satisfying results.
Bonus Tip
When stuffing the apple, be sure not to overfill it, as it may lose its round shape. Keep the stuffing firm but not stretched to preserve its natural curves.


