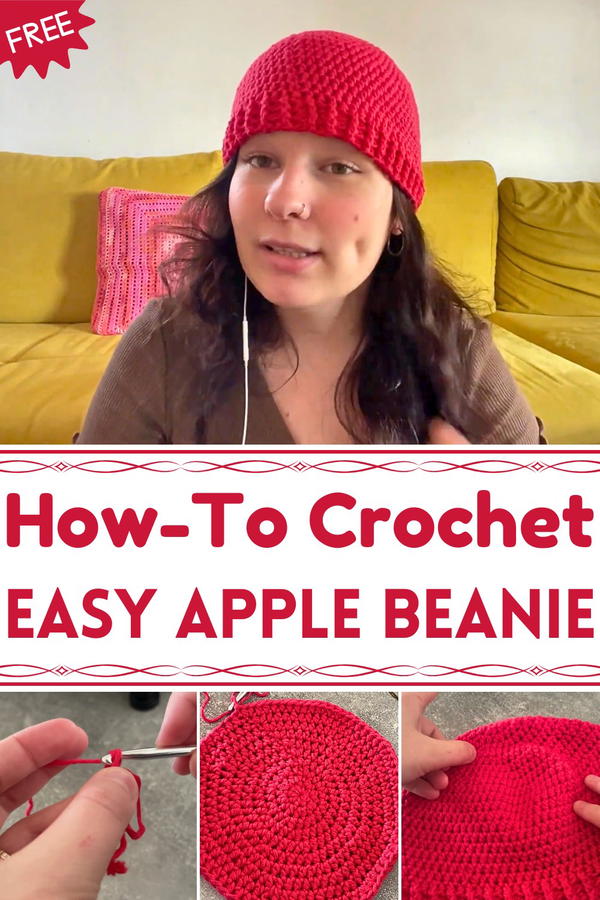
Crunch into cozy style with this Free Crochet Apple Beanie Pattern, featuring playful handmade details that add charm and warmth to chilly days.
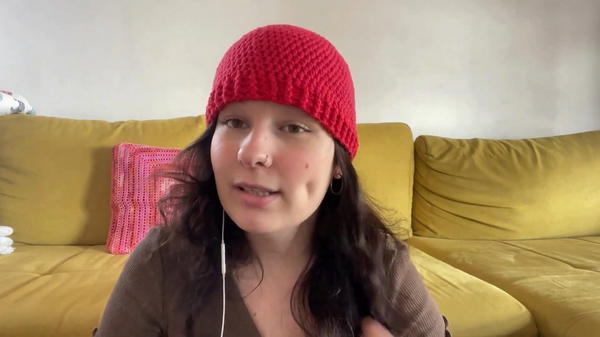
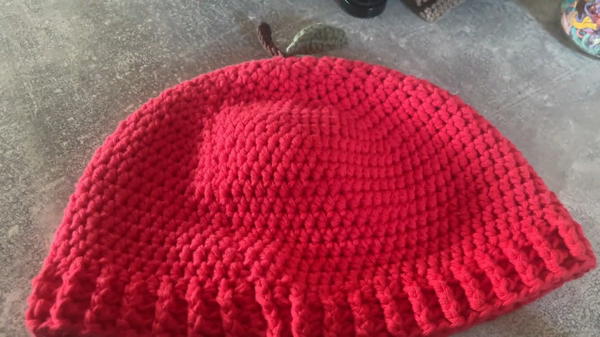
Autumn mornings often bring a crisp chill that calls for something cozy yet playful to wear. Soft yarn accessories are perfect for adding warmth while keeping outfits stylish and fun. The Free Crochet Apple Beanie captures that feeling perfectly, turning textured stitches into a snug, comfortable hat full of character. Its raised stitch pattern resembles a ripened apple, adding depth and a whimsical touch to any outfit.
Cozy Crochet Apple Beanie Pattern You’ll Keep
Vibrant color options bring a cheerful pop to autumn and winter wardrobes, making it both practical and eye-catching. Beyond warmth and comfort, this beanie carries charm that makes it ideal for gifting, spreading a handmade touch of care and joy. Its versatile style suits all ages and occasions, from brisk outdoor strolls to seasonal gatherings, combining function with playful elegance.
Soft, breathable, and easy to wear, it keeps the head cozy without feeling heavy. With its lively appearance, snug fit, and handmade appeal, the Free Crochet Apple Beanie turns simple yarn into a delightful accessory that brings personality, warmth, and subtle sophistication to any chilly day.
Materials Required
- Yarn:
- Red for the apple body (cotton recommended)
- Brown for the stem (cotton or cotton-acrylic blends)
- Green for the leaf (cotton recommended)
- Hook Sizes:
- 5 mm for the main body of the beanie
- 2.5 mm or 3 mm for the stem and leaf (smaller sizes recommended for a rigid structure)
- Additional Tools: Pair of scissors, tapestry needle for weaving in ends.
- Notes on Yarn: The tutor advises using cotton yarn for flexibility and comfort but notes that yarn weight and material can vary depending on availability. This may affect the total yardage required.
Special Features
- Incorporates a textured ribbing with front post and back post double crochets.
- Includes an attached stem and leaf for an apple-like aesthetic.
- Completely customizable in size and length (from baby hats to adult versions).
Step-by-Step Instructions
Part 1: Creating the Base of the Beanie
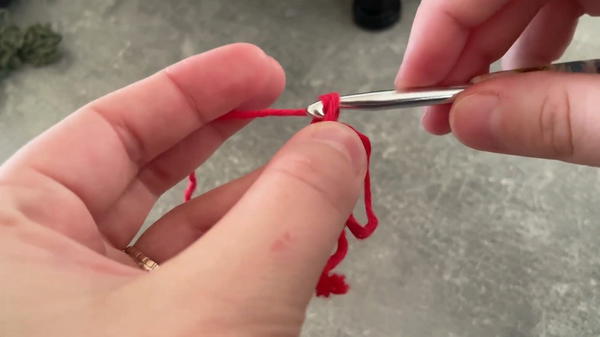
Start with a Magic Circle:
- Wrap the yarn around two fingers to create a cross and form the starting loop.
- Chain 1 to secure the circle.
- Perform 8 half-double crochets (HDC) into the ring. Close the circle by pulling gently on the tail and slip-stitch into the first HDC.
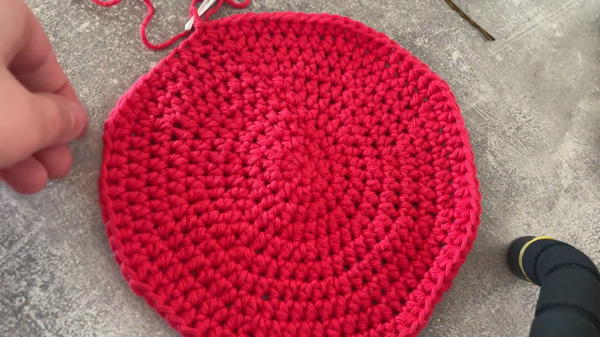
Increase and Expand:
- For row 2, make 2 HDCs in each stitch to total 16 stitches.
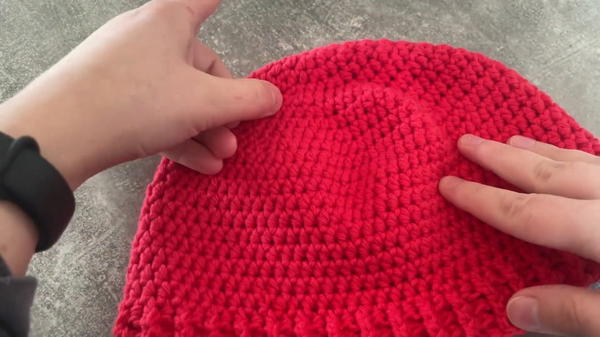
- Continue increasing in subsequent rows. Follow the pattern of increasing every other stitch (1 HDC in one stitch, 2 HDCs in the next), every third stitch, and so on, until the diameter reaches 16 cm (around 6.3 inches) for an adult-size beanie.
Fine-Tune the Height:
- Once the base is complete, stop increasing and make HDCs in each stitch of the round to build the desired height.
- Adjust the length depending on whether you want the beanie to cover your ears or sit above them. For example, keep in mind that the ribbing will add another 5 cm (2 inches) to the height.
Part 2: Adding the Textured Ribbing
Switch to Front Post and Back Post Double Crochets:
- After finishing the main body, alternate between front post and back post double crochets to form a sturdy ribbing.
- Be careful not to pull stitches too tightly in this step, as it may make the brim too rigid or uncomfortable.
Repeat Rows:
- Continue the ribbing pattern for 1–2 rows (or more if desired), ensuring a neat, flexible finish.
Part 3: Crocheting the Stem
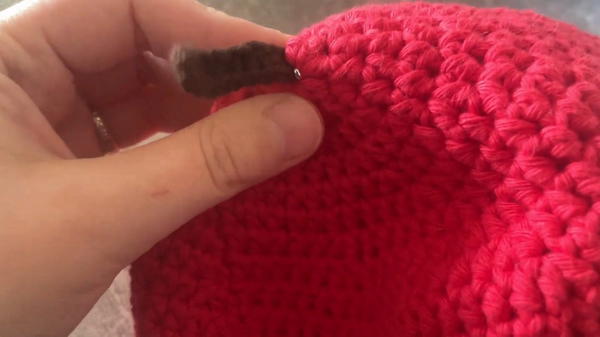
Stem Construction:
- Use the brown yarn and 2.5 mm hook.
- Chain 7, then:
- Skip the first 2 chains and perform 1 double crochet in the next two stitches.
- Follow this with 1 half-double crochet in the next three stitches.
- End with 1 single crochet in the last two stitches, chain 1, and fasten off.
Attach the Stem:
- Use the loose ends to secure the stem to the top center of the beanie.
- Knot tightly on the inside and weave in the ends.
Part 4: Crocheting the Leaf
Leaf Construction:
- Using green yarn and a 2.5 mm hook, chain 12.
- In the second chain from the hook, work as follows:
- Slip stitch in the first stitch.
- Single crochet in the next two stitches.
- Half-double crochet in the next stitch.
- Double crochet in the next three stitches.
- Half-double crochet, then single crochet again in the last two stitches.
Mirror the Pattern on the Other Side:
- Chain 2 and turn to work along the opposite side of the original chain.
- Repeat the same stitch sequence to create a symmetrical leaf shape.
- Fasten off and attach to the beanie near the stem using loose ends or additional yarn.
Tutor’s Suggestions
- Maintain a Relaxed Tension: Avoid crocheting too tightly, especially during the ribbing section, to ensure comfort and flexibility in the final product.
- Adjust the Size: The beanie can be customized for children or adults. For size guidance, refer to the chart in the video description.
- Use Smaller Hooks for Details: A smaller hook is recommended for the stem and leaf to give them a more rigid and firm structure.
- Cotton vs. Acrylic Yarn: The tutor suggests cotton for better texture, but acrylic yarn can also be used with slight adjustments to weight and stitch count.
Uses of the Apple Beanie
- Fashion Accessory: A cute, themed addition to your wardrobe.
- Gifting: Perfect for fall, back-to-school, or themed birthday presents.
- Baby and Child Photoshoots: An adorable prop for photography sessions.
- Customized Looks: Easily adaptable for different fruit designs by changing yarn colors.
Tip
When working with magic circles, always crochet over the tail of the yarn. This ensures you can pull the circle tight and prevent unraveling. If you’re new to this technique, take your time practicing to get it right.
Conclusion
The apple beanie is a delightful and versatile project, ideal for all skill levels. It introduces beginners to basic techniques like the magic circle and half-double crochet, while its ribbing and detailed accents provide a rewarding challenge.


