Organize essentials stylishly with this Free Crochet Pouch Pattern, bringing a practical, handmade touch that adds charm and functionality to daily use.
Small, functional accessories have played a crucial role in organizing everyday life, offering convenience while adding a personal touch. A handmade pouch provides an ideal solution for keeping essentials neatly stored, whether for travel, daily errands, or home use. The Free Crochet Pouch Pattern offers a way to craft a versatile, lightweight bag that combines practicality with subtle charm. Its compact size makes it perfect for holding cosmetics, stationery, small gadgets, or personal items, keeping them secure and easily accessible.
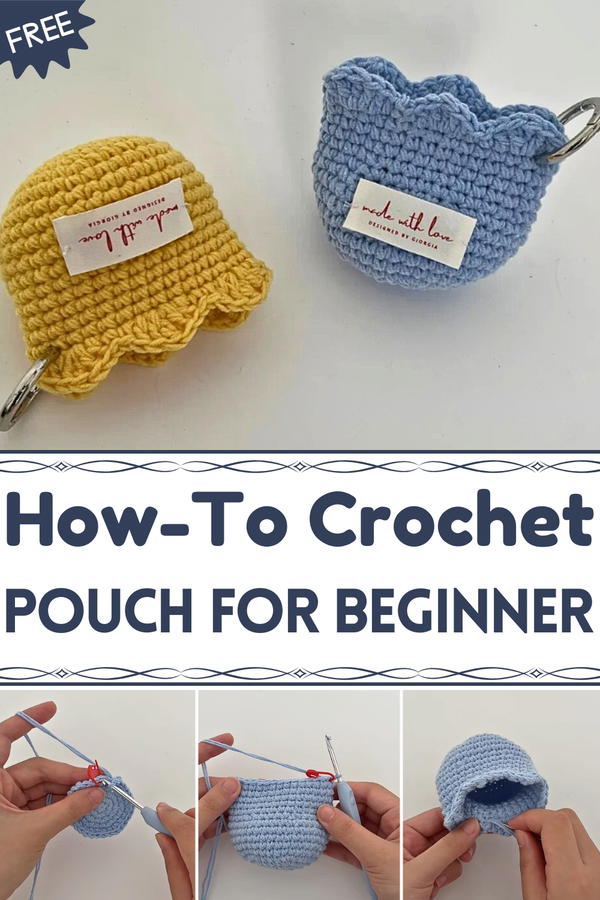
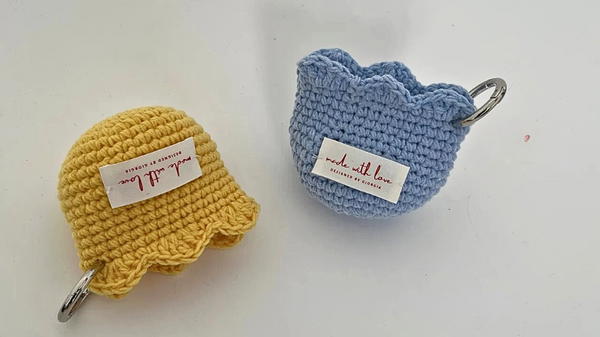
Soft Crochet Pouch Pattern to Store Makeup
The textured stitches provide durability and visual interest, while the choice of yarn and color allows each pouch to reflect individual style. Step-by-step instructions ensure that crocheters of all skill levels can complete the project with confidence, enjoying the calming and focused rhythm of stitching. Beyond its utility, creating the pouch offers a rewarding sense of accomplishment and a tactile connection to the finished piece.
Finished pouches are not only practical but also make thoughtful gifts, personalized keepsakes, or stylish storage solutions. Each handcrafted pouch transforms yarn into a functional accessory that blends convenience, aesthetic appeal, and personal expression, demonstrating how small handmade items can enhance organization, add charm, and bring satisfaction to everyday life.
Materials
- 4-ply cotton yarn (two strands used simultaneously)
- 4mm crochet hook
- Yarn needle (for concealing ends)
- Scissors
Step-by-Step Instructions
Step 1: Starting with a Magic Loop
- Make a magic loop.
- Crochet 6 single crochets into the loop.
- Mark the first stitch of the round using a stitch marker.
- Pull the tail of the loop to tighten it.
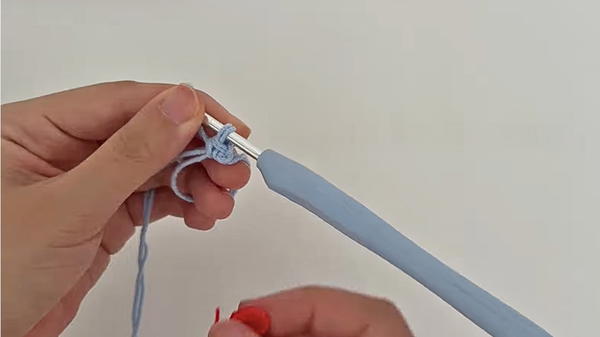
- Make a slip stitch to join the first and last stitches.
- Chain one to start the next round.
Step 2: Round 2 (Increasing)
- In each stitch of the previous round, make an increase. (One single crochet, then two single crochets in the same stitch, repeated for all stitches.)
- Complete the round with a slip stitch, then chain one to start the next round.
Step 3: Round 3
- Alternate between one single crochet in the first stitch and an increase (two single crochets in the next stitch), repeated six times.
- This will give you a total of 18 stitches.
- Finish with a slip stitch and chain one for the next round.
Step 4: Rounds 4–6 (Expanding the Circle)
- Round 4: Make two single crochets in consecutive stitches, followed by an increase. Repeat six times (24 stitches total).
- Round 5: Make three single crochets in consecutive stitches, followed by an increase. Repeat six times (30 stitches total).

- Round 6: Make four single crochets in consecutive stitches, followed by an increase. Repeat six times (36 stitches total).
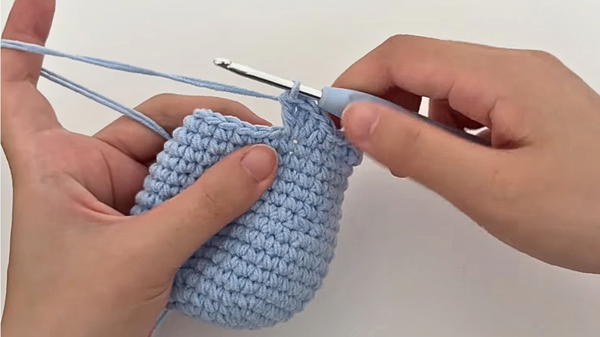
Step 5: Rounds 7–11 (Even Rounds)
- For the next five rounds, chain one to start, then crochet 36 single crochets in each round without any increases.
- Slip stitch to join at the end of each round.
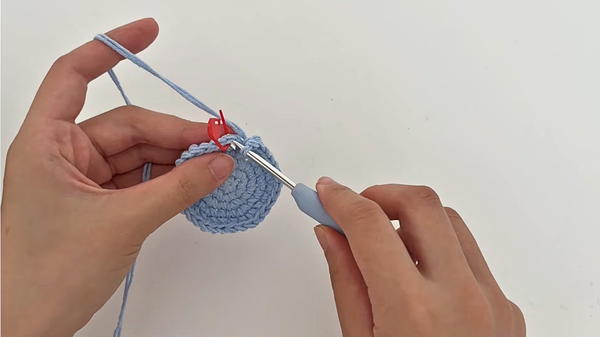
Step 6: Round 12 (Decreasing)
- Work one single crochet in the first four stitches, then make a decrease (crocheting two stitches together).
- For the decrease: Insert your hook into the stitch, yarn over, pull through; insert into the next stitch, yarn over, pull through; yarn over, and pull through all loops.
- Repeat four single crochets followed by a decrease around the round. There should be 30 stitches total.
Step 7: Rounds 13–17 (Even Rounds)
- For the next five rounds, chain one to start, then crochet 30 single crochets in each round.
- Slip stitch to join at the end of each round.
Step 8: Final Decorative Round (Round 18)
This round adds a decorative edging to the pouch:
- Start with one single crochet, followed by one double crochet.
- In the next stitch, create a combination of one double crochet, one triple crochet, and another double crochet in the same stitch.
- To make a triple crochet: Yarn over twice, insert the hook into the stitch, yarn over and pull through; yarn over and pull through two loops, yarn over and pull through two loops again, then yarn over and pull through the remaining loops.
- In the following stitch, work one double crochet and one single crochet.
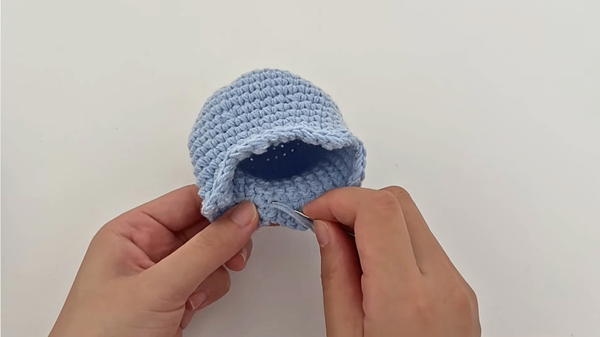
- Repeat this decorative pattern five times around the pouch.
- Finish with a slip stitch, snip the yarn, and secure the ends.
Special Features
- The decorative edging with double and triple crochets sets this design apart from basic pouches.
- The alternating increases and decreases create a rounded shape suitable for storing small items.
- Working with two strands of yarn makes the pouch sturdy and durable.
Level of Difficulty
This project is beginner-friendly, with a mix of simple techniques like magic loops, single crochet, increases, and decreases. The final round may require slightly more focus due to the combination of stitches, but the tutor explains it well.
Tutor’s Suggestions
- Mark the first stitch of each round to maintain accuracy in counting.
- Use the tail yarn from the magic loop to adjust and tighten the loop at the beginning.
- Always finish with a slip stitch and chain appropriately to ensure smooth transitions between rounds.
- Practice the decrease and decorative stitches (double/triple crochets) beforehand if you're new to these.
Uses of the Pouch
- Storage for coins, small accessories, or craft supplies.
- A sweet gift for friends or family.
- A great practice project for honing beginner crochet skills.
Tip
Pro Tip: If you're struggling to keep the tension consistent while crocheting with two strands of yarn, try winding them together into a single ball before starting. This prevents tangling and ensures smoother progress.
Conclusion
This crochet project is an enjoyable way to practice and refine your fundamental skills while creating a functional and stylish round pouch. The tutorial is simple yet detailed, making it accessible for beginners.


