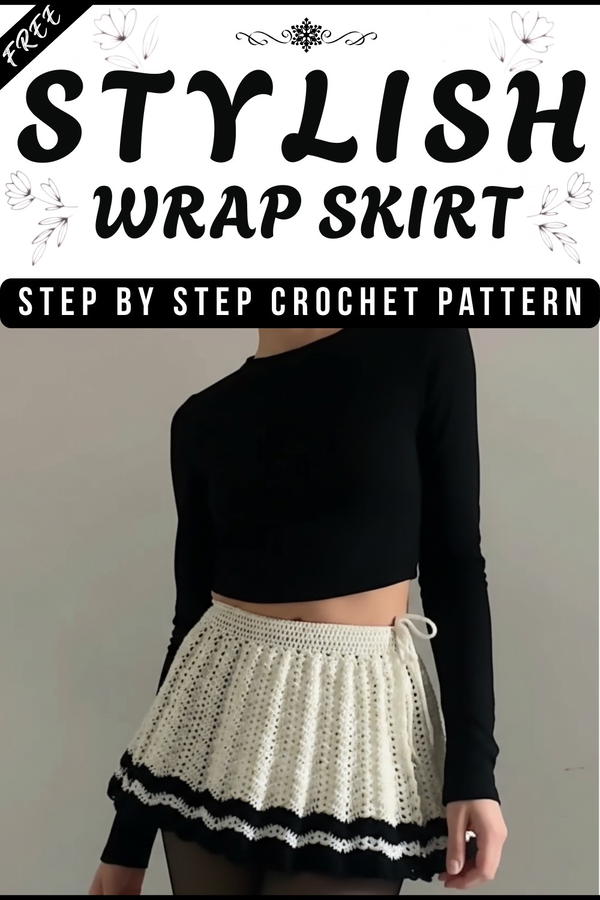
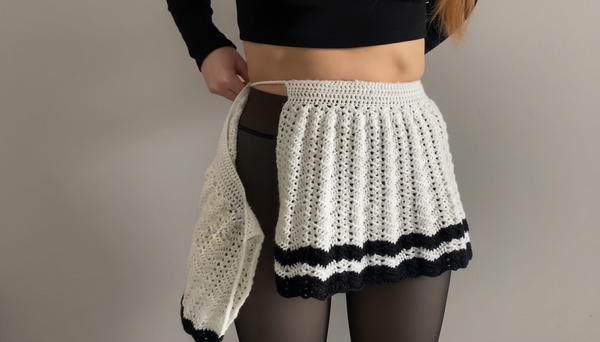
There’s nothing more beautiful and comfortable than wearing a handmade skirt you created yourself. Using a crochet wrap skirt pattern, you can make a stylish and adjustable piece that’s sure to be the best in your wardrobe. This skirt wraps gently around your waist and ties securely, fitting every size perfectly without need for buttons or zippers.
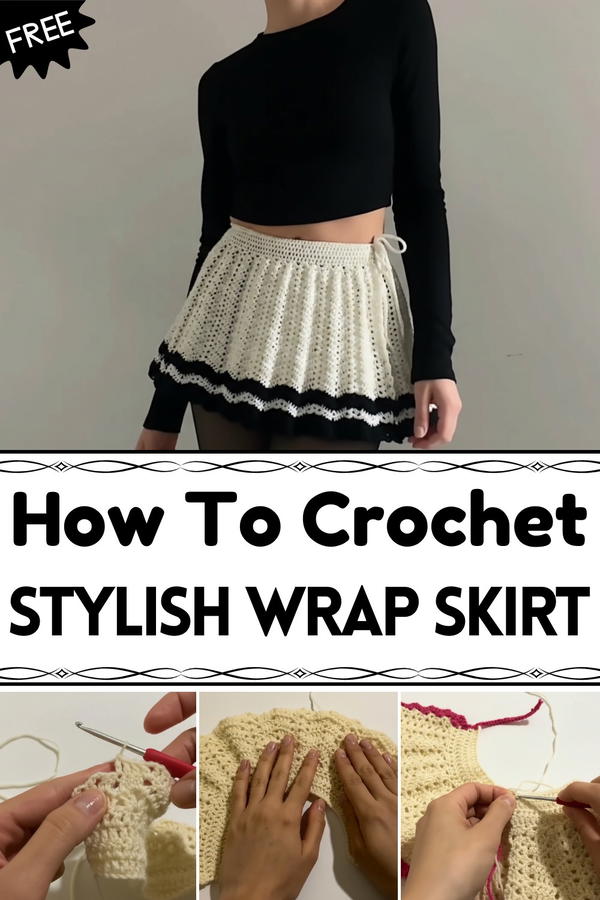
Delicate Crochet Wrap Skirt Pattern That Adds Feminine Flair
The lovely crochet technique gives the fabric a light, airy look, making it just right for hot weather or for layering in cooler months. With your own choice of colors and patterns, you can create a classic, single-color skirt or a vibrant one with stripes that stands out everywhere.
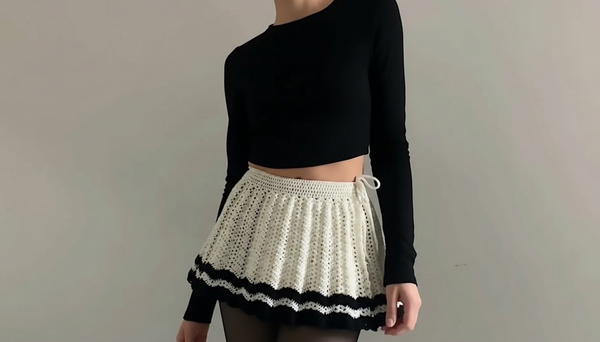
One of its most unique features is its easy fit—you simply tie it with a cord or ribbon, making dressing up quick and simple. Whether worn at home, outside, or on vacation, this skirt shows off your creativity and style every day.
Crochet Wrap Skirt Pattern
Skill Level
Intermediate to Advanced
Materials
- Yarn: Fingering or light DK weight yarn (thin, suitable for a US size 3 (3.25 mm) crochet hook)
- For tutorial/sample clarity, a slightly thicker yarn can be used.
- Choose cotton or acrylic based on seasonality.
- Crochet Hook: US size 3 / 3.25 mm
- Tapestry Needle: For weaving in ends
- Scissors
- Measuring Tape
- Optional: Coordinating satin ribbon for added waist detail
Key Abbreviations (US Terms)
- ch: chain
- dc: double crochet
- sl st: slip stitch
- st: stitch
- rep: repeat
- sk: skip
Special Notes
- The wrap skirt is worked flat in rows, beginning with the waistband.
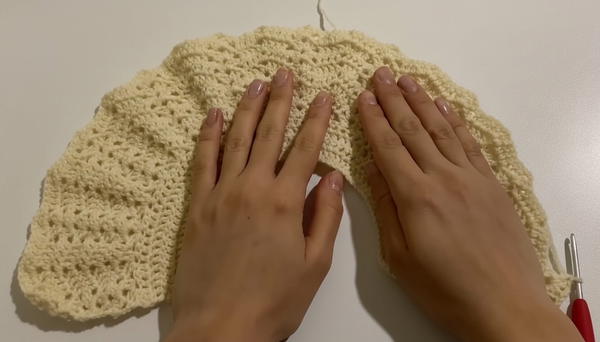
- Body of the skirt is shaped with an expanding fan stitch pattern.
- The length and width are fully customizable.
- The ties/cords should be long enough to wrap securely around your waist.
- Always use double crochet (US dc) for the main stitch unless otherwise noted.
- Turning chains count as a stitch unless otherwise stated.
Sizing
- Waist Measurement: Measure the distance from your preferred starting point on one side of your waist, around to the opposite side to allow fabric overlap.
- Example: 80 cm (31.5 in)
Step-by-Step Pattern
1. Waistband Foundation
Create Base Chain:
- Make a slipknot.
- Ch a length to match your waist measurement.
(For 80 cm, approx. 160 chains; adjust as needed for your desired fit.)
Row 1:
- Ch 3 (counts as first dc here and throughout), dc in 4th ch from the hook and each ch across.
- Tip: For sample/test, you may work fewer chains (e.g., 60) to practice stitches.
Rows 2-5:
- Ch 2, turn, dc in each st across.
- Rep this row to create approx. 3.5 cm (1.5 in) wide waistband (add or subtract rows as desired).
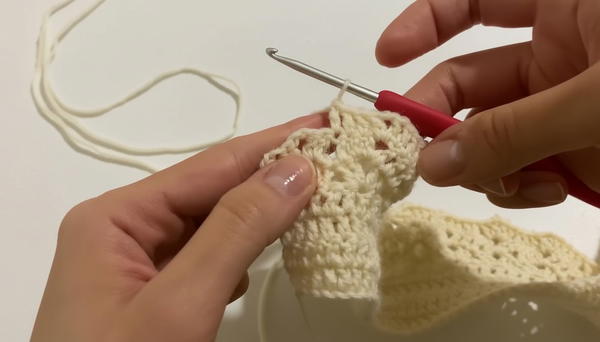
2. Fan Stitch Skirt Body
Establish the Fan Pattern
Row 1 of Skirt/Row 6 overall (Fan Foundation):
- Ch 2, turn. (Does not count as a stitch)
- (In first st ONLY):
- 2 dc, ch 2, 2 dc (first fan made)
- Repeat fans across:
- Sk 2 sts, in next st work (2 dc, ch 2, 2 dc)
- Continue across, ending with dc in last st (or as pattern fits).
- Tip: The last st may not be a full fan; simply dc in the last st for a straight edge.
Row 2 (Fan Expansion):
Ch 3, turn (counts as first dc).
In the first ch-2 sp of previous fan, work (2 dc, ch 2, 2 dc) [Fan].
For every alternate fan, increase as follows:
- If normal fan:
- (2 dc, ch 2, 2 dc) in ch-2 sp.
- If increasing fan: (creates a wider flare)
- 2 dc, 1 dc in ch-2 sp, ch 2, 1 dc in ch-2 sp, 2 dc.
- Alternate normal and increasing fans across.
- If normal fan:
Continue alternating normal fans and increasing fans at intervals to achieve desired skirt flare.
Subsequent Rows (Shape Skirt)
Continue working in rows, always turning at the end, and alternate between:
- Normal fan: (2 dc, ch 2, 2 dc) in each fan/ch-2 sp.
- Increasing fan: Work 2-3 dc at the start, 1 dc in the center space, ch 2, 1 dc in the center, complete the remaining dc to expand the fan by 2 sts.
- Each time you "increase," your fans will grow wider, creating the skirt's A-line.
After each increase row: Work several normal fan rows (no increases) to maintain width before the next increase row.
- Example:
- 5 normal rows (8 sts per fan) → 1 increase row (10 sts per fan) → repeat as needed to desired length.
- Example:
3. Length and Color Changes
- Length: Continue pattern until skirt reaches desired length (can be measured at the center-back).
- For sample: 16 rounds = approx. 15.5 cm (6 in)
- Full-length skirts may require over 40 rounds depending on yarn and fit.
- Changing Colors (Optional):
- At the end of a row, before pulling through the last part of your final dc, drop the old color and pull up a loop of the new yarn. Continue crocheting next row as usual.

- At the end of a row, before pulling through the last part of your final dc, drop the old color and pull up a loop of the new yarn. Continue crocheting next row as usual.
4. Hem Finishing
- With RS facing, work a final row of fans along the edge of the skirt for a decorative border:
- (In first space): 2 dc, ch 2, 2 dc.
- Skip space, fan in next st, rep to end.
5. Finishing the Waistband
- With RS facing, work a row of single crochet along the top edge to neaten the waistband:
- Sc in each st across.
6. Ties/Cords
- Short Tie: Ch to desired length for short tie (e.g., 48 cm/19 in), fasten off, weave in ends.
- Long Tie: For wrap-around, ch longer cord (e.g., 86 cm/34 in), fasten off.
- Attach Cords: Weave the ends into each corner of the waistband, or as needed for your fit.
- Optional: Weave ribbon or create decorative cords for extra detail.
7. Final Assembly
- Weave in all ends with your tapestry needle.
- Block your skirt gently to shape.
- Feed long tie through fabric side as needed to wrap around waist securely.
Pattern Correction and Tips
- Increases are crucial to ensure the skirt "flares" and wraps properly.
- If your skirt begins to ruffle or flare too much, reduce the number of increased fans and work more rows between increase rounds.
- Always count your dc’s in each fan after increase rounds to maintain symmetry.
- If working in stripes, always change color at the end of a row for clean transitions.
- For a longer-lasting waistband, consider working the top row in single crochet for more structure.
Conclusion
This intermediate to advanced wrap skirt pattern teaches the construction of garments using the fan stitch technique, features seamless color or yarn changes, and allows for full customization in both size and length. Perfect for expressing personal style with unique colors and finishes, this skirt is a refined crochet garment suitable for both casual and dressy occasions.
Tips
- Use stitch markers to quickly identify increase fans across rounds.
- Block your finished skirt—especially if using cotton or natural fibers—for the best drape.
- Swatch before beginning to match gauge and check desired fabric density.
- Securely fasten off all ends for durability, especially on high-wear items such as skirts.