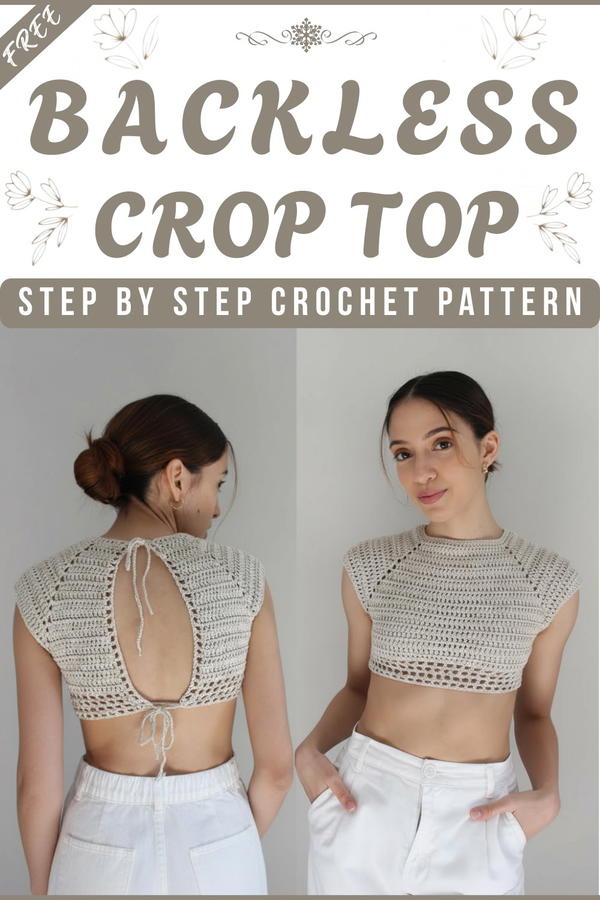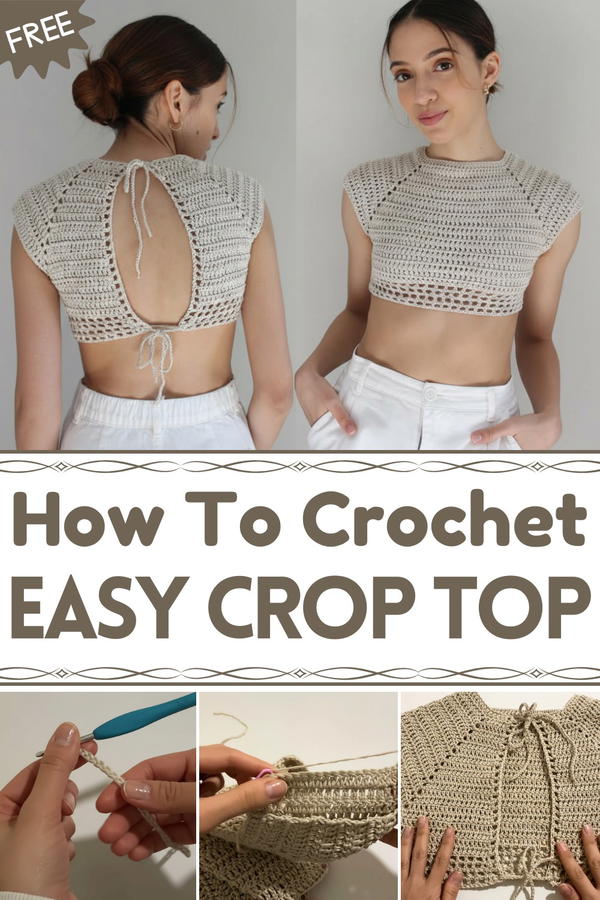
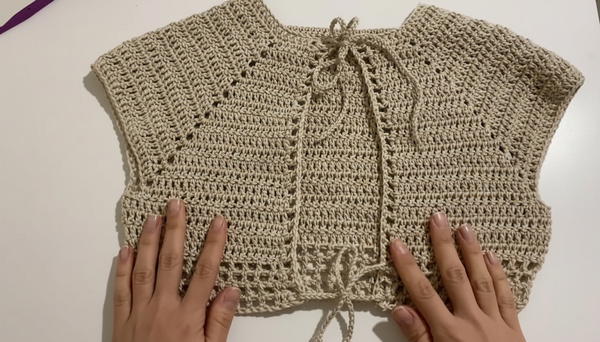
Flawless Crochet Crop Top Pattern for Effortless Summer Style
Lightweight, breathable, and comfortable, it keeps you cool while adding a handmade elegance. Beyond fashion, making it is a relaxing and creative activity, giving you satisfaction and a sense of accomplishment.
Its benefits include being reusable, easy to style, and suitable for all seasons. This Crochet Crop Top Pattern creates crop top that are practical, stylish, and perfect for expressing your personal style in a simple and charming way.
Crochet Open-Back Top Pattern
Materials
- Yarn: 100% Cotton, Medium weight (#3/light or #4/worsted, as preferred)
- Yarn Quantity: ~150 grams (amount may vary based on size)
- Hook: 4 mm (or size recommended by yarn label)
- Notions:
- Stitch markers (or hair clips)
- Measuring tape
- Scissors
- Yarn needle (for weaving in ends)
Skill Level
Intermediate to Advanced
Key Abbreviations (US Terms)
- ch = chain
- dc = double crochet
- st(s) = stitch(es)
- sl st = slip stitch
- sp = space
- rep = repeat
- yo = yarn over
Special Notes
- Pattern is worked top-down from the neckline.
- Yoke is formed with raglan increases, allowing for custom fitting.
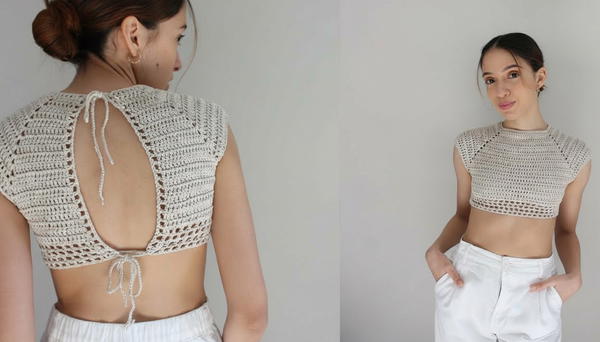
- Open back design; ties are added for closure.
- Adjust foundation chains and total rounds for custom sizing.
- Use stitch markers to indicate raglan points (where increases are made for sleeves/body).
Pattern Instructions
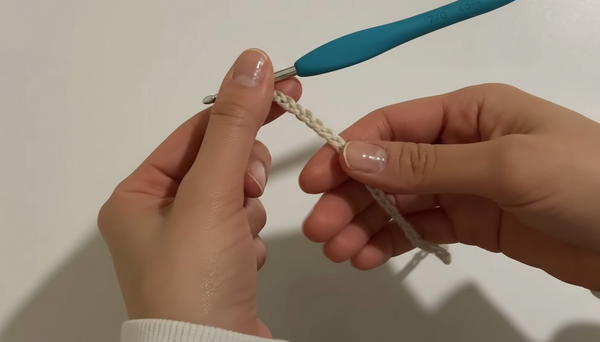
1. Foundation Chain and Yoke Division
a. Measure neck: Decide width desired for neck opening. (Example: 66 ch for a more open back version.)
b. Foundation chain:
- Ch 66. (Adjust for size and desired neckline openness.)
c. Yoke Division:
- Using the sample division:
- Back edge (each side): 5 sts
- Sleeve (each): 16 sts
- Front: 24 sts
(Make adjustments based on your measurements.)
d. Mark raglan points (use markers or hair clips) to divide for back edges, sleeves, and front appropriately.
2. Setup Row (Row 1):
- Ch 3 (counts as first dc), dc in each ch across (total: 66 dc).
- Place stitch markers according to your calculated raglan division.
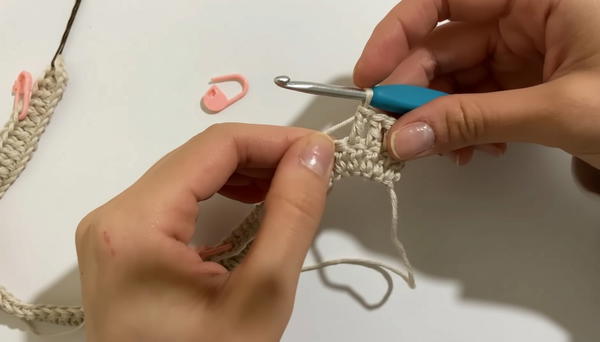
3. Yoke Increases (Raglan Section)
Row 2:
- Ch 2, turn.
- Dc to 1st marker, in marked st/sp:
- (dc, ch 2, dc) in one st/sp (this is the raglan increase); replace marker in ch-2 sp.
- Dc to next marker, repeat (dc, ch 2, dc) at each marked point; replace markers as you go.
- Continue this pattern to end of row.
Row 3 and Beyond:
- Ch 2, turn.
- Dc in each st to ch-2 sp (marker),
- (dc, ch 2, dc) in each ch-2 sp; replace marker in each ch-2 sp.
- Dc in each st to end.
- Rep this row pattern, working increases at raglan points each row, until yoke reaches underarm/desired width (typically 13-16 rows as needed).
4. Joining Sleeves and Body
- On the row where yoke is complete (armscye is large enough), work as follows:
- Ch 2, turn.
- Dc up to first raglan ch-2 sp.
- In ch-2 sp, dc, then ch 3 (creates armhole).
- Skip all sleeve sts to next raglan ch-2 sp, dc in ch-2 sp.
- Continue with next body section.
- Repeat for other side.
- Finish dc’s for the round.
- Try on the yoke. If the armhole is too tight, add more ch for underarm space.
- Dc in ch sps of underarm in the following rounds to maintain sleeve width.

5. Body of Top
- Continue working in rounds/rows of dc to desired length (after the sleeves are joined).
- At each armhole, dc in each of the ch-sts you made for the underarm join.
- Tip: Try on the top as you go to ensure fit.
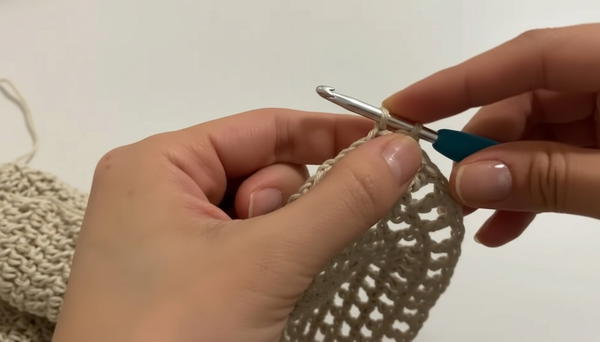
6. Bottom Edging (Openwork Lace Section)
Round 1:
- Ch 2 (counts as first dc), dc in next st,
- ch 1, skip next st, dc in next st,
- Rep from * to * around.
Join with sl st to beginning dc.
Subsequent Rounds:
- Ch 2, dc in next dc; ch 1, skip ch-1 sp, dc in next dc;
- Rep as established.
- Work 4 rounds or to desired depth of lace.
7. Finishing the Back
Back edging:
- With RS facing, attach yarn at back neck edge.
- Ch 2, dc in next st,
- Ch 1, skip 1 st, dc in next st–repeat to end.
- Complete 2 or more rows as for bottom lace edge.
Repeat on other side of slit/open back so both sides are finished evenly.
8. Finishing Touches
- Make ties:
- Ch (long enough to tie in back, ~40-50 ch), make 2.
- Attach one to each upper back corner for closure.
- Weave in all yarn ends with the tapestry needle.
- Block gently to desired measurements if needed.
Conclusion
This pattern produces a comfortable, open-back crochet top with a beautifully shaped yoke, constructed seamlessly with a lacy bottom edge for extra flair. The top is highly customizable for size, length, and fit, allowing you to create a bespoke, stylish piece for any occasion.
Pattern Corrections & Tips
Correction:
- If you want a closed back, simply avoid making the back slit and join the foundation chain into a ring.
- For larger/smaller sizes, adjust starting chain and overall rounds as needed.
Tips:
- Always check your gauge and try on the yoke before joining sleeves to ensure perfect fit.
- Use stitch markers consistently to avoid losing track of raglan increase points.
- Try adding extra underarm chains for a looser sleeve or subtracting for a closer fit.