Make a stylish and comfy Prada-inspired bucket hat with this simple crochet guide that brings a fresh, playful touch to your wardrobe!
This stylish hat brings together comfort and a cool, modern look that anyone will love. Its neat, even stitches give it a smooth, soft feel, making it great to wear all day long. The rounded shape gently shades your face from the sun, perfect for beach trips, casual outings, or fun outdoor events. It fits comfortably on most heads, offering a relaxed yet secure fit that feels just right.
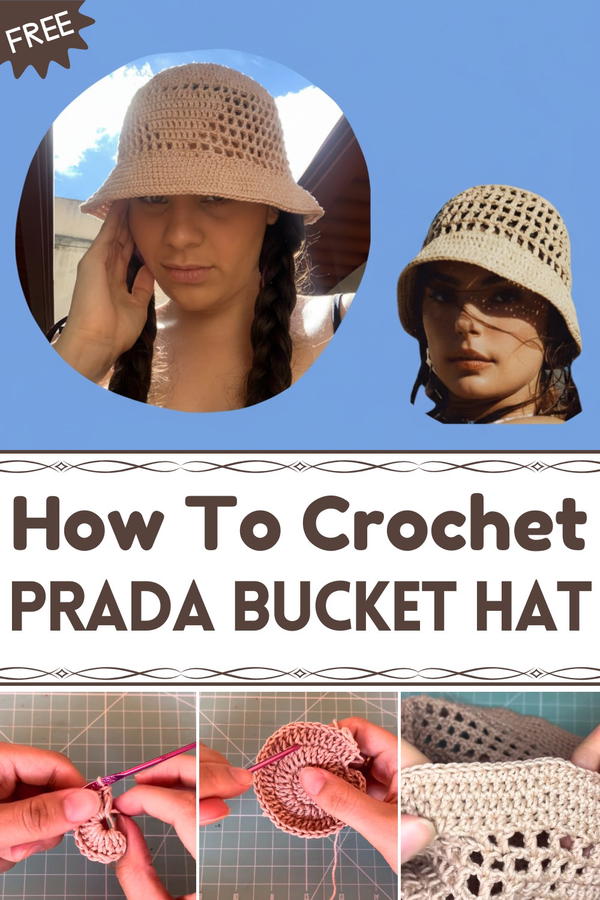
Crochet Prada Bucket Hat Perfect for Any Season
With its bright and cheerful colors, this hat easily pairs with many outfits, adding a splash of handmade charm and freshness wherever you go. Wearing or making this hat lets you show off your unique style and appreciation for creative, personal accessories. It’s more than just a hat — it’s a fun way to express yourself while staying comfortable and protected from the sun.

Crochet Prada-Inspired Little Hat
Materials
- Amigurumi yarn by Círculo (or similar yarn)
- Crochet hook size 2.5 mm
- Stitch markers (optional)
- Yarn needle
- Scissors
Special Features
- Worked in continuous rounds starting from a magic ring
- Uses double crochet (dc) stitches extensively for solid, durable texture
- Incremental increases shape the hat’s crown perfectly
- Unique alternating stitch pattern ("pine cone" clusters and singles) adds textured design
- Adjustable size by counting rounds and increments
- Suitable for gifting or personal use
Level of Difficulty
Intermediate: Requires ability to work magic ring, double crochet, chain stitches, increasing and decreasing, stitch counting, and working in rounds.
Step-by-Step Crochet Pattern
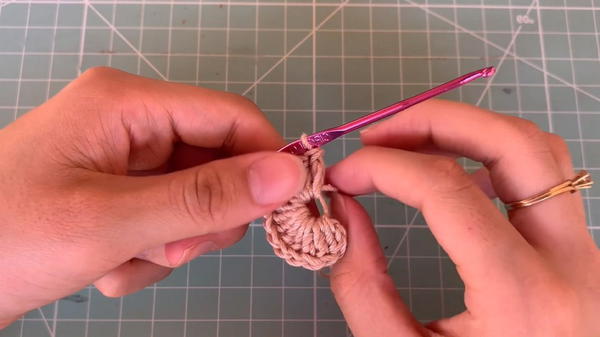
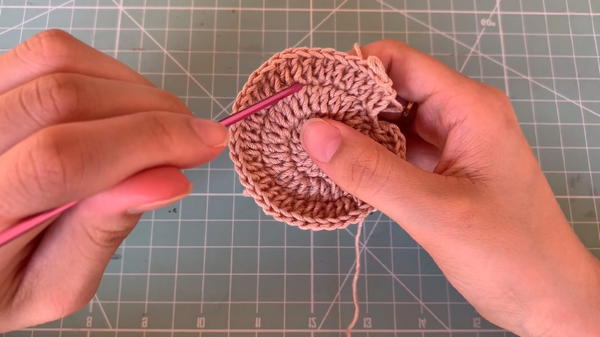
1. Magic Ring and First Round
- Make a magic ring (also called adjustable ring). Pass yarn twice around two fingers forming an "X," insert hook, pull loop through, chain 3 (counts as 1 dc).
- Work 14 double crochet (dc) stitches inside the magic ring (including the turning chain).
- Pull the tail to tighten the ring. You will have 14 dc stitches total including the starting chain 3.
- Join the round by slipping into the top of the starting chain 3.
2. Second Round – Double Increase
- Chain 3 (counts as 1 dc).
- Work 2 dc in the same stitch (first stitch); this doubles the stitch count.
- Repeat: 2 dc in each stitch around.
- End with 28 dc stitches total; join with slip stitch as usual.
3. Third Round – Pattern Establishment
- Chain 1, single crochet (sc), chain 1, then make 2 dc stitches in the next stitch (pine cone cluster).
- Repeat across the round until the end; alternate single crochet between double crochet pairs.
- Close with slip stitch to the initial sc.
4. Subsequent Rounds – Alternating Stitch Pattern
- Work alternating pine cone clusters (2 dc in same stitch or adjacent) and single crochet (sc) stitches in a repeating pattern to build up texture and shape.
- Increase by adding an extra "pine cone" cluster per round at evenly spaced intervals to allow hat to expand properly.
- Maintain stitch count carefully to avoid uneven shaping.
5. Increasing Stitch Counts and Shaping
- Increase gradually as you add rounds: go from 28 stitches to 42, then 56, following the same increasing double crochet pairs per round logic.
- Increase counters as follows: add one extra "pine cone" cluster every few stitches per round, maintaining balance.
- Continue until desired hat size (measured with head circumference).
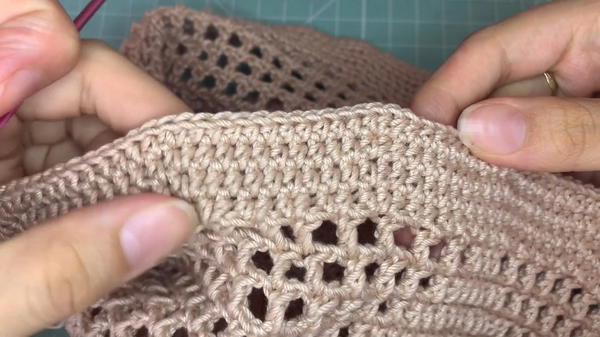
6. Working Base and Sides of Hat
- After crown is shaped, continue to work in rounds without increasing.
- Use the “little house” pattern: chain 1, skip a stitch, dc in next stitch, alternating mesh spaces for a textured effect.
- Count repeats precisely; add a closing half double crochet or slip stitch to finish.
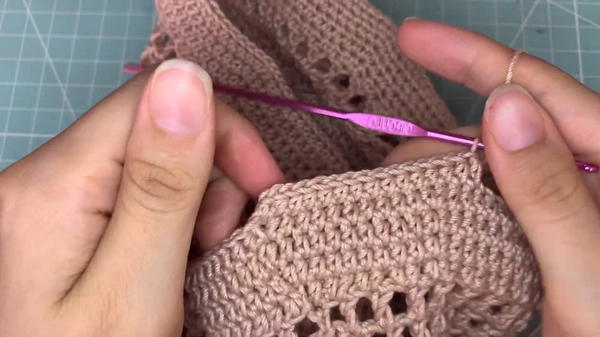
7. Triangle Section (optional shaping for a snugger fit)
- Begin reducing stitch count along sides by skipping stitches and chaining to form small triangles.
- Slowly decrease number of double crochet stitches per side to taper the piece.
- Close decreases evenly on both sides for a balanced triangle shaping.
8. Finishing Round
- At desired height, finish with a round of single crochet (sc) stitches to tidy the edges.
- For a neat border, chain 2 or 3 before joining the last stitches.
9. Weave in Ends and Block (optional)
- Using a tapestry needle, weave in all loose yarn tails.
- Block gently or shape by hand to smooth and ensure perfect fit and appearance.
Tutor’s Suggestions
- Use stitch markers to mark the beginning of rounds and key increase points.
- Count stitches regularly to maintain accurate increases and decrease patterns.
- Loosen the magic ring slightly before starting to avoid a tight center hole.
- Make swatches if uncertain about tension or yarn suitability.
- Take breaks during repetitive increases as the pattern grows.
- Adjust number of rounds and increases to fit different head sizes.
Uses
- Fashion accessory complementing casual or chic outfits
- Great for cooler months or spring with lightweight yarn
- Gift option due to easy size customization and classic style
- Perfect for fans of designer-inspired crocheted accessories
Tip
To avoid tight or uneven rounds, keep your tension even and relax your grip on the yarn, especially during increase rounds. Use a stitch marker at the round's start to keep track easily.
Conclusion
This Prada-inspired little hat pattern marries fashion with crochet technique, creating a practical and stylish accessory. With increasing rounds carefully balanced with charming stitch patterns, you can customize the hat size and shape.