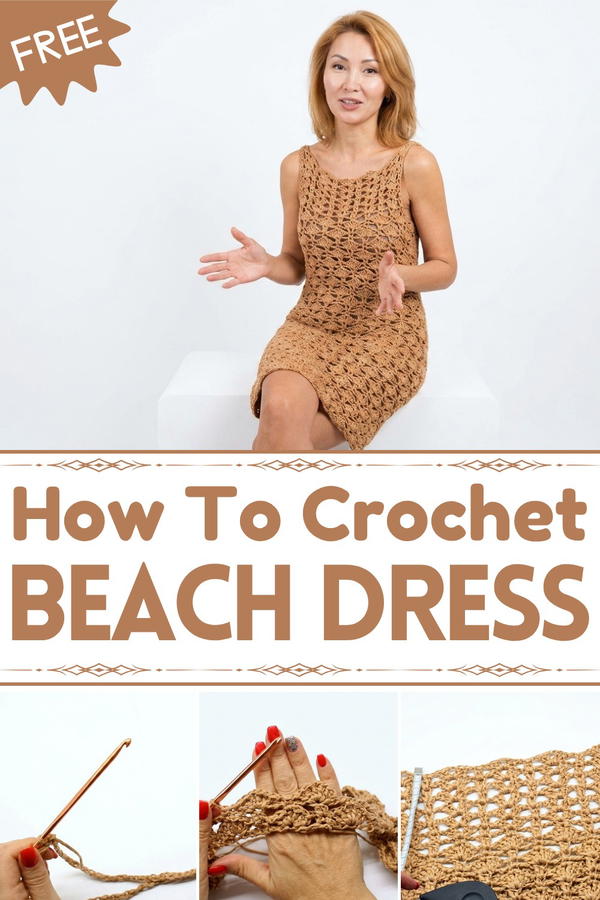
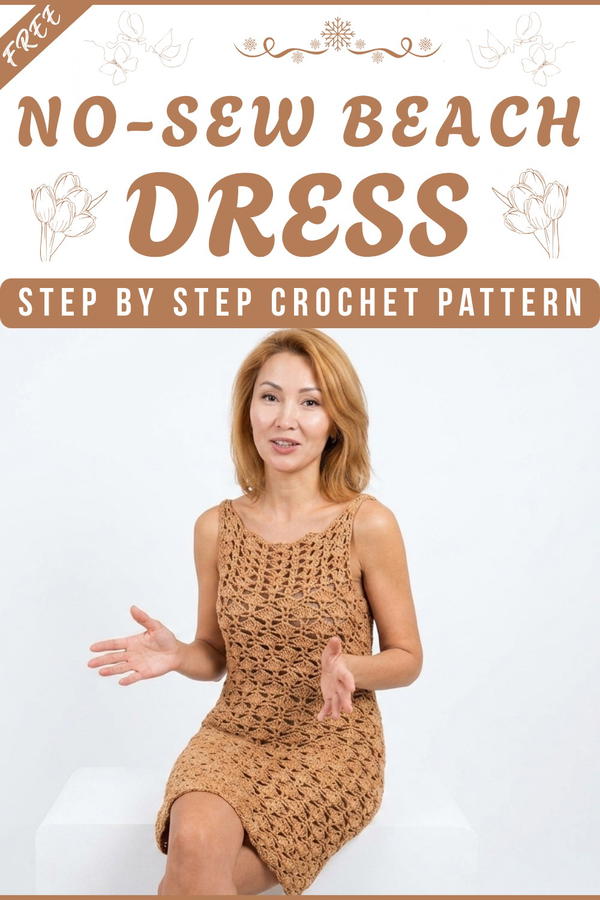
Unfold your creativity with this Free Crochet Beach Dress Pattern, a delightful design perfect for staying cool and chic during sunny days out.
Sunshine on your skin and a cool breeze by the shore, it’s moments like these that make a stylish outfit essential. The Free Crochet Beach Dress Pattern allows you to create a stunning and lightweight dress perfect for summer adventures. With delicate crochet details, this dress offers a blend of simplicity and elegance, making you feel beautiful and comfortable all day. Its airy design is ideal for keeping cool in warm weather while adding a touch of sophistication to your beachwear.
Crochet Beach Dress Made Simple – Get the Free Pattern
Whether you’re relaxing by the sea or strolling through a vacation spot, this handmade dress adds charm to your look while being practical and easy to pack. The flowy appearance enhances its beauty, ensuring you look effortlessly chic while enjoying the outdoors. If you’re searching for an affordable and fulfilling project, this crochet pattern is your ultimate summer wardrobe solution. Designed with love, it’s perfect for gifting or treating yourself to something special.

Crochet Fresh and Light Dress in the Round
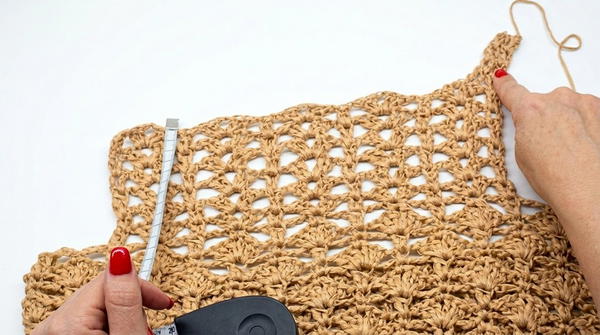
Finished Size
The example dress is designed for a small size (90 cm circumference). However, customization instructions are provided to adapt the pattern to larger sizes and desired lengths.
Materials
- Ribbon Yarn
- Recommended yarn: Trusty King Ribbon Yarn in cream variant
- Yarn consumption: Approximately 2–3 balls for a small size dress.
- Explore different shades for customization.
- Crochet Hook
- Size: 5.5 mm.
- If tension feels tight or heavy, increase hook size to 6 mm.
- Stitch Markers
- For marking armholes.
- Blunt Tapestry Needle
- For sewing shoulder straps.
- Scissors
Gauge
For this project:
- 10 cm x 10 cm (worked in staggered fan motifs) = Approximately 20 stitches and 12 rows. Adjust hook size if required.
Pattern Details
Step 1: Foundation Chain
Determine Circumference:
- Measure your widest circumference (hips or bust). Use this as the basis for your chain length.
- The chain length must be both sufficient to surround your body and a multiple of 8 for the fan motif.
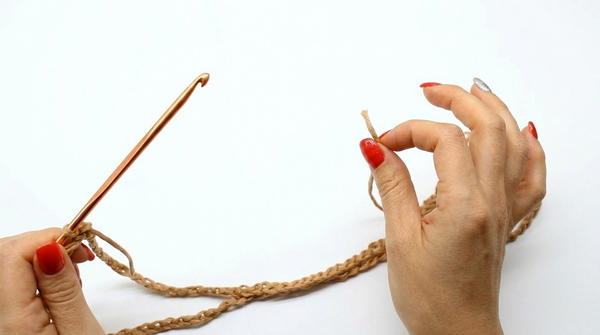
Create Foundation:
- Chain the desired length; for example:
- Small size (90 cm circumference): Chain 120 stitches.
- Adjust larger sizes by increasing multiples of 8 (e.g., 128, 136, etc.).
- Join the beginning and end of the chain using a slip stitch to form a ring.
- Chain the desired length; for example:
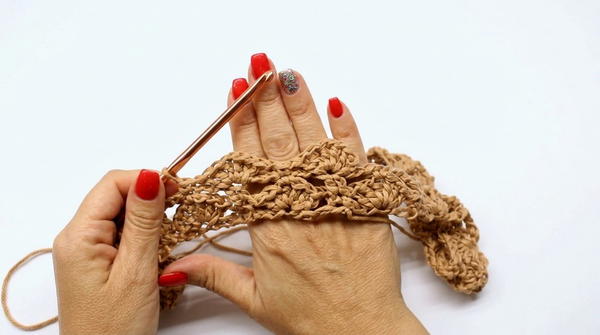
Step 2: Fan Motif Base Row
Begin Round 1:
- Start with 1 chain (does not count as a stitch).
- Work 1 single crochet in the same stitch.
Create Fan Motif:
- Chain 1.
- Skip the next 3 base chains, and in the 4th chain, work:
- 3 double crochets, 1 chain (separation chain), 3 double crochets (all into the same stitch).
Add Single Crochet:
- After the fan, chain 1, skip the next 3 chains, and in the 4th chain, work 1 single crochet.
Repeat:
- Continue alternating fans (worked in 4th stitch) and single crochet (in 4th stitch after skipping 3).
- At the end of the round, ensure that remaining stitches align for closure.
- Join with a slip stitch to complete the first row.
Step 3: Transition Row
Setup for Fan Alternation:
- Chain 2 (does not count as a stitch), and in the same stitch:
- Work 1 double crochet and 3 chains.
- Insert into the central chain of the fan motif (to anchor the structure).
- Chain 2 (does not count as a stitch), and in the same stitch:
Double Crochets Closed Together:
- Chain 3, and on the next single crochet, work 2 double crochets closed together:
- Yarn over, insert into the stitch, pull through halfway (2 loops remain).
- Yarn over again, insert into the same stitch, pull through halfway.
- Close all loops together.
- Chain 3, and on the next single crochet, work 2 double crochets closed together:
Repeat:
- Continue alternating closed double crochets and chains/single crochet anchors.
- Join at the end of the row, positioning yourself in the fan motif's central chain.
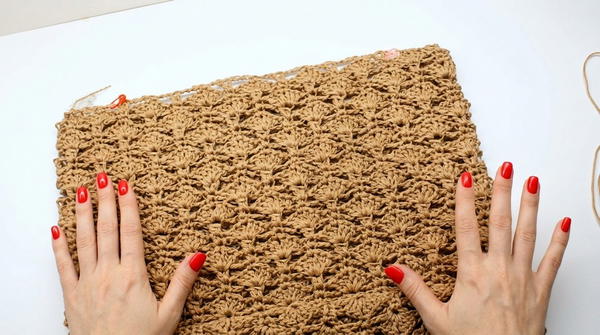
Step 4: Staggered Fans
Place Fans Onto Closed Double Crochets:
- Transition rows shape fan placement to stagger them and create dynamic texture.
- On each row of closed double crochets, restart fans:
- 3 double crochets, chain 1, 3 double crochets.
Repeat Patterns for Height:
- Alternate fan rows with double crochet/chain rows.
- Work in rounds until the desired panel height is reached.
Step 5: Armhole Creation
Leave the Round:
- Stop circular work to begin linear stitching for the upper body and shoulders.
- Use stitch markers to mark armholes (approx. 7 cm on each side).
Linear Pattern:
- Continue staggered fans, but lighten fans:
- Work 2 double crochets, chain 2, 2 double crochets (instead of 3 stitches each).
- Work linear rows for a panel measuring approximately 30 cm (for straps and neckline adjustments).
- Continue staggered fans, but lighten fans:
Step 6: Shoulder Straps
Create Straps:
- Work 4 rows of 2 double crochets closed together across the strap width (at neckline edges).
Repeat for Both Sides:
- Ensure symmetry between front and back panels.
Finishing
Sew Shoulder Straps:
- Using a tapestry needle, sew front and back straps together securely.
Final Touches:
- Weave in all loose ends to tidy the project.
- Steam lightly or block for even texture.
Tips for Maintaining the Pattern
- Consistency: Ensure uniform stitch tension throughout the project to preserve the staggered fan effect.
- Customization: Adjust panel length by referencing a garment you own for preferred measurements.
- Strengthen Straps: Double stitch seams at shoulders for durability.
Final Words
This seamless dress is both beginner-friendly and visually stunning, showcasing staggered fan motifs that create texture and movement. Ideal for beachwear or casual layering, the dress is lightweight and elegant.


