Stay warm in style with Free Crochet Fingerless Gloves that offer comfort, flexibility, and charm in every stitch for everyday elegance and ease.
On chilly mornings when the world feels hushed and still, a crochet fingerless glove offers a graceful balance between warmth and freedom. This handmade accessory has long been a favorite for those who value both comfort and utility. A free crochet fingerless glove is not only a stylish addition to any wardrobe but also serves practical needs, keeping the hand warm while allowing the fingers the agility to write, type, text, or sip a hot cup of tea.
How to Make Free Crochet Fingerless Gloves
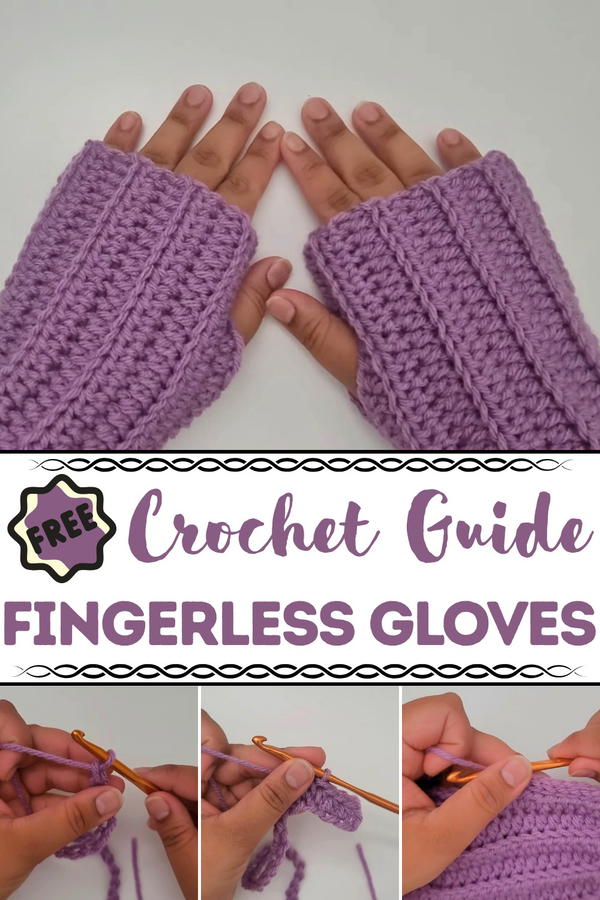
With delicate stitches and a textured finish, it carries a unique charm that speaks to timeless elegance and personal expression. Its breathable nature makes it suitable for transitional seasons, offering a cozy layer without the bulk. Whether worn indoors for a subtle touch of warmth or outdoors as a statement piece, it fits effortlessly into both casual and polished ensembles.
Lightweight yet insulating, the glove makes a thoughtful gift and a treasured keepsake. Soft yarn choices and intricate stitchwork combine to highlight the natural beauty of handmade textile art. It speaks of slow moments and thoughtful touches, wrapping the hand in comfort while preserving connection with the world around it. A perfect harmony of function and fashion, this glove is a quiet celebration of mindful detail.
Materials Needed
Category 4 Yarn
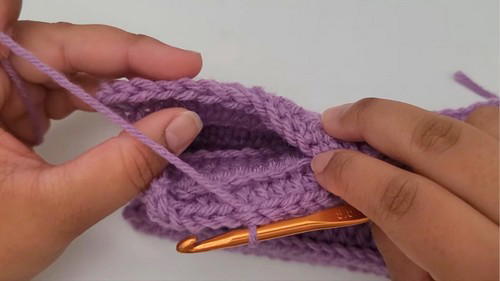
- The tutorial uses purple yarn, but you can choose any color or texture you prefer for customization.
5.5mm Crochet Hook
- Adjust the size according to your preferred tension or yarn thickness.
Darning Needle
- Essential for sewing and weaving loose ends.
Scissors
Special Features
Ribbed Pattern
- Created using back loop half double crochet stitches, adding a stretchy texture to the gloves.
Customizable Size
- The chain length determines the glove’s length, and the number of rows determines the width.
Thumb Hole
- Tailored stitching creates the thumb opening, ensuring comfort and flexibility.
Step-by-Step Instructions
1. Start with a Chain
- Make a slip knot and chain to the desired length of the glove. For the tutorial, the chain length is 30 stitches.
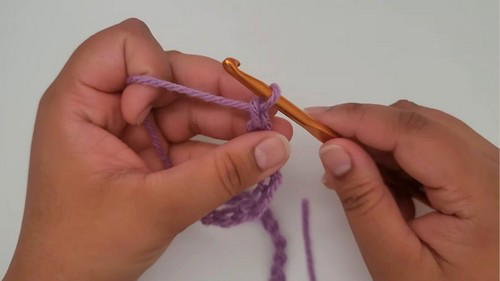
- Add two extra chains at the end (total 32 chains).
2. Row 1: Half Double Crochet
- Skip the first two chains and work a half double crochet into the third chain.

- Continue half double crochets into each chain, working into the back bumps to ensure easier stitching later.
- Finish with a chain of two and turn your work.
3. Row 2: Back Loop Half Double Crochet
- Skip the first two chains and work into the back loop of the first half double crochet stitch.
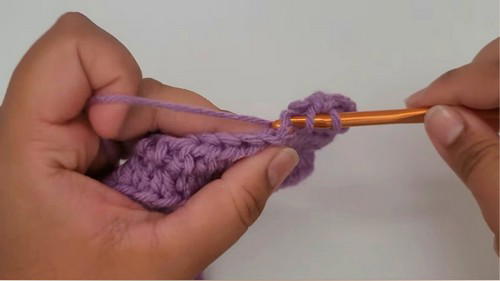
- Back loop half double crochets create the ribbed texture needed for flexibility.
- Chain two and turn your work.
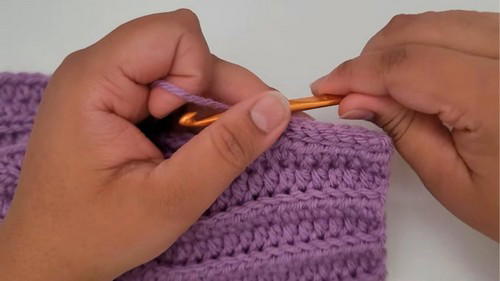
4. Continue Repeating Rows
- Repeat the back loop half double crochet technique for each row until you reach the desired width of the glove.
- The width should wrap comfortably around your hand. The video’s example has 17 rows.
5. Joining the Edges
- After finishing the last row, chain one and fold the work in half lengthwise.
- Use slip stitches to join both edges together, ensuring the stitches align evenly.
6. Creating the Thumb Hole
- Stop slip stitching at the desired point for the thumb opening.
- Slip stitch only one side of the work for a few stitches, leaving an open gap for the thumb.
- Resume stitching both sides together after the thumb hole gap.
7. Secure and Finish
- Chain one at the end and cut the yarn, leaving a small tail.
- Use the darning needle to weave loose ends securely into the work.
- Flip your glove inside out to reveal the finished piece.
Tutor’s Suggestions
- Be Flexible with Yarn and Hook: Use materials that suit your style and desired glove thickness.
- Test Fit Often: Continuously check the width by wrapping the work around your hand to ensure the fit is comfortable.
- Count Evenly: Ensure both sides align evenly when slip stitching for proper symmetry.
- Work in Back Loops: This technique is essential for creating the stretchy ribbed texture.
Uses
- Stylish Accessory: These sleeveless gloves can enhance your outfit during colder months.
- Gift Option: Handmade gloves make for thoughtful and customizable gifts.
- Beginner Practice: Ideal for crocheters practicing basic stitches and creating wearable items.
Level of Difficulty
This tutorial is beginner-friendly, with clear instructions and basic crochet techniques such as slip knots, chaining, half double crochet, and slip stitching. Intermediate crocheters can challenge themselves by experimenting with more complex patterns.
Tip
Stretch Test Before Finalizing: Before finishing the glove, stretch it to ensure the ribbed pattern has the desired fit. Adjust the number of rows accordingly.
Conclusion
This Crochet Fingerless Gloves pattern is perfect for creating a practical yet stylish accessory while mastering foundational skills. The ribbed sleeveless gloves are customizable, ensuring they fit your hand comfortably and reflect your unique style. With materials readily available and straightforward techniques, crocheting these gloves is both a relaxing and rewarding experience.


