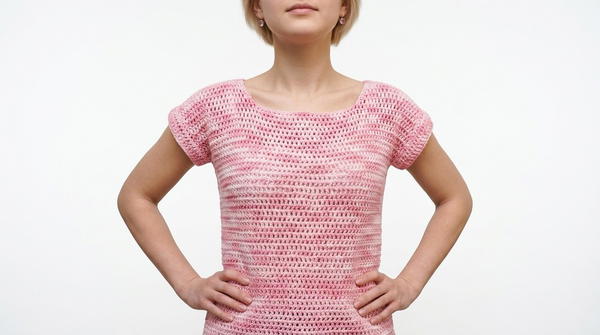
Stitch a lightweight crochet T-shirt with this free guide where comfort meets effortless style perfect for casual days or layering to suit your mood.
A soft and airy crochet T-shirt offers a simple way to enjoy comfort and style in a single piece. Using a free crochet T-shirt pattern, you can stitch something that feels light on the skin and suits any casual day. Its beauty lies in its intricate texture created with yarn—something so unique it catches everyone’s eye. Perfect for warm weather, this T-shirt looks chic and feels breathable, making it ideal for sunny outings or cozy evenings at home.
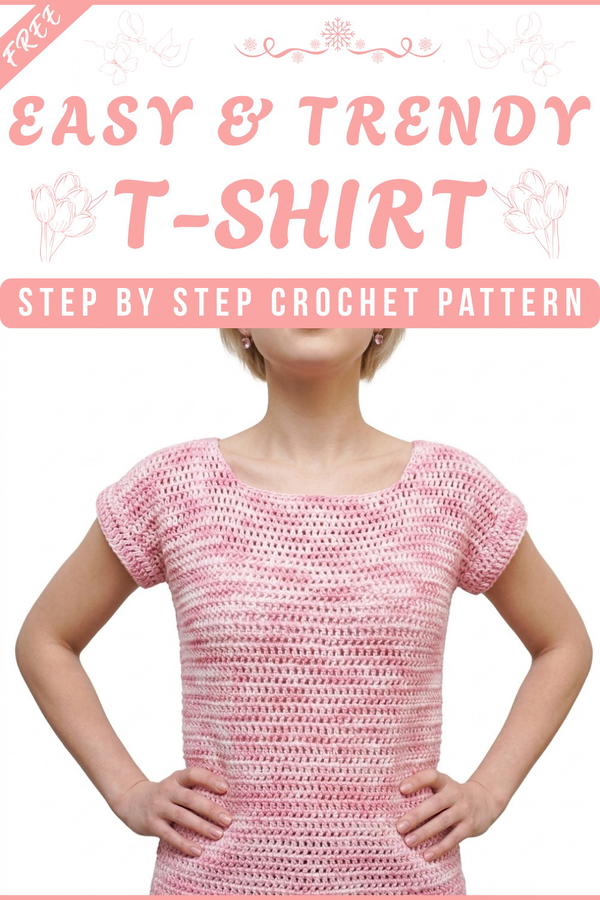
Crochet T-Shirt Pattern Perfect for Hot Weather

The pattern allows room for personalization, whether you prefer subtle shades or bold, vibrant colors, making the final look truly stand out. It’s a wearable piece of art that is easy to pair with jeans, skirts, or even shorts. Perfect for both beginners and seasoned crochet lovers, this project combines ease with striking results, offering something that’s as enjoyable to wear as it is to stitch. A crochet T-shirt is more than just clothing—it’s a timeless treasure.
Crochet Colorful Summer T-Shirt
Finished Size
This pattern creates a t-shirt that measures approximately:
- Bottom Width: 55 cm
- Height: 43 cm (front and back panels)
- Sleeve Length: 33 cm
Customizable sizing options are included for adapting the t-shirt to various sizes (S–XL).
Materials
- Shaded Cotton Flock Yarn
- Suggested Variant: Aqua Green
- Weight: 50 g balls (7 g required per t-shirt)
- Tremezzo Crochet Hook
- Recommended Size: 3.5 mm (as per label) or use 4.0 mm for smoother, softer stitches.
- Scissors
- Blunt Tapestry Needle
- 2 Ribbon Pieces (optional)
- Purpose: For bows and balloon-style adjustments. Choose ribbon based on your desired aesthetic.
- Stitch Markers
Gauge
- Gauge Swatch:
Create 10 cm x 10 cm of double crochets worked in the rib pattern. The panel should measure evenly without puckering.
Pattern Breakdown
Step 1: Create the Back Panel (Trapezoidal Shape)
Foundation Row:
- Chain 95 chains (equal to 55 cm).
- Mark the last chain (95th) with your thumb.
- Add 2 chains for turning (these do not replace the first double crochet).
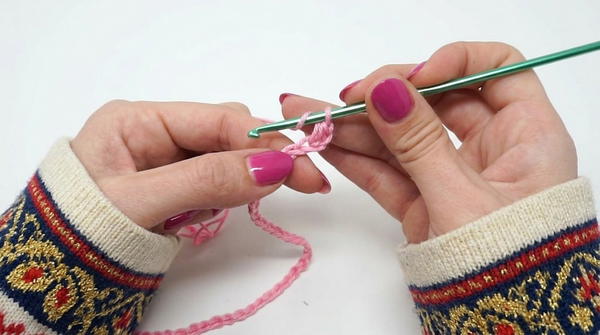
Row 1:
- Starting Double Crochet:
- Yarn over.
- Insert hook into the third chain from the thumb-marked chain.
- Pull yarn through and complete the double crochet.
- Continue: Work 1 double crochet into each chain across for a total of 95 double crochets.
- Starting Double Crochet:
Row 2–4:
- Work double crochets in rib pattern (back loop only).
- At the beginning and end of the rows, join 2 double crochets together to strengthen edges:
- Insert hook into the back loop, yarn over, pull through, and partially offset work 2 double crochets together.
- Complete 95 stitches per row.
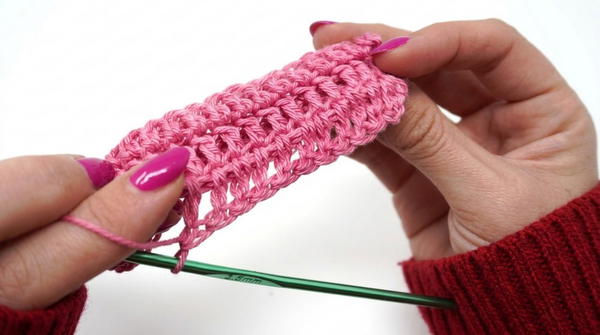
Fold Strip Into Tubular:
- Fold the four rows into half lengthwise to form a tubular edge.
- Work joining stitches using single crochets along the top edge.
Establish Main Section:
- Continue with regular double crochets:
- Insert hook between stitches (not directly into loops).
- Work 9 rows of evenly spaced double crochets between gaps.
- Tip: Begin and end rows with paired double crochets for consistent edges.
- Continue with regular double crochets:
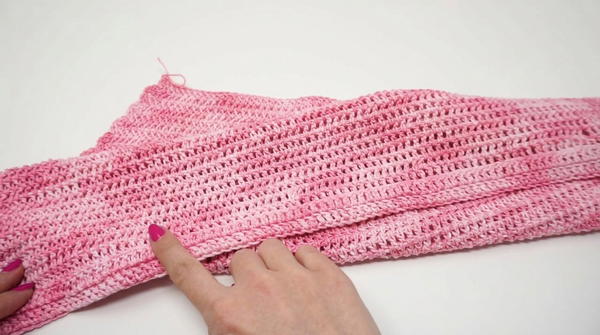
Shape the Trapezoid:
- Rows 10–36: Reduce stitches gradually:
- Skip the first double crochet space at the start of each row.
- Skip the last double crochet space.
- This will create a narrow trapezoid for the back panel.
- At Row 36: Cut and fasten off yarn.
- Rows 10–36: Reduce stitches gradually:
Step 2: Create the Front Panel (Neckline Variation)
- Repeat Steps 1–5 for the front panel until Row 29.
- Split for Neckline:
- Mark the central stitches (33 on each side) and divide work accordingly:
- Left Side: Work regular rows with a gradual decrease until 7 rows remain at the top.
- Right Side: Mirror the left side of the neckline (same stitch count and decrease pattern).
- The front panel now has a trapezoidal neckline.

- Mark the central stitches (33 on each side) and divide work accordingly:
Step 3: Crochet the Sleeves
- Foundation Row:
- Chain 52 chains (length based on your arm circumference).
- Rows 1–4:
- Work double crochets into each chain for four rows.
- Use rib stitch (back loop only).
- Fold & Tubular Join:
- Fold the strip lengthwise to create a tubular cuff.
- Use single crochets to join the edges.
- Repeat for Second Sleeve.
Step 4: Sewing the Panels
Attach the Back and Front Panels:
- Align the pieces on the wrong side (reverse panels).
- Sew along the edges, starting from the shoulders (13 stitches each).
- Reinforce using double stitches at intersections.
Sew the Sleeves:
- Placement: Align sleeve edges with body panels (based on approximate measurements of 14–15 rows).
- Attach using single crochets or tapestry needle.
Finish Side Seam:
- Optionally leave tubular edges open for ribbon or adjustable design.
- Sew securely into place otherwise.
Step 5: Add Ribbon (Optional Design)
- Insert ribbons into tubular hems.
- Style 1: Tie bows at the bottom for a classic decorative appearance.
- Style 2: Gather ribbons to create balloon sleeves or cinched waist detailing.
Tips for Customization
- Adjusting for Size:
- Increase or decrease the starting chain.
- Extend the trapezoid height for more oversized designs.
- Color Variations:
- Experiment with other shaded cotton flock yarns for contrasting effects.
- Neckline Depth:
- For deeper necklines, extend the split rows at the front panel.
Special Techniques
- Rib Stitch: Ensures clean, textured edges.
- Tubular Fold: Provides stability for hems without additional borders.
- Double Crochet Join: Creates seamless finishes on edges.
Conclusion
This colorful summer t-shirt combines simplicity, style, and versatility. Perfect for beginners and enjoyable for seasoned crocheters, the seamless tubular edges and neckline variation will make this project a delightful addition to your wardrobe.
Final Look
Once sewn and turned right side out:
- The t-shirt exhibits a soft and textured feel.
- Optional ribbon accents enhance the aesthetic appeal and functionality.
Important Remarks
- Ensure Accurate Gauge: Follow the recommended tension for uniform stitches.
- Placement of Sleeves: Reference measurements for symmetry.
- Custom Fit Practices: Test panels against your body before sewing.


