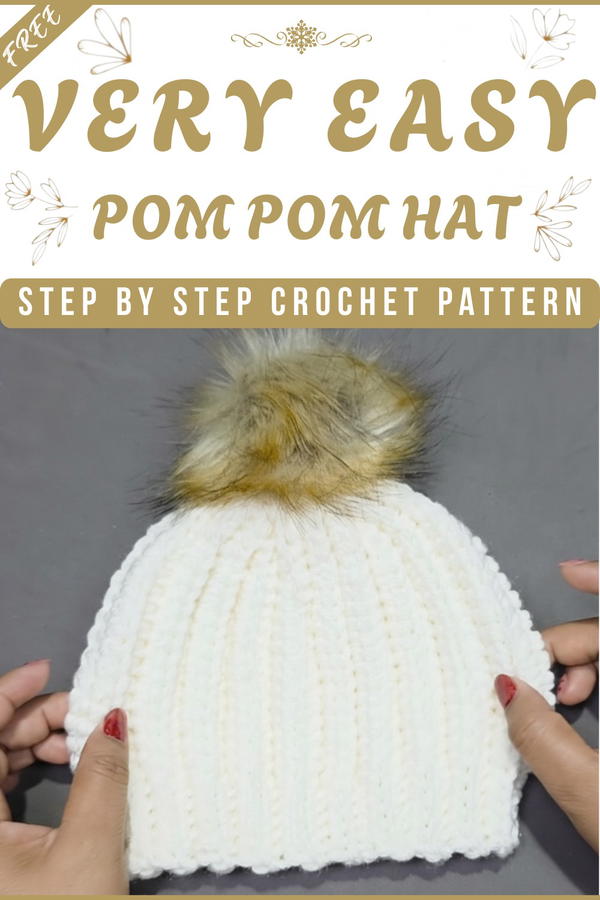
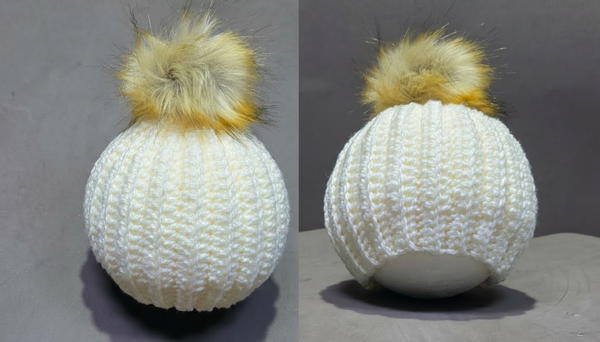
A fun and bright hat brings color and joy to everyday life. The crochet pom pom hat pattern shows you how to make a soft, warm hat that is perfect for any season. This hat is famous for its playful pom pom on top, making anyone wearing it look cheerful and stylish. You can pick any color of yarn and even mix different shades for a unique and personal touch.
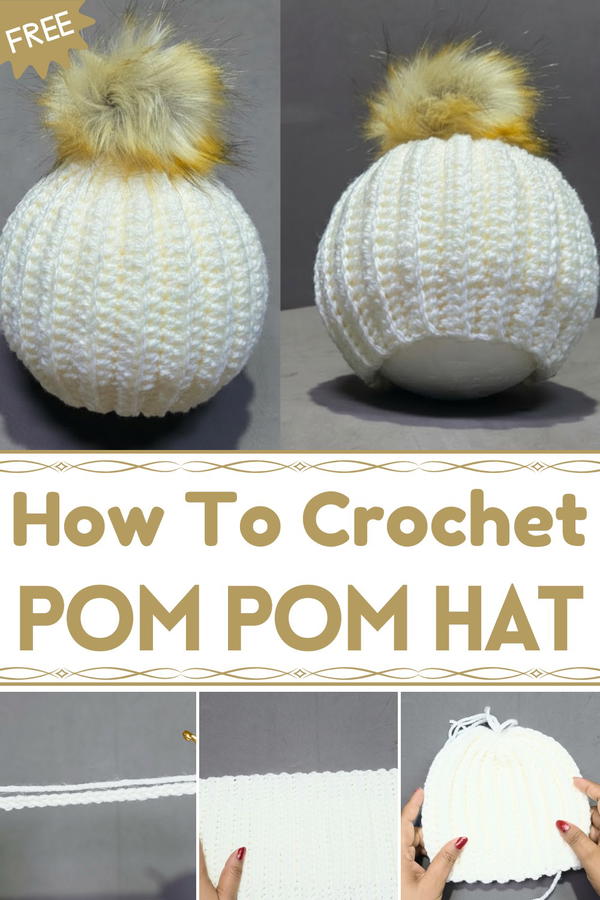
Sweet Crochet Pom Pom Hat Pattern to Add Cozy Cute Vibes
This hat is easy to use and keeps your head cozy in cold weather or adds flair to your outfit. The special feature is the big, fluffy pom pom, which makes the hat extra cute and fun. Great for children or adults, this hat can be a gift for a friend, family member, or nice just for yourself. No matter your age, you can enjoy making and wearing one, showing off your own creativity and style.
Crochet Pom-Pom Hat Pattern
Skill Level
Intermediate to Advanced
Materials
- Yarn: Worsted/Aran weight yarn, approximately 5 mm thickness (Yarn Example: Medium/Category 4 acrylic or wool)
- Hook: 5 mm (US H-8) crochet hook
- Optional: Pom-pom for finishing, tapestry needle, scissors
Key Abbreviations (US Terminology)
- ch = chain
- sc = single crochet
- hdc = half double crochet
- sl st = slip stitch
- st(s) = stitch(es)
- rep = repeat
Special Notes
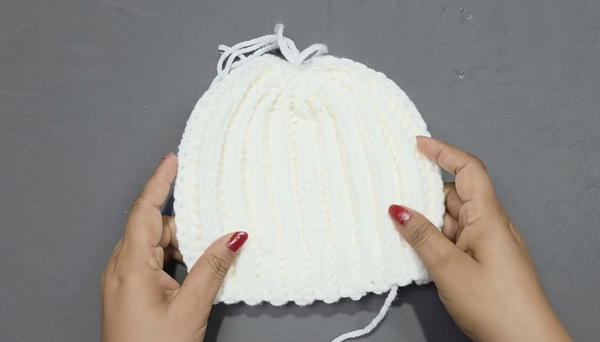
- Gauge: Each rib panel is based on 25 chains and should measure roughly 17 cm (height). Finished hat's circumference is about 40 cm (unstretched; stretches to fit 1-year-old baby).
- Ribbing Effect: The entire pattern is worked in rows, picking up the back loop only (blo) to create attractive ribbing.
- Last Stitch: At the end of each row, for the last sc, pick up both loops (not just blo) to ensure firm edge.
- Sizing Up/Down: For other sizes, adjust starting chain length for height and number of rows for circumference.
Pattern Instructions
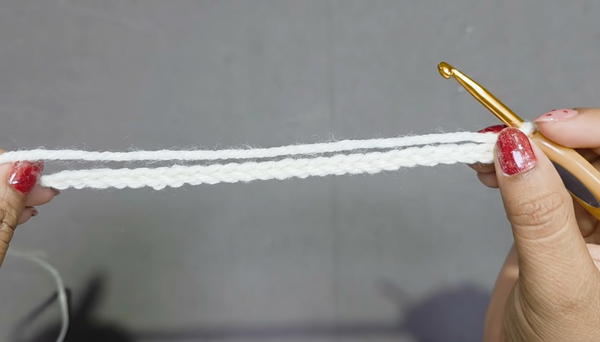
1. Foundation Row
- Begin with a slip knot.
- Ch 25 (for baby size, adjust as necessary for desired height).
2. Row 1
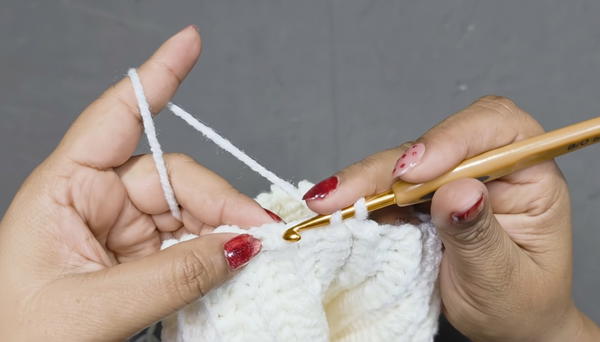
- Skip the first ch. Insert hook in second ch from hook, work 1 sc.
- Work 1 sc in each of next 4 chs.
(You now have 5 sc total – these form the band.) - Next, work 1 hdc in each ch across, except for the last 5 chs.
- In last 5 chs, work 1 sc in each ch.
- Turn.
3. Row 2
- Ch 1 (does not count as a stitch).
- In first st, work 1 sc blo.
- Work sc blo in next 4 sts. (5 total)
- Work hdc blo in each st until last 5 sts remain.
- Work sc blo in each of the last 4 sts.
- In last st, work sc picking up both loops.
- Turn.
4. Repeat Rows
- Repeat Row 2 until piece measures 40 cm (head circumference for 1-year-old baby; adjust for other sizes).
- Important: Always work in the back loop except for the very last sc on each row, which should go through both loops.

5. Seaming
- Fasten off, leaving a long tail for sewing.
- Fold the piece so starting row meets the ending edge (right sides together).
- Attach yarn; using slip stitch blo-to-blo across to seam the edges.
- Fasten off.
6. Finishing Top
- With a yarn needle and additional yarn, weave through every row end at top edge.
- Draw string tight to close the crown of the hat.
- Tie securely, weave in ends.
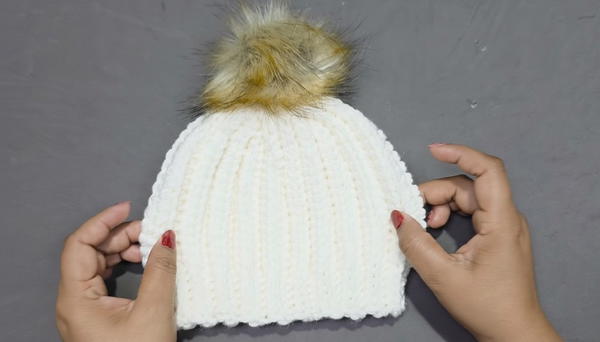
7. Optional Pom-Pom
- Attach purchased or handmade pom-pom to the crown using yarn tails for a decorative finish.
8. Final Touches
- Turn hat right side out.
- Secure and trim all loose ends.
- Shape ribbing evenly.
Sizing Information
| Age | Height (starting chain) | Circumference (finished rows) |
|---|---|---|
| 1 year | 25 ch ≈ 17 cm | 40 cm (stretchy fit) |
| Toddler | Increase by 3-5 ch | Increase total rows by 5-8 cm |
| Child/Adult | Increase as needed | Increase to preferred size |
Conclusion
This ribbed hat offers a classic look and fantastic stretch using alternating single and half double crochet stitches worked in the back loops. Its simple construction is well suited for intermediate to advanced crocheters looking for a quick, versatile project. You may add a pom-pom for a fun touch or leave the hat plain for a timeless appearance.
Pattern Corrections & Tips
- Correction: For best results, always work the last single crochet of each row through both loops, not just back loop, to create a strong and neat seam.
- Tip: Maintain even tension when working in the back loop to ensure defined ribbing and a professional finish.
- Tip: Use a measuring tape to check length as you crochet, especially if you adjust sizing.
- Tip: For seaming, slip stitch through corresponding back loops only for a nearly invisible join.
- Tip: When gathering the crown, ensure stitches are pulled tightly and tied off securely for a neat, closed top.