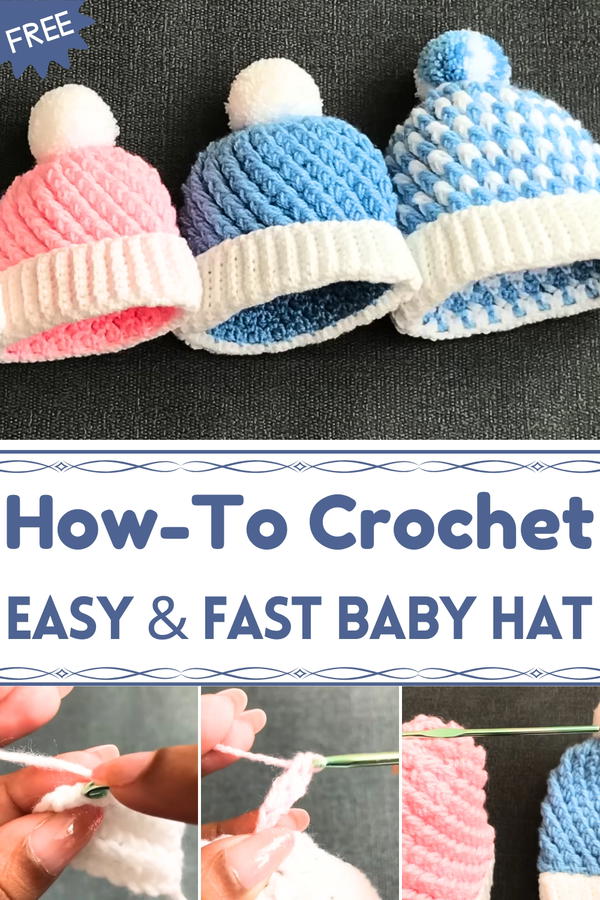
Crown little heads with this Crochet Baby Hat pattern, a sweet design that blends softness and charm for cozy wear or thoughtful gifting.
The sight of a newborn resting peacefully, wrapped in softness and innocence, has always been a moment that melts hearts. A Crochet Baby Hat pattern captures that tenderness with every stitch, turning a simple accessory into something both practical and meaningful. Its gentle texture ensures comfort for delicate skin, while its snug fit keeps little ones warm in cooler weather. Thoughtful details add character, allowing the hat to carry both charm and function in equal measure.
Creative Crochet Baby Hat for Little Ones
More than just an item of clothing, it becomes a keepsake—something cherished by parents and admired by all who see it. Whether worn daily, used for special photos, or gifted at baby showers, this hat holds a timeless appeal. Its adaptability allows for different sizes, shades, and styles, making it suitable for any occasion or season. The soft fibers provide not only warmth but also a lightweight feel, ensuring ease for tiny heads without causing discomfort.
The Crochet Baby Hat pattern reflects love stitched into form, offering protection, beauty, and sentiment all in one piece. It serves as both a practical necessity and a tender symbol of care, making it a treasured addition to every little one’s early wardrobe.
Materials Needed
Yarn:
- Main color yarn (double knit knitting yarn):
- Approximately 30–50g depending on size.
- Second color yarn: Around 10g for accent details (optional).
- Suggested: 100g, 330-meter skeins.
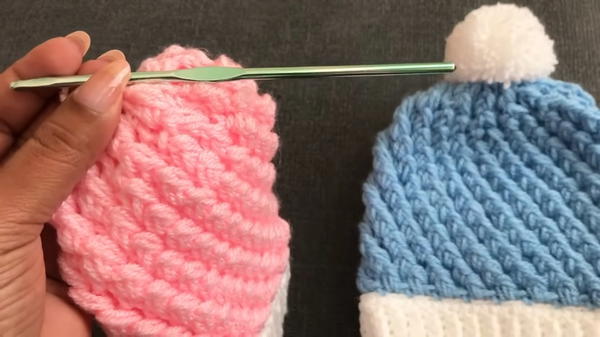
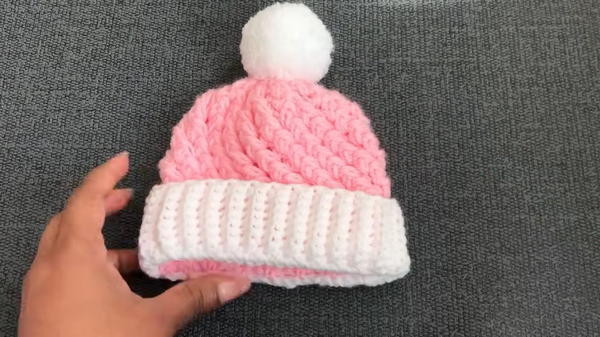
(Example colors used: pink and white for 0–3 months, blue and white for 3–6 months).
- Main color yarn (double knit knitting yarn):
Crochet Hook:
- 4mm hook (recommended for the selected yarn).
Scissors: For cutting yarn ends.
Yarn Needle: To sew and secure seams and finish the hat.
Pom-Pom Maker (Optional): To add a pom-pom at the top of the hat.

Special Features
Four Size Options:
- The pattern includes instructions for creating hats in sizes for:
- Tiny/Early-born Newborns: 30–40 weeks.
- 0–3 months old.
- 3–6 months old.
- 6–12 months old.
- The pattern includes instructions for creating hats in sizes for:
Fast and Easy to Make:
- Depending on your speed, the hat can be completed in 20–30 minutes.
Comfortable and Baby-Friendly:
- The design ensures softness and comfort, making it suitable for sensitive baby skin.
Beginner-Friendly Pattern:
- Simple stitches, repetitive patterns, and slow-paced explanations ensure that even crochet novices can follow along.
Customizable:
- You can create hats in one or two colors and even add decorative pom-poms to personalize the final piece.
Level of Difficulty
Beginner-Friendly
The pattern is straightforward and designed for crocheters of all skill levels. It uses basic crochet stitches, including slip knots, single crochets, and puff stitches, while introducing techniques like back-loop-only stitching and decreasing stitches for shaping the hat.
Tutor’s Suggestions
Leave Enough Yarn Tail:
- At the start of the ribbon, leave 15 cm yarn tail to make it easier to join the first and last rows later.
Consistent Stitches:
- Ensure that each row has the correct number of single crochets to maintain proper shaping of the hat.
Measure by Size:
- Keep track of the rows for each size:
- Tiny/Newborn: 48 rows.
- 0–3 months: 54 rows.
- 3–6 months: 60 rows.
- 6–12 months: 66 rows.
- Keep track of the rows for each size:
Optional Pom-Pom:
- Add a pom-pom using the secondary yarn color for a playful and stylish finish.
Use Stitch Markers:
- To mark the start or end of rows, making it easier to track progress when working in the round.
Step-by-Step Instructions
Step 1: Create the Ribbing
Start with a Slip Knot:
- Make a slip knot, then chain 9 to create the starting foundation for the ribbing.
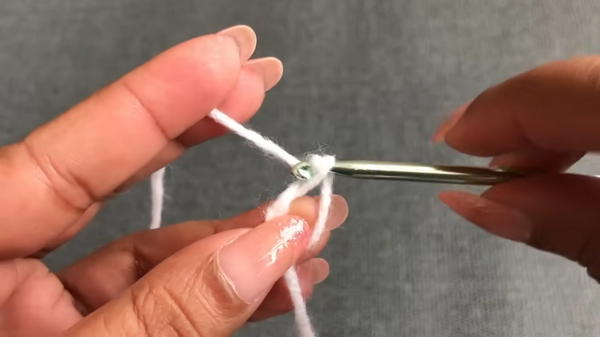
- Make a slip knot, then chain 9 to create the starting foundation for the ribbing.
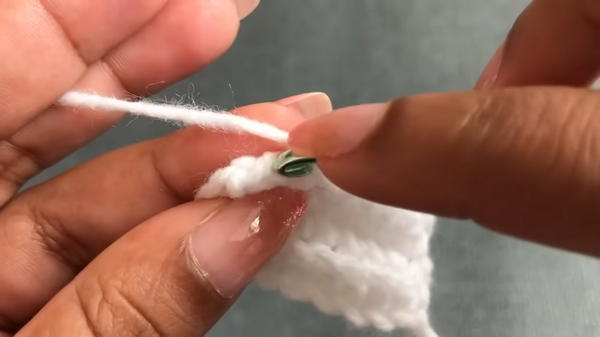
Single Crochet Each Row:
- Begin the first row by skipping the first chain and single crochet into the second chain.
- Use back-loop-only single crochets for every row after this.
- Continue this pattern for the following rows:
- Newborn: 48 rows.
- 0–3 months: 54 rows.
- 3–6 months: 60 rows.
- 6–12 months: 66 rows.
Connect the Edges:
- Use the leftover tail from the starting yarn to join the first and last rows of the ribbing. Use a yarn needle and secure each stitch tightly.
2: Build the Hat’s Base
Crochet Around the Ribbing:
- Start by making single crochets along the edge of the ribbing. Ensure one single crochet per row of ribbing.
Work the Foundation Rows:
- Create a steady, circular row of single crochets to establish the shape of the hat.
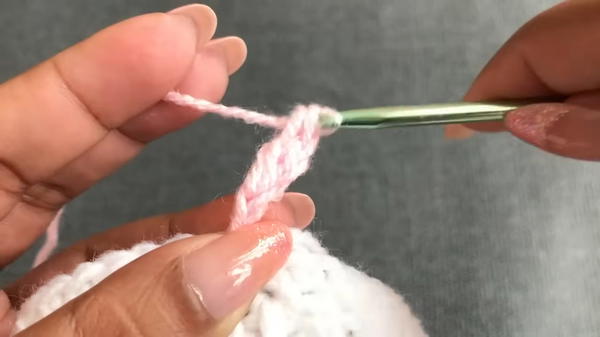
3: Add the Main Pattern
Begin with the Secondary Color (Optional for Two-Tone Hat):
- Chain two. Then:
- Skip two single crochets.
- In the third stitch, work single crochet, chain two, and double crochet.
- Chain two. Then:
Create the Puff Stitch Pattern:
- Switch to the main color and work puff stitches into the double crochet of each pattern segment from the previous round. Combine single crochets in between each puff-stitch block.
Repeat the Puff Stitch Rounds:
- Continue for the designated number of rounds, depending on the size:
- Newborn: 11 rounds.
- 0–3 months: 12 rounds.
- 3–6 months: 13 rounds.
- 6–12 months: 14 rounds.
- Continue for the designated number of rounds, depending on the size:
4: Decrease for Shaping
Combine Rows for Tapering:
- Work the puff stitches by merging two sets of stitches together at a time.
Final Rows:
- Reduce the puff stitch count further in the last two rows.
- Finish with one round of single crochets to close the top.
Close the Top:
- Use a yarn needle to weave through the remaining stitches and cinch the top closed securely.
5: Add the Final Touches
Attach a Pom-Pom (Optional):
- Create a pom-pom using your secondary yarn color and attach it to the top of the hat.
Weave in Loose Ends:
- Use a yarn needle to hide and secure all loose ends inside the hat.
- Use a yarn needle to hide and secure all loose ends inside the hat.
Uses and Benefits
Baby Gift:
- A perfect handmade gift for newborns, baby showers, or birthdays.
Custom Accessory:
- Lightweight and soft, making it an ideal winter or fall accessory for babies.
Skill Practice:
- An excellent project for learning puff stitches, working in the round, and back-loop-only techniques.
Tip
To achieve smooth and even puff stitches, ensure consistent tension across all rows. This enhances the 3D texture of the pattern while maintaining the hat’s softness.
Conclusion
The Crochet Baby Hat pattern is a fantastic project for anyone wanting to create a heartfelt, handmade baby hat. Easy enough for beginners but customizable for experienced crocheters, it offers a versatile and unique way to try out different sizes, colors, and patterns. Whether as a treasured gift or for a personal crochet project, this pattern provides everything you need to make an adorable and functional baby hat.


