Turn yarn into a fashionable statement with this free crochet handbag pattern featuring two short handles and a flap for a versatile accessory you’ll love to carry.
Adding a handmade touch to your wardrobe can bring both style and practicality in one charming package. If you appreciate thoughtful craft projects, the creation featured on the Promlatex. Шнур для вязания.. channel offers a wonderful example. This beautiful piece is a crochet handbag that perfectly balances form and function, featuring two short handles and a classic flap to complete its design.
Easy and Stylish Free Crochet Handbag with Two Short Handles and a Flap Pattern
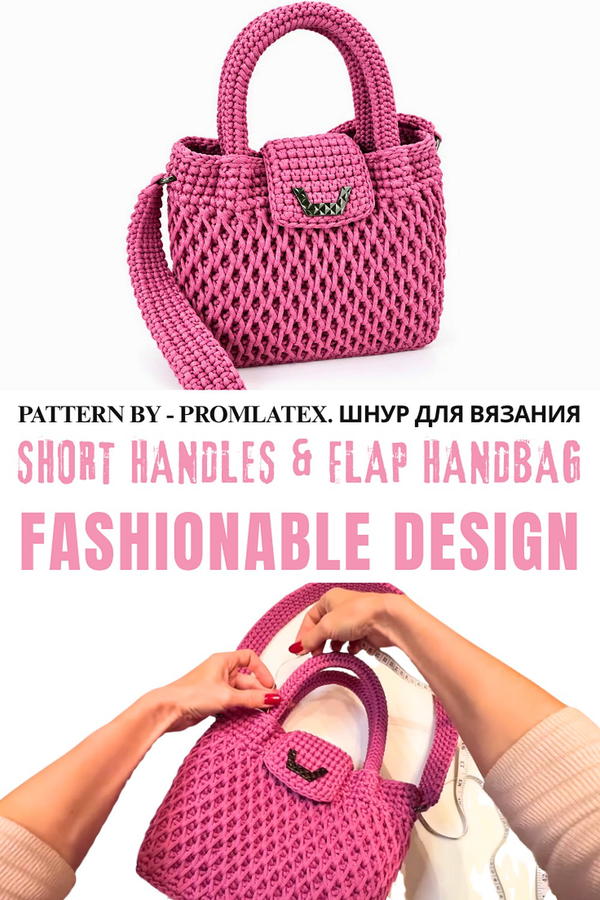
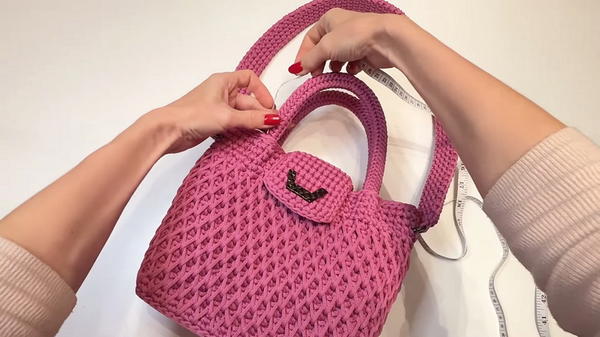
This handbag showcases a medium size that’s just right, not too big, not too small, making it an ideal everyday accessory. Its structured base and textured body create a sturdy yet elegant silhouette. The flap, finished with a magnetic snap, adds a touch of sophistication while providing secure closure. Whether in a vibrant cyclamen color or timeless black, the bag’s finish radiates charm and versatility, suitable for a casual outing or a polished look.
Beyond its aesthetic appeal, this crochet handbag holds great gifting potential. Handmade accessories like these bring a personalized feel appreciated by recipients for occasions such as birthdays, holidays, or special milestones. The combination of durable construction and thoughtful design makes it a practical accessory that complements any style while offering convenience.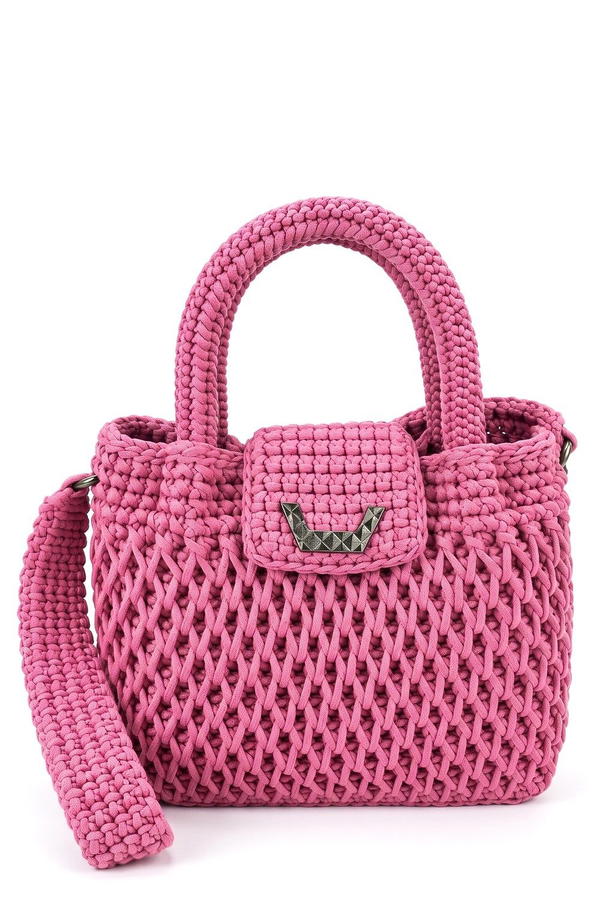
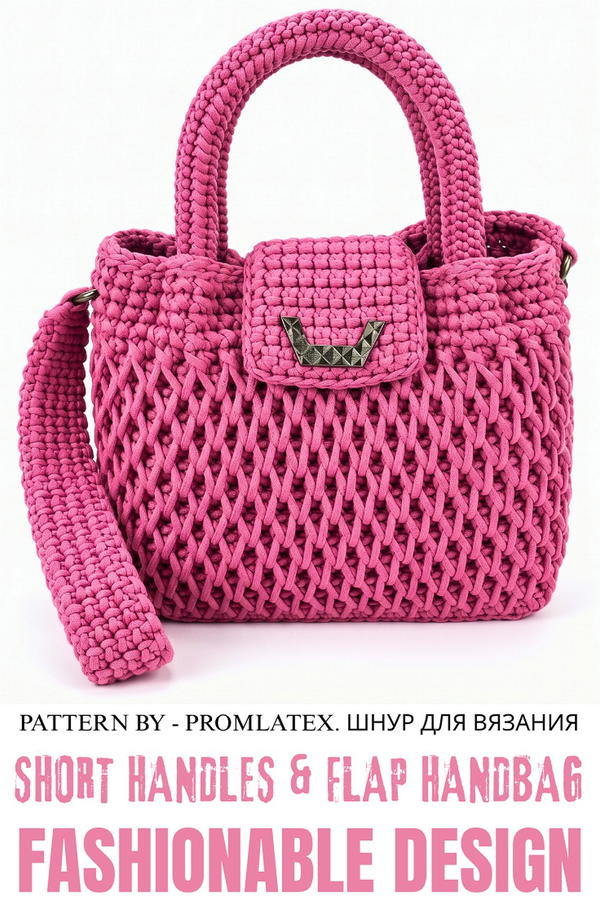
Crochet Bag Pattern with Handles, Flap, and Shoulder Strap
This crochet bag pattern features a dense and structured design, complete with short handles, a functional flap, and an additional long shoulder strap. Ideal for daily use, the bag measures approximately 22 x 22 x 11 cm. The thoughtful details of this design, such as the honeycomb-patterned walls, sturdy handles, and sleek lining, offer durability and visual appeal, making it both practical and elegant.
Skill Level
Intermediate – This pattern is suitable for crocheters confident in working with firm tension, handling stitch patterns like single crochet, twisted stitches, and honeycomb designs, creating and sewing parts, and incorporating hardware for functionality.
Materials
Supplies
- 4 mm Polyester Cord: Approximately 360–370 meters (approx. 2 skeins of 200 meters each).
- Crochet Hooks: Size 3.5 mm and 4 mm.
- Tools and Hardware:
- Scissors.
- Lighter (for sealing cord ends).
- 2 swivel clasps for the long strap.
- Sew-in magnetic closure for flap security.
- Plastic needle.
- Stitch markers for keeping track of rows and crucial points.
Stitch Abbreviations
- Chain (ch): Yarn over, pull through the loop on the hook.
- Single Crochet (SC): Insert hook into stitch, yarn over, pull through stitch, yarn over, pull through both loops on the hook.
- Slip Stitch (sl st): Insert hook into stitch, yarn over, pull through stitch and the loop on the hook.
- Twisted Stitch: A variation of the single crochet where the stitch forms an X-shape. Achieved by inserting the hook from back to front instead of the usual forward motion.
- Honeycomb Stitch: Alternation of standard SC and long stitches anchored two rows below, creating a textured effect.
Helpful Tips
- Cord Management: Seal cut cord ends with a lighter to prevent fraying and ensure a neat finish.
- Tension Consistency: Ensure even tension throughout the pattern to prevent uneven edges and distortion, especially important for structured parts like the flap or handles.
- Marker Usage: Use stitch markers to keep track of row counts, corner points, and transitions between sections.
- Lining Fit: For a clean look, measure the interior lining accurately, allowing room for expansion and movement inside the bag body.
- Hardware Attachment: Double-check the placement of hardware (like swivel clasps for the strap and the magnetic closure) for proper alignment and functionality.
Step-by-Step Pattern Instructions
1. Dense Base
The base forms the sturdy bottom of the bag and is worked tightly to ensure durability.
Foundation
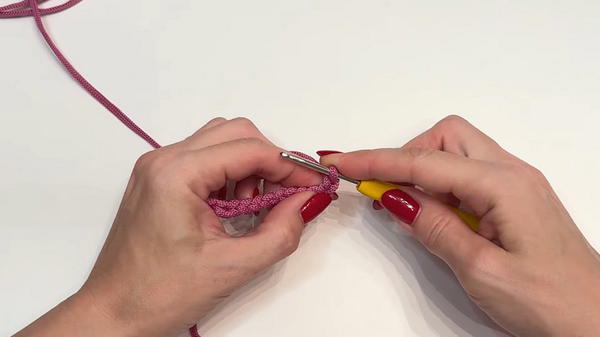
- Using the 3.5 mm crochet hook, chain 12, followed by one turning chain.
Row 1-39
- Work single crochets (SC) back and forth over the chain, picking up the back loop and a portion of the previous row for extra firmness.
- Continue until completing 39 rows.
Bordering the Base
- Border the base by working single crochets (SC) around the perimeter:
- Work 3 SC into each corner stitch to create rounded edges.
- Crochet 20 SC along the longer edges on each side to make uniform sides.
- Adjust as needed to ensure the entire border reaches 76 stitches total.
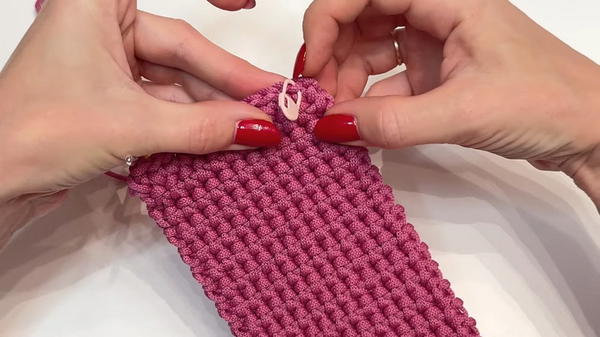
2. Wall Structure
Switch to the 4 mm hook to begin forming vertical walls for the bag.
Round 1-2
- Work standard single crochets (SC) around the base, ensuring even coverage with 76 stitches per round.
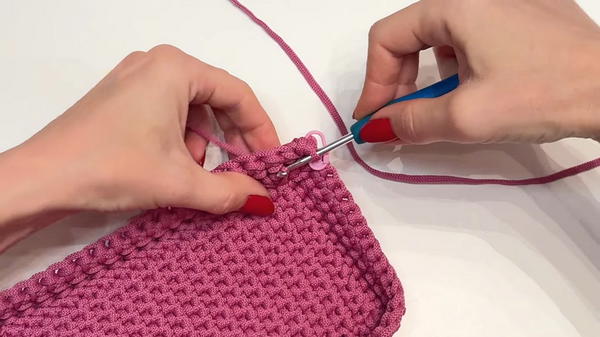
Round 3 (Honeycomb Pattern)
- Begin the honeycomb stitch:
- Alternate between 1 standard SC and 1 long stitch, anchoring the long stitch two rows down.
- Repeat the honeycomb pattern throughout the row to create a textured wall design.
Continue the honeycomb stitch for subsequent rounds until the walls reach the desired height (approximately 22 cm).
3. Upper Edge
The edge of the bag is finished with a clean and decorative border that forms a subtle X-shaped pattern.
Round 1-4
- Work 4 rows of single crochet using the twisted stitch technique:
- Insert your hook from back to front, creating an X-shaped texture across the surface.
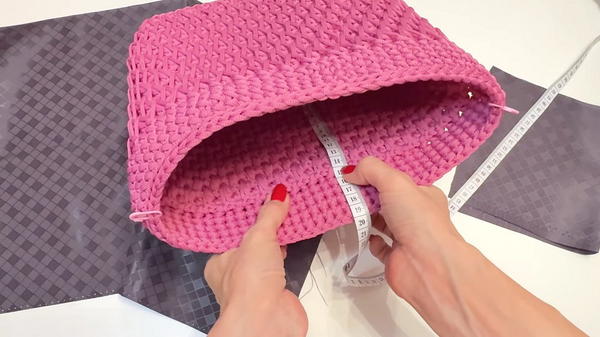
- Insert your hook from back to front, creating an X-shaped texture across the surface.
4. Decorative Base Trim
To accentuate the base edge, work a surface slip-stitch trim:
Round 1
- Use slip stitches (sl st) to create a clean decorative line around the bottom edge of the bag. Ensure stitches are even for a polished finish.
5. Lining
The lining adds structure and functionality.
Cut and Prepare
- Measure the fabric to fit the interior of the bag, including an internal pocket, if desired.
Sewing the Lining
- Hand-sew the lining into the bag using a plastic needle and sturdy thread.
- Ensure the lining covers the internal seams and fits snugly inside the bag for added durability.
6. Short Handles
The bag’s short handles are designed for hand-carrying and feature thick cords for strength.
Handle Construction
- Using the 4 mm hook, chain 70 stitches.
- Work 4 rounds of slip stitches (sl st) around the chain to create a dense cord-like texture.
Attachment
- Sew each handle end securely to the bag body using a plastic needle for durability and strength.
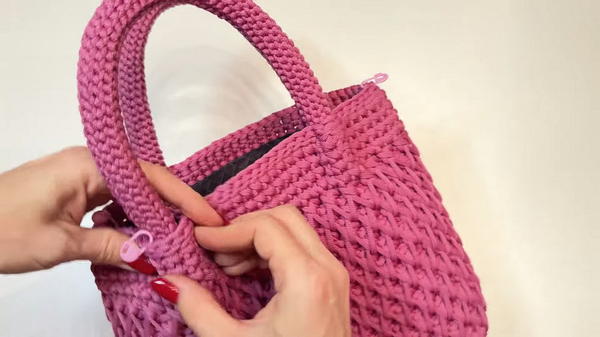
7. Flap & Hardware
The flap protects the contents of the bag and adds a secure closure.
Flap Construction
- Using the 4 mm hook, crochet a rectangular flap:
- Begin with a 10-stitch-wide foundation and work back and forth until the flap measures approximately 15 cm in length.
Hardware Attachment
- Attach the sew-in magnetic closure to the flap, ensuring central alignment for functionality.
- Securely sew the flap to the rear upper edge of the bag.
8. Long Shoulder Strap
The strap allows for convenient shoulder carrying and is designed for durability and non-stretch edges.
Strap Construction
- Using the 4 mm hook, crochet back and forth over 5 stitches, working evenly to maintain straight edges.
- Work until the strap measures approximately 83 cm in length.
Attachment
- Use swivel clasps to attach the strap securely to the bag’s side edges.
Final Steps
Inspect the Bag
- Ensure every part of the bag is uniformly aligned, secure, and functional.
Seal Cord Ends
- Trim any loose cord ends and carefully seal them using a lighter to prevent fraying.
Conclusion
This structured crochet bag pattern balances style and functionality with its dense walls, textured design, and hardware elements. Its versatility, from a flap closure to the option of a shoulder strap, makes it ideal for everyday use. The durable polyester cord ensures longevity, while the decorative trim and lining details elevate the overall design. Perfect for crafting a practical yet stylish accessory, this bag is an excellent addition to any wardrobe!