Organize with style using this free crochet hanging pocket basket pattern that’s perfect for adding charm and storage space to any room effortlessly.
Adding a handmade touch to your home décor is always rewarding, especially when combining beauty with practicality. One such charming project is a versatile basket that not only decorates your space but also helps you organize everyday items effortlessly. If you’ve been searching for a creative and functional accessory, the free crochet Hanging Pocket Basket pattern is an excellent choice worth exploring. Presented thoughtfully on the Promlatex. Шнур для вязания. channel, this pattern inspires crafters to create a unique piece that brightens up any room.
Free Crochet Hanging Pocket Basket Pattern Perfect for Any Room
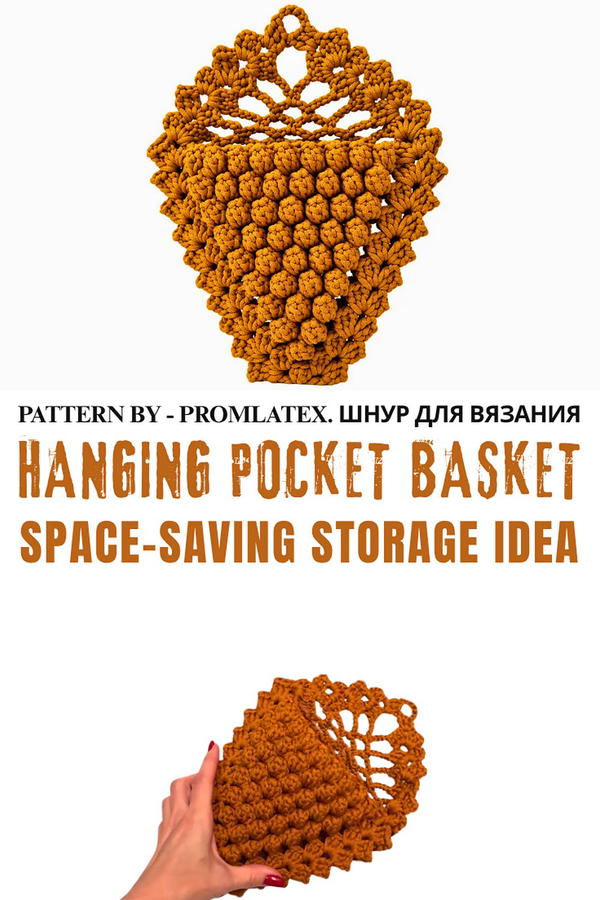
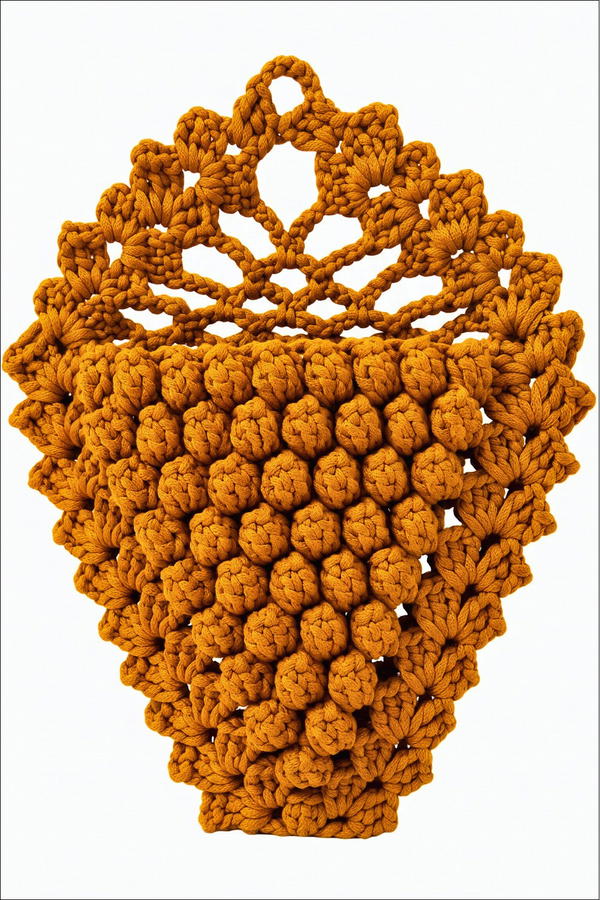
This hanging pocket basket features a spacious, gently rounded shape with a textured design that showcases the artistry of crochet. Its mustard shade adds a warm, inviting vibe, making it perfect to hang anywhere, from a cozy corner in the living room to bathroom walls, thanks to its moisture-resistant construction. The basket’s charming style blends rustic handmade appeal with modern functionality, making it ideal for storing small essentials like combs, cotton pads, or even displaying fresh flowers.
Aside from enhancing your home, this crochet basket carries wonderful gifting potential. Its combination of style and usefulness ensures it will be appreciated by anyone who receives it, whether as a thoughtful housewarming gift or a unique present for friends who love organized spaces. The handcrafted nature of this project adds a heartfelt touch that’s difficult to match with store-bought items.
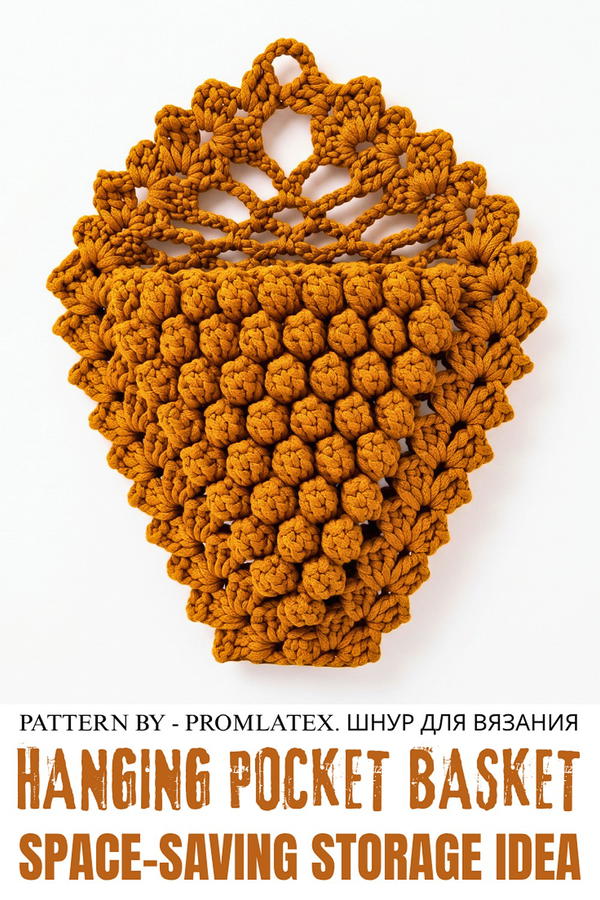
Crochet Hanging Pocket Basket Pattern
This crochet hanging pocket basket is a versatile and functional project, perfect for organizing small items such as mail, toiletries, or craft supplies. The intricate design combines a textured popcorn stitch with fan stitches and mesh rows, resulting in a practical yet decorative basket. Measuring 22 cm wide and 28 cm long, this basket features a sturdy hanging loop for convenient placement.
Skill Level
Intermediate – This pattern is suitable for crocheters comfortable with working in rounds, popcorn stitches, mesh patterns, and basic shaping techniques.
Materials
- Polyester Cord (3 mm): Approximately 100 meters.
- Crochet Hook: 3.5 mm.
- Tools:
- Scissors.
- Lighter (to seal the cord ends).
Stitch Abbreviations
- Ring: A small loop secured with slip stitch to begin shaping the rounds.
- Chain (ch): Yarn over and pull through the loop on the hook.
- Double Crochet (DC): Yarn over, insert hook into stitch, yarn over, pull through stitch (3 loops on hook), yarn over, pull through two loops, yarn over, pull through last two loops.
- Popcorn Stitch: Work 5 DCs into the same stitch, remove the hook, insert it into the first DC, then pull the dropped loop through.
- Slip Stitch (sl st): Insert the hook into stitch, yarn over, pull through the stitch and the loop on the hook.
Helpful Tips
- Tension Consistency: Maintain consistent tension, especially with the popcorn stitches, to avoid distortion in the basket shape.
- Popcorn Appearance: Pull the dropped loop tightly to achieve clearly defined popcorn texture.
- Securing Cord Ends: Use a lighter to neatly seal any frayed cord ends after cutting.
- Joining Sides: Ensure careful alignment of arcs while joining the front and back pieces to avoid uneven edges.
- Mesh Panel: Regularly measure during mesh panel decreases to keep the basket proportions consistent and visually clean.
Step-by-Step Pattern Instructions
1. Base Foundation
The base forms the foundation of the basket and features symmetrical fan elements worked in continuous rounds.
Initial Ring
- Create a ring by forming a small loop of cord and secure it with a slip stitch.
Round 1
- Chain 3 (counts as the first DC).
- Work 2 DC stitches into the ring, followed by 2 chain stitches.
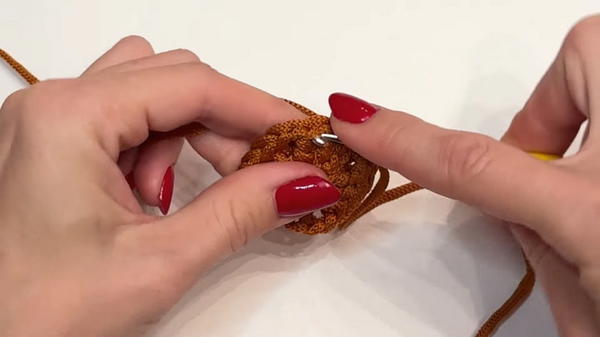
- Repeat this sequence of 3 DC + 2 chain stitches three more times, creating four fan-shaped corner arcs.
- Close the round with a slip stitch into the first arc.
Expanding Rounds
- Continue working in rounds to expand the base:
- In each corner arc, crochet one fan element consisting of 3 DC, 2 chain stitches, 3 DC.
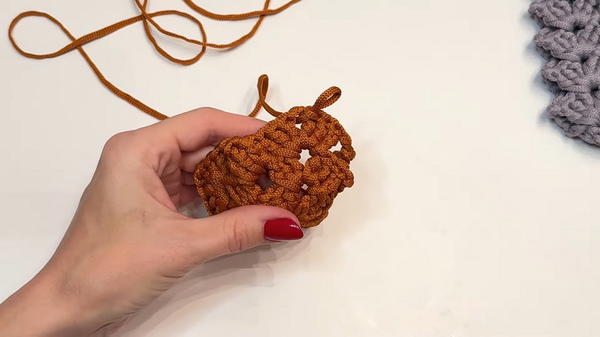
- Work DC stitches along the side arcs as needed to ensure a flat, even base.
- In each corner arc, crochet one fan element consisting of 3 DC, 2 chain stitches, 3 DC.
Repeat this pattern until the base reaches the desired size.
2. Adding 'Popcorn' Texture
To add dimension and texture, integrate popcorn stitches starting from the third row.
Creating Popcorn Stitches
- In the side arcs, begin working popcorn stitches:
- Crochet 5 DC stitches into the same space.
- Remove the hook from the working loop, reinsert it into the top of the first DC, and pull the dropped loop through to create the popcorn effect.
- Separate popcorn stitches with 1 or 2 chain stitches, repeating the sequence along the arc.
Textured Pattern Progression
- In subsequent rows, increase the number of popcorn stitches along each row’s side arcs.
- Work fan elements into the corner arcs as in previous rounds to preserve the shape of the basket base.
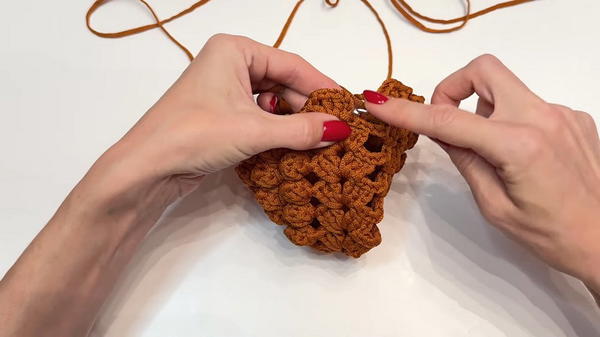
Repeat this textured pattern until the base is fully expanded and measures approximately 22 cm wide.
3. Shaping the Pocket
Transition from the base to the vertical body of the basket, working in rows to shape the pocket.
Joining the Sides
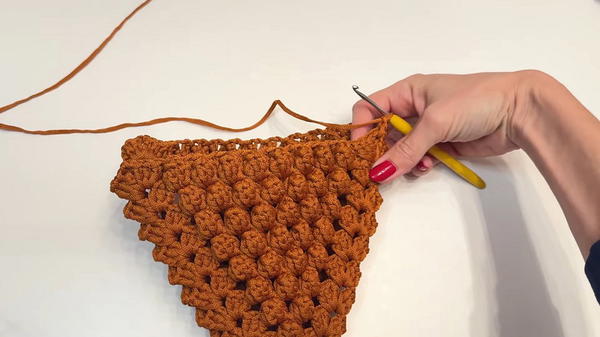
- Align the front and back pieces of the basket by folding the base.
- Using the fan stitch, join both corresponding arcs along the side edges to begin forming the pocket structure.
Vertical Rows for Panel
- Work mesh rows on only the back side of the basket to form the hanging panel:
- Create mesh using 4-chain spaces between each double crochet.
- Gradually decrease the width of the panel as you approach the top by skipping stitches along each row’s edges.
Repeat the vertical rows until the panel reaches the desired height.
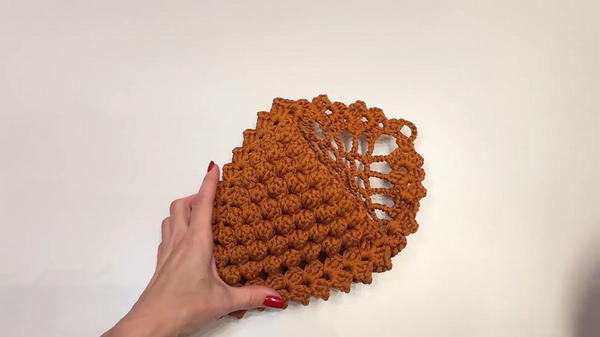
Adding the Hanging Loop
- Fan Stitch Top: Complete the panel with a final fan stitch row for symmetry and durability.
- Form the Hanging Loop:
- Chain a sufficient number of stitches (approximately 12-15 chains).
- Join the chain back to the base of the panel with a slip stitch to form a loop.
Final Steps
Inspect the Basket
- Ensure the basket is symmetrical and that the pocket and hanging panel align properly.
Seal the Cord Ends
- Use scissors to trim excess cord. Carefully seal frayed ends with a lighter for a clean, professional look.
Shape the Pocket
- Gently pull and adjust the edges of the basket and pocket panel to form a well-defined shape.
Conclusion
This crochet hanging pocket basket combines functionality and style for home organization. The use of textured popcorn stitches adds depth to the design, while the hanging panel provides practicality and versatility. With sturdy polyester cord, the basket is durable and ideal for regular use. Customize colors and sizes to suit your needs or match your home décor. Perfect for holding small items, this hanging basket is both a decorative and practical solution for organizing your space.