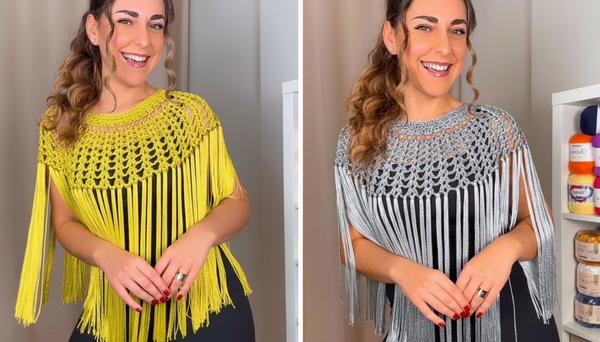
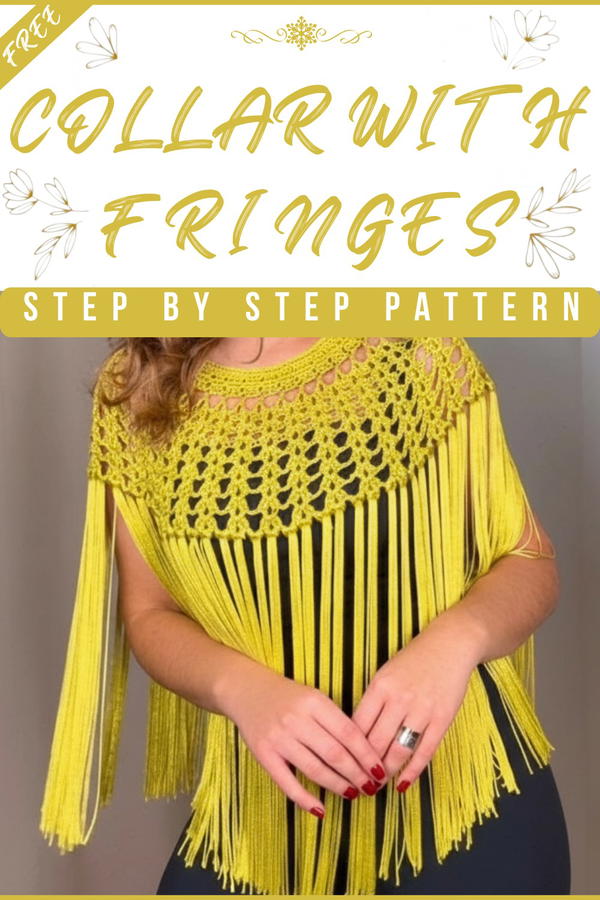
Small handmade details can make any outfit look more special and attractive. A Crochet collar with fringes pattern adds a lovely and stylish touch to dresses, tops, and sweaters. Its beauty comes from the soft yarn, neat stitches, and flowing fringes that move gently and look eye-catching. The appearance is delicate, elegant, and very pleasing, making simple clothes look more fancy and unique.
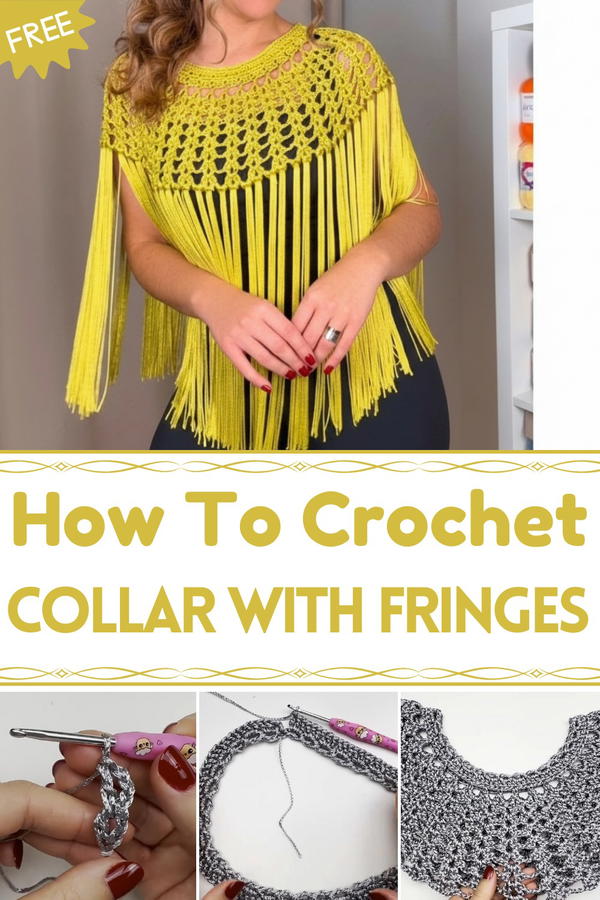
Quick Crochet Collar with Fringes Pattern Step by Step
It can be worn for daily use, parties, or special occasions to enhance any outfit easily. This collar is light in weight and comfortable around the neck, so it feels soft and easy to wear. Many people like it because it is simple to make and looks creative without being difficult. The fringes give a playful and graceful look that stands out. Overall, it is a pretty, useful, and decorative handmade piece that adds charm, style, and beauty to wearing over on top and shirt.
Necessary Materials and Supplies
Yarn:
- Encanto yarn (standard thread, not Slim; Slim is thinner).
- Suggested color: Aluminum (Code 8473) or Vagalum (Firefly, Code 5564).
- Total required: 4 skeins (approximately 512 meters total).
- For the fringes: 2 skeins plus 24 meters for the additional fringe material.
Crochet Hook:
- Size 3.5 mm, preferably the Círculo decorated crochet hook.
Other Tools:
- Scissors.
- Finishing/tapestry needle.
- Liquid silicone glue (transparent when dried to prevent fringe from sliding).
- A measuring object for fringe cutting (40 cm cardboard or lid).
Important Notes
- Encanto Yarn’s Characteristics:
- Made from 100% viscose, this yarn has a smooth, shiny texture that adds elegance to the finished piece.
- To prevent yarn from slipping, secure leftover yarn with a safety pin or store it in a small container during work.
Pattern Instructions
Step 1: Creating the Base Links (Circle Foundation)
Setup:
- Begin with a slip knot on the crochet hook.
- Crochet 3 chain stitches.
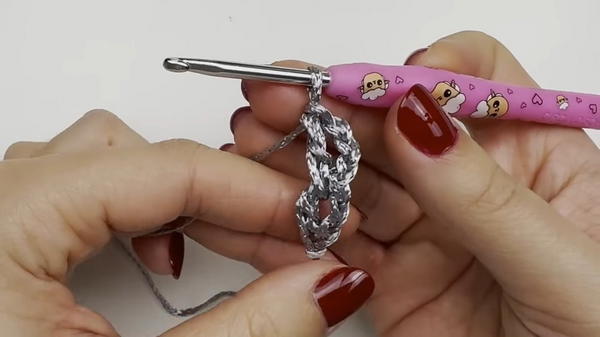
First Link:
- Create two double crochet stitches in the first chain stitch to form the first link.
- This link is composed of 2 double crochets grouped together.
Subsequent Links:
- Chain 3 stitches, then insert the hook into the middle space between the previous 2 double crochet stitches.
- Create another double crochet stitch, followed by another group of 2 double crochet stitches.
- Repeat the sequence for 35 links (for size XS).
Note:
- For larger sizes:
- Size M: 40 links.
- Size L: 45 links.
- Size XL/XXL: Adjust the links for a wider circumference around the neckline.
- Stretch the foundation chain to approximately 52 cm for size XS.
Closing the Circle:
- Insert the hook into the first double crochet stitch and join the links into a circle using a slip stitch.
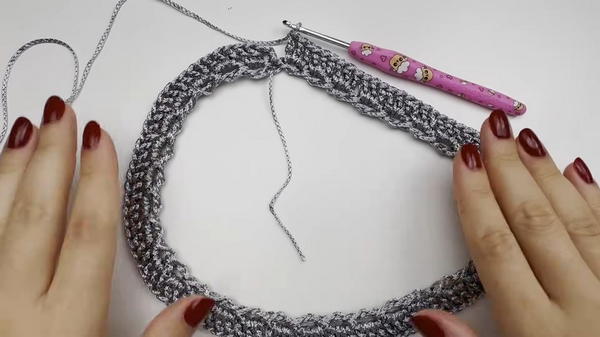
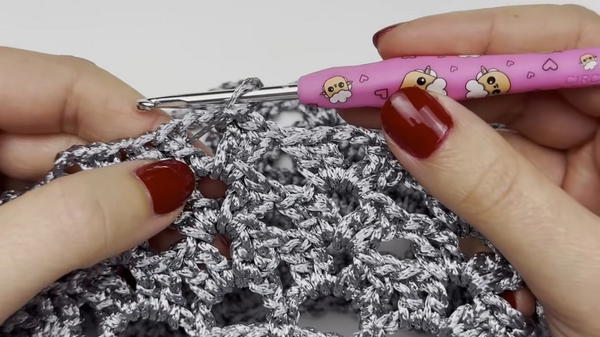
Step 2: Building the Fan Design
1st Row: Treble Crochet in Links
- Foundation: Chain 3 stitches (equivalent to the first double crochet).
- Create 2 more double crochet stitches inside the first link.
- Repeat the process in each link (3 treble crochets per link) until the end of the row.
- Close the row with a slip stitch.
Fan Formation Rows:
Rows 2–3 (Identical Fans):
- Insert 4 treble crochet stitches into each space, grouped as follows:
- 2 treble crochet stitches, 2 chain stitches, 2 treble crochet stitches.
- Do not add a chain stitch between fans.
Row 4: Fans with Single Chain Stitch Increase:
- Add 1 chain stitch between fans to begin expanding the collar.
Row 5: Fans with Double Chain Stitch Increase:
- Add 2 chain stitches between fans.
Rows 6–8: Fans with Triple Chain Stitch Increase:
- Add 3 chain stitches between fans for final growth.
- Ensure spacing becomes wider across these rows to achieve the optimal flare for the cape/collar.
Tip for Yarn Addition:
When changing skeins mid-project, ensure the new yarn is seamlessly added by fastening the last stitch with the new color/thread and securing the ends using tapestry needles and liquid silicone glue. This process prevents any loose ends or slipping.
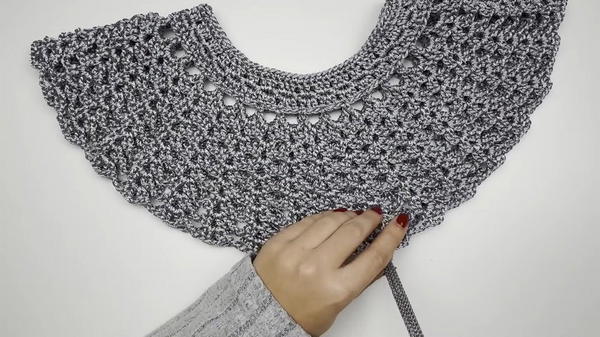
Step 3: Neckline Finishing
Attach the yarn to the top portion of the links (the opposite side, closer to the neck).
Create the following sequence:
- 3 treble crochets in the first two links.
- 2 treble crochets in the third link.
- Repeat the sequence in rows (3-3-2 pattern).
For an invisible finish:
- Cut the thread, thread a tapestry needle, and simulate the last chain stitch for a flawless neckline edge.

- Cut the thread, thread a tapestry needle, and simulate the last chain stitch for a flawless neckline edge.
Complete the neckline with a row of single crochet stitches for a clean finish.
Step 4: Adding the Fringes
Cutting the Fringe Materials:
- Cut 80 cm strands (a total of 350 strands).
- Use any object measuring 40 cm for precision wrapping and cutting.
Placement:
- Each fringe section contains 5 strands folded in half (resulting in 10 strands per fringe section).
- Insert fringes into each fan space and chain stitch space across the last row.
Securing the Fringes:
- Apply liquid silicone glue over the wrong (inner) side of the fringes to prevent them from sliding.
- Press the glue gently and let it dry fully, ensuring transparency.
Tip for Styling Fringes:
- Trim the fringe edges for a tapered, sharper finish. Leave the edges as they are or create dramatic effects by cutting shapes like diagonal peaks.
Remarks and Tips for Success
Yarn Tension:
Maintain even tension while crocheting to achieve uniform stitches and an elegant draped effect.Measurements:
- Ensure the finished piece length before attaching fringes fits your desired dimensions.
- The height of the fan section is approximately 15 cm.
Customization Options:
- Add more rows of fans if you prefer a longer cape.
- Experiment with a variety of colors from the Encanto yarn collection for unique looks.
- Add more rows of fans if you prefer a longer cape.
Conclusion
This beautiful crochet collar/cape combines timeless elegance with modern styling. The fringe detailing gives a touch of sophistication, and the pattern allows for plenty of creative freedom with color selection and sizing.