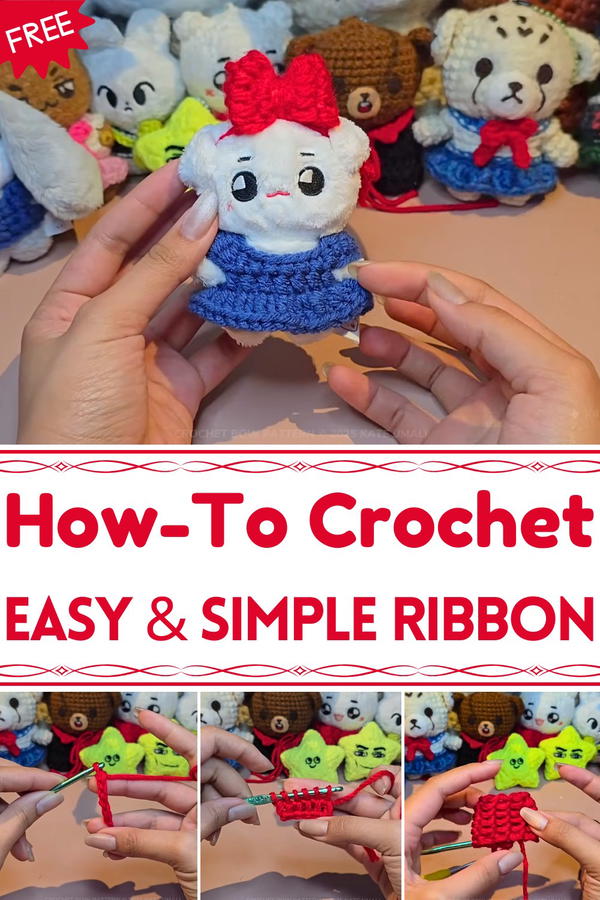
Weave elegance effortlessly with this Free Crochet Ribbon Pattern, adding delicate charm, versatile style, and subtle sophistication to any project or accessory.
Ribbons serve as versatile accents that enhance clothing, accessories, and home décor with subtle elegance and practical functionality. The Free Crochet Ribbon Pattern allows crafters to transform simple yarn into delicate, flexible ribbons that can be adapted for countless uses. They can tie hair, decorate bags, hats, or garments, or add a personalized touch to gift wrapping, bringing charm and a handcrafted feel to everyday items. Their soft texture ensures comfort when worn, while the lightweight construction allows easy attachment without adding bulk.
Sweet Stitch Crochet Ribbon Pattern That Brings Joy
Beyond decorative applications, crochet ribbons can organize small items, secure rolled-up papers, or embellish textiles such as cushions, table linens, or curtains. The pattern provides opportunities to experiment with colors, lengths, and stitch variations, making each ribbon a unique expression of style and creativity. Durable enough to withstand repeated handling, they maintain their shape and charm over time.
For crocheters, working on these ribbons offers a satisfying hands-on experience, combining focus, skill, and artistic expression in a small project. Each finished piece becomes more than an accessory; it merges practicality with aesthetic appeal, offering a versatile, elegant, and thoughtful addition to personal fashion, home décor, or gifting that adds a subtle yet memorable handmade touch.

Materials Needed
- Yarn: Number 4 acrylic yarn (specifically from Daiso was used, but any fluffy yarn will suffice).
- Crochet Hook: 4.5 mm hook (a hook without a handle, like a Tunisian crochet hook, is ideal).
- Optional Materials for Headband Finish:
- Stretchy string for securing the bow to dolls.
- Yarn for creating a chain headband strap.
Steps to Create the Fluffy Crochet Bow
Step 1: Start with Tunisian Crochet
Make the Foundation Row (Row 1)
- Create a slip knot and chain 6 stitches for the foundation row.
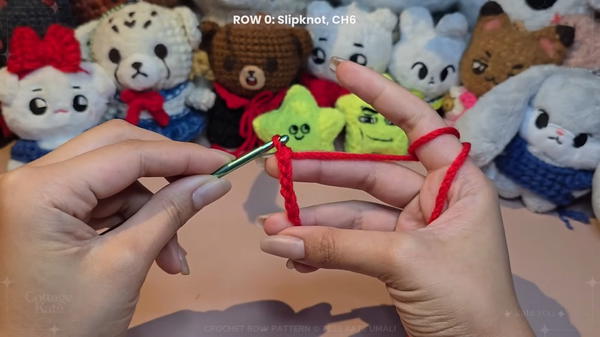
- Perform a forward pass, picking up loops in the back loops of the chains to add 6 loops to the hook.
- Complete a backward pass by pulling yarn through one loop and then two loops at a time until the row is complete.
- Create a slip knot and chain 6 stitches for the foundation row.
Row 2: Form the Net Tunisian Stitch
- For the forward pass, pick up loops from the bumps on top of the stitches. Once again, aim for 6 loops on the hook.

- Perform the backward pass in the same way as Row 1.
- For the forward pass, pick up loops from the bumps on top of the stitches. Once again, aim for 6 loops on the hook.
Repeat Rows for Fluffiness
- Repeat the process until you have 9 rows in total. This ensures the bow will have a plush, fluffy appearance.
Step 2: Connect the Ends and Shape the Bow
Joining the Ends
- Match the bumps on the last row with the stitches on the foundation row.
- Use a slip stitch to connect the ends—this requires 5 slip stitches across.
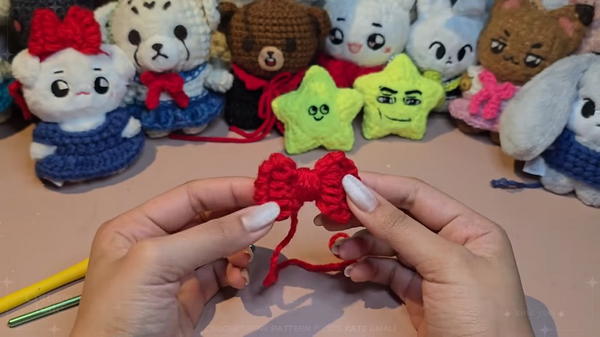
Shaping the Bow
- Place the seam in the middle and pinch the connected band to create the bow shape.
- Wind the yarn around the center tightly and secure the pinch with a firm slip stitch.

Step 3: Crochet and Attach the Middle
- Crochet the Bow's Center Wrap
- Chain 20 to 30 stitches (depending on your preferred size).
- Wrap these chains tightly around the middle of the bow 3–4 times.
- Slip stitch to secure the chains and trim any excess.
Step 4: Add the Adjustable Headband (Optional)
Yarn Strap Method
- Instead of cutting the yarn, chain 30–40 stitches to form an adjustable headband for a doll.
- Measure the chain length around the doll’s head and adjust accordingly.
- Weave in any loose ends to finish.
Stretchy String Method
- Alternatively, use stretchy string for a faster solution.
- Slip a loop of the string through the middle of the bow and adjust to secure it around the doll’s head.
Special Features
- The bow is made entirely with Tunisian crochet, a technique that gives it its fluffy texture.
- The tutorial focuses on creating accessories for 10 cm dolls, but the pattern can be adjusted for larger sizes.
- The design allows for flexibility—whether you want just the bow, a full headband, or an easily adjustable strap.
Level of Difficulty
- Beginner-Friendly: The tutorial is straightforward with clearly explained steps. Tunisian crochet is introduced in a simple and usable way, making it ideal for those new to the technique.
Tutor’s Suggestions
- When choosing a crochet hook, use one without a handle, similar to a Tunisian crochet hook, for better control.
- To achieve the fluffy look, use a net Tunisian stitch, as demonstrated in the video.
- For an even bow appearance, pull and adjust the yarn after shaping the bow and stitching the center.
Uses
- Adorable accessories for 10 cm dolls, perfect for collectors or doll enthusiasts.
- The pattern can also be modified to create bows for larger items, such as headbands for children or decorative items for crafts.
Tip
For a fluffier and more structured bow, ensure that your tension is consistent as you wrap the yarn around the center. Pull the yarn tightly but adjust as needed to create an even and polished look.
Conclusion
This video tutorial by Cottage Kate provides a charming and manageable crochet project for creating Kiki’s inspired fluffy bow. The project is customizable, versatile, and perfect for beginners. Whether you make it as a standalone bow or part of a headband, the tutorial allows for creativity and personalization.


