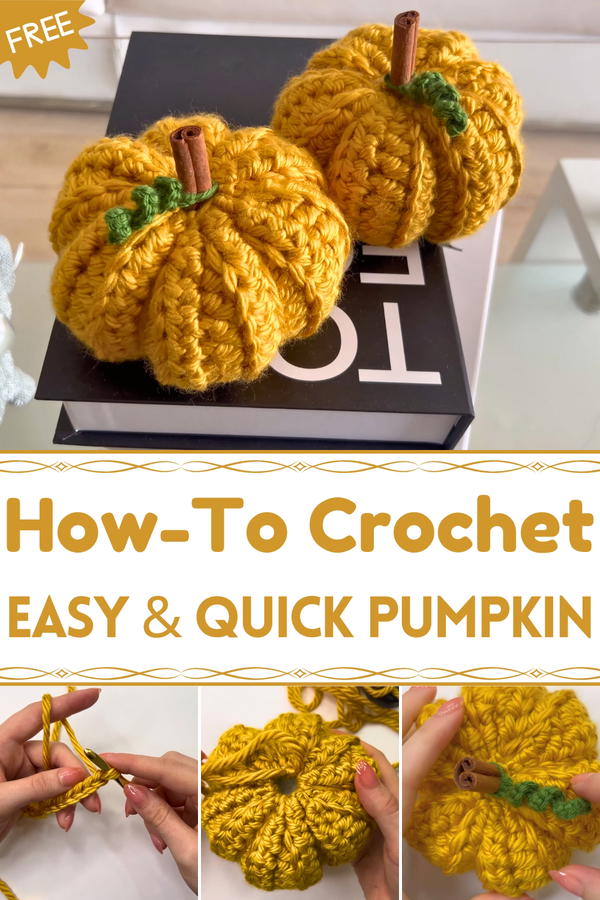
Stitch autumn charm with this Crochet Pumpkin pattern, a cozy design to bring seasonal warmth and festive style to décor or heartfelt gifts.
Seasonal décor often feels incomplete without the familiar charm of pumpkins, symbols of warmth, harvest, and timeless beauty. The Crochet Pumpkin pattern captures that spirit in a lasting way, offering a cozy piece that brings character to any festive setting. With its rounded shape, textured ridges, and sturdy stem, it reflects the natural appeal of a pumpkin while adding softness and comfort through yarn.
Timeless Beauty Crochet Pumpkin for Autumn Displays
Unlike real pumpkins that spoil over time, this version stays vibrant and intact year after year, becoming a dependable favorite for decorating. Its lightweight size makes it versatile enough for mantels, shelves, centerpieces, or even tiered trays, offering countless ways to enhance seasonal displays. Beyond home décor, it also serves as a thoughtful handmade gift, carrying warmth and cheer to friends and loved ones.
The soft texture enriches the atmosphere of gatherings, adding depth and charm without overwhelming the space. Suitable for rustic farmhouse settings as well as modern homes, it adapts beautifully to any style. With durability, elegance, and festive joy combined, the Crochet Pumpkin pattern is more than decoration—it is a timeless keepsake that keeps the spirit of harvest celebrations alive year after year.
Materials Required
- Chunky Yarn: Jasmine used yellow-orange yarn to suit the fall theme, but any color works.
- Crochet Hook: Recommended sizes are 6mm or 8mm (Jasmine used 6mm for tighter stitches).
- Polyfill Stuffing: For stuffing the pumpkin.
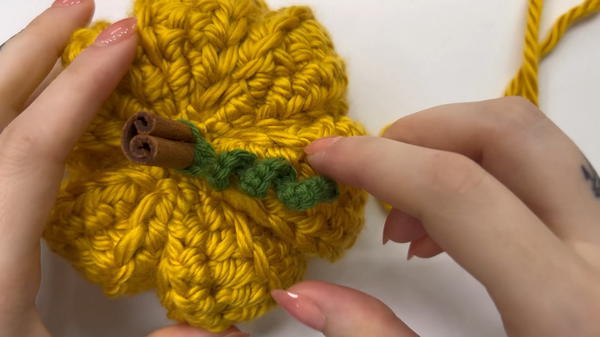
- Cinnamon Stick: For the stem.
- Yarn Needle: For sewing.
- Lightweight Yarn (Optional): For the spiral leaf detail.

Special Features
- Beginner-Friendly: Jasmine emphasizes that her tutorial is simple, using half-double crochets throughout, making it accessible for those just starting out.
- Customizable: The pumpkins can be made in various sizes and colors, depending on your preference. For example, Jasmine notes that light pinks, whites, or other colors can be used to complement your home décor.
- Cinnamon Stick Stem: Instead of crocheting a stem, Jasmine uses a real cinnamon stick. This not only simplifies the process but also adds a pleasant fragrance.
- Includes Leaf Detailing: A small spiral leaf adds a final touch, tying the design together for a more polished look.
Step-by-Step Instructions
1. Base and Body
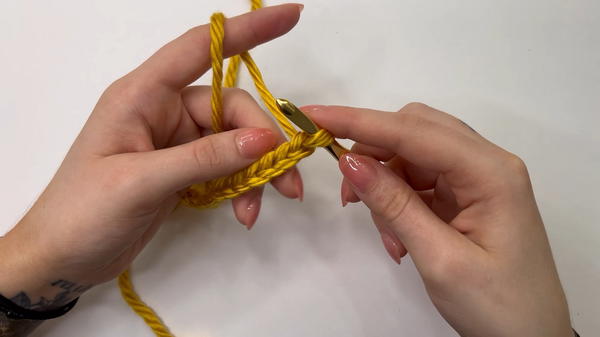
- Begin by making a slip knot and chain 15.
- Create a row of half-double crochets (HDCs), going into the back side of the chain for a cleaner look, ending with 14 stitches.
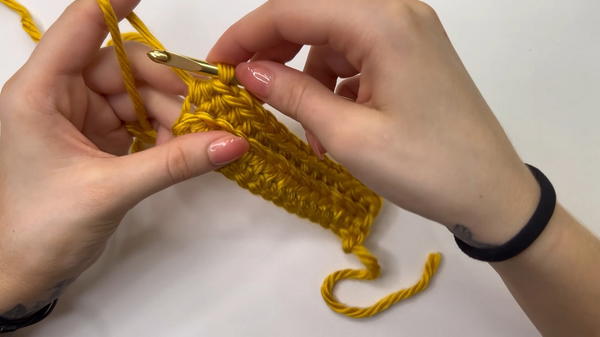
- Chain 1, turn your work, and work HDCs in the back loop only. This creates ridges, giving the pumpkin texture.
- Repeat this pattern, chaining 1 at the end of each row, until you have a rectangle. Jasmine suggests finishing with 24 rows for a medium-sized pumpkin.
2. Assembly
- Fold the rectangle in half and use slip stitches to seam the edges together. Jasmine recommends picking up the front loop of one side and the back loop of the other for a seamless look.
- Once seamed, leave a long tail for threading.

3. Shaping the Pumpkin
- Use a yarn needle to gather one end of the pumpkin by weaving in and out of the ridges and pulling tightly to close the bottom.
- Flip the pumpkin and repeat the process at the top, leaving space for the stuffing.
- Stuff the pumpkin with polyfill, ensuring even distribution throughout. Adjust the tightness as needed so the shape stays rounded.
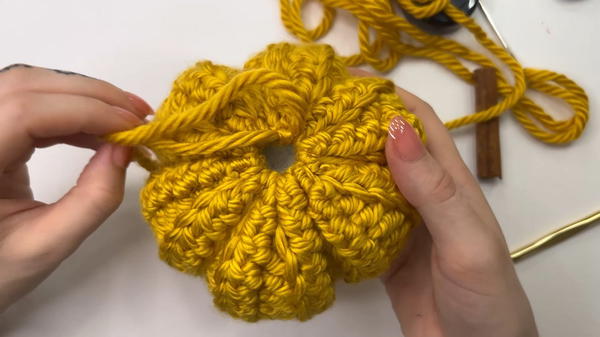
4. Adding Grooves
- Use the long tail of yarn to create the classic pumpkin grooves. Thread the yarn up from the bottom to the top, pulling tightly to form segments. Repeat this step around the pumpkin, spacing the grooves evenly. Jasmine recommends keeping two ridges between each groove.
5. Final Touches
- Insert the cinnamon stick in the center hole as the stem.
- For the optional leaf detail, work with lightweight yarn and a smaller hook (3.25mm).
- Chain 15 and make 2 single crochets in each chain. This will create a spiral leaf. Knot the leaf to the top of the pumpkin and trim any excess yarn.
Tutor’s Suggestions
- For tighter stitches that don’t show the stuffing, Jasmine recommends using a smaller hook size, such as 6mm instead of the recommended 9mm.
- Stitch markers can be helpful for identifying the first and last stitch of each row.
- The pumpkin's design can be customized with more rows for a larger size or alternative colors to match your seasonal décor.
Uses
- Perfect as table centerpieces or mantel décor during the fall season.
- Can be used as handmade gifts for friends and family.
- Adds a cozy, homemade touch to Halloween or Thanksgiving setups.
Level of Difficulty
This project is beginner-friendly and requires only basic crochet skills such as chaining, half-double crochets, and slip stitching. Jasmine’s clear explanations and suggestions ensure that even beginners can easily complete the project.
Conclusion
Creator's crochet pumpkins are an adorable and easy way to bring the warmth and coziness of fall into your home. Their versatility in size, color, and detailing makes them a great choice for both beginners and experienced crocheters. Paired with the cinnamon stick stem, these pumpkins are not only visually charming but also fragrant, offering an all-around seasonal treat.
Tip
To make your pumpkin durable and maintain its shape, ensure that the stitches are tight and the stuffing is evenly distributed. If using lighter yarn for detailing, match it with a smaller hook size for a consistent finish.


