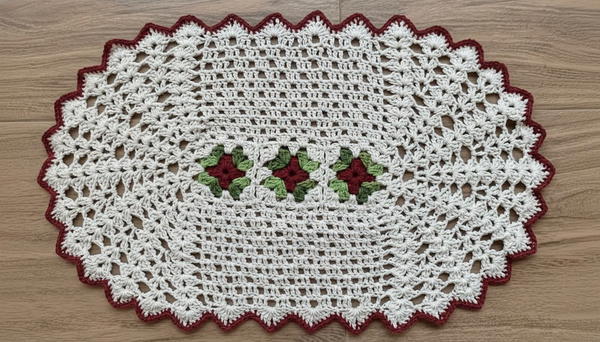
Add charm to your space with a Crochet Growing Flower Rug Pattern that blooms with colors, feels soft, and brings playful cheer to any room or corner.
Stepping onto a soft bed of blooming flowers every time you walk into a room. This flower rug brings that magic to life with its bright colors and cozy texture. Soft petals crocheted from warm yarn spread across the floor, creating a joyful and inviting space. Perfect for bedrooms, living rooms, or play areas, this rug adds comfort while turning any spot into a happy garden. The vibrant hues catch the eye, brightening up even the dullest corners.
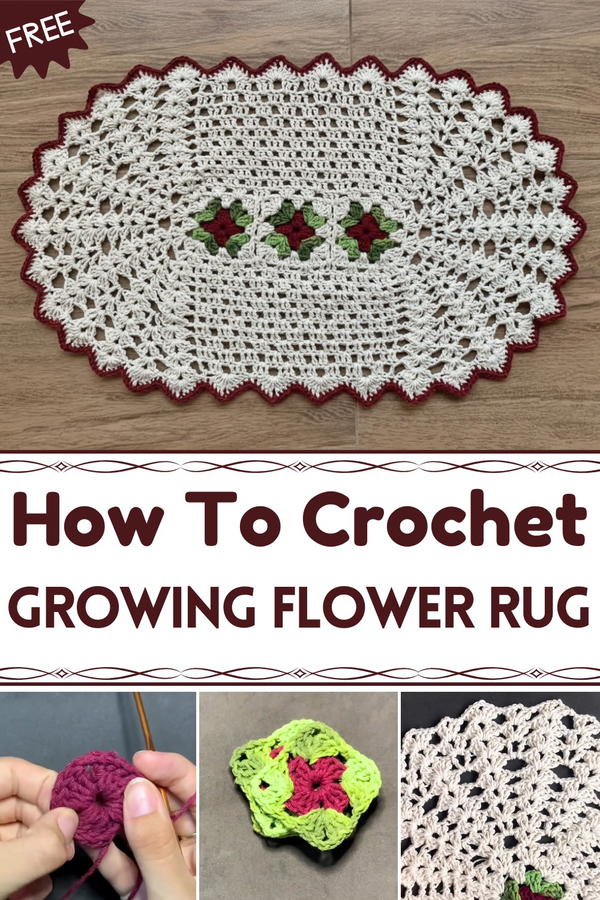
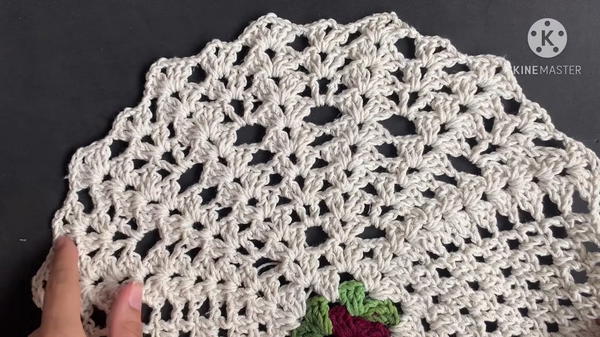
Charming Crochet Growing Flower Rug Pattern Ideal for Living Room
Its gentle surface feels nice underfoot, making every step a pleasant experience. More than just decoration, this rug brings warmth, happiness, and a welcoming atmosphere to any home. Simple yet full of charm, it creates a cozy place for family and friends to gather, rest, or play. Everyone can enjoy the comfort and beauty it offers, making any room feel fresh and alive.
Crochet Petite Rose Motif and Square Pattern
Special Features
- Little rose motifs made with groups of double crochet (high stitches)
- Fan clusters creating a textured floral look
- Oval and straight edges balanced for shaping
- Seamless joining and edging with neat slip and single crochet stitches
- Uses size 6 cotton yarn and 3.5 mm crochet hook for a firm yet lovely fabric
Difficulty Level
Intermediate — Requires knowledge of crochet basics, such as chain, slip stitch, single and double crochet, as well as fan stitch construction and sewing pieces together.
Materials Needed
- Raw cotton yarn, size 6 (main color for roses)
- Colored yarn and green yarn for leaves and accents
- 3.5 mm (size 4) crochet hook
- Tapestry needle for sewing tails
- Scissors
Step-by-Step Pattern
Round 1: Foundation Chain & Ring
- Make a slip knot and chain 6.
- Join with a slip stitch to form a ring.
Round 2: Rose Petal Base
- Chain 2, then work a slip stitch (very low stitch) into the first chain.
- Chain 3 (counts as first double crochet).
- Work 3 more double crochets into the ring for 4 total (including chain 3).
- Chain 1 to separate groups.
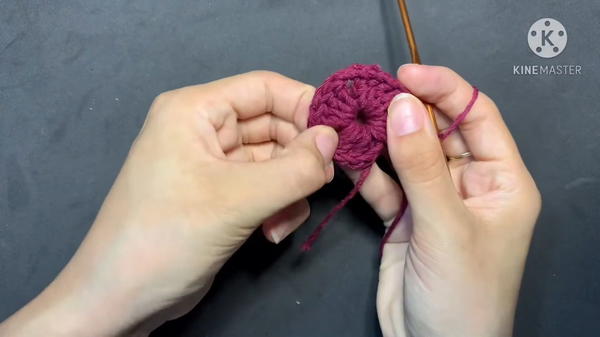
- Repeat the cluster of 4 double crochets separated by chain 1 four times total.
- Join with slip stitch on the 3rd chain of the beginning chain 3 to close the round.
- Cut yarn and fasten off.
Round 3: Leafy Fan Base (Green Yarn)
- Attach green yarn with a loop at any stitch.
- Chain 3 (counts as first double crochet).
- Work a fan cluster:
- Double crochet, chain 2, double crochet, chain 2, double crochet (3 double crochets separated by 2 chains) all into the same stitch to form the first fan.
- Make chain 1 between fans.
- Repeat the fan stitch all around the ring.
- End with a slip stitch to the top of the initial chain 3 to close the round.
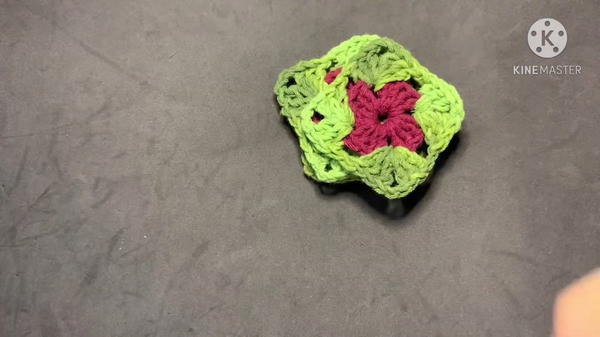
Round 4: Repeating Green Leaf Fans
- Continue making the same fans as Round 3 in every stitch and chain space, separated by chain 1.
- End with slip stitch and cut yarn.
Step 5: Make Multiple Squares
- Repeat the above rounds to create the desired number of rose squares (e.g., 3 or more).
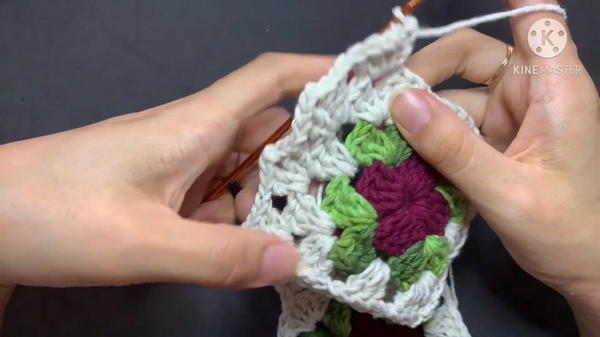
Step 6: Preparing to Join Squares
- Arrange the squares in the desired layout.
Step 7: Joining Squares
- Using a tapestry needle and yarn in matching color, sew squares together by inserting needle through the outer loops or edges, catching the loop of the adjacent square to create a neat seam.
- Use single crochet stitches to make the seams stronger if desired.
- For a decorative and secure join, make an X-shaped stitch crossing over the middle of the joined loops.
Step 8: Edge Finishing
- Once all squares are joined, work an edging in single crochet all around the assembled piece to give a clean finish.
- You may add decorative picots or scallops by chaining and slip stitching at intervals if you wish.
Tutor’s Suggestions
- Keep your tension medium to slightly tight for better texture.
- Blocking the squares before joining helps keep size uniform and edges flat.
- Sew with care and take time to align corners perfectly for a neat finish.
- Experiment with different color combinations for creative flair.
Uses
- Lovely for baby blankets, rugs, decorative throws, or wall hangings.
- Makes charming gifts for friends and family who love handcrafts.
- Can be adapted to larger projects by increasing number of squares.
TIP:
If you find the fan clusters tricky, practice just the fans separately on scrap yarn before starting your squares. Remember that consistent stitch height ensures a pleasant finished look.
Conclusion
This crochet pattern combines simple clusters and fan stitches to craft enchanting little rose squares with leafy borders, perfect to brighten any space. Although intermediate, careful attention to joining and finishing makes this project satisfying and worth the effort.