Gently start your next project with the Free Crochet Amigurumi Sea Bunny Pattern that adds playful personality and instant cuteness to your plush collection.
Few creatures spark curiosity quite like the tiny sea bunny, a real marine animal known for its fuzzy ears and surprising cuteness. The Free Crochet Amigurumi Sea Bunny Pattern lets you bring this ocean oddity to life with soft yarn and sweet detail, making it a delightful project for those who adore unusual yet lovable creations. Whether used as a keychain, shelf accent, or thoughtful gift, this plushie adds charm wherever it lands.
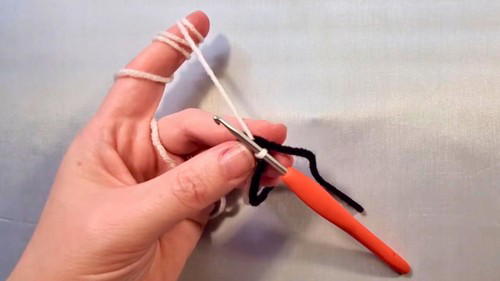
Turn Soft Yarn into Crochet Amigurumi Sea Bunny Plush – Easy Free Pattern
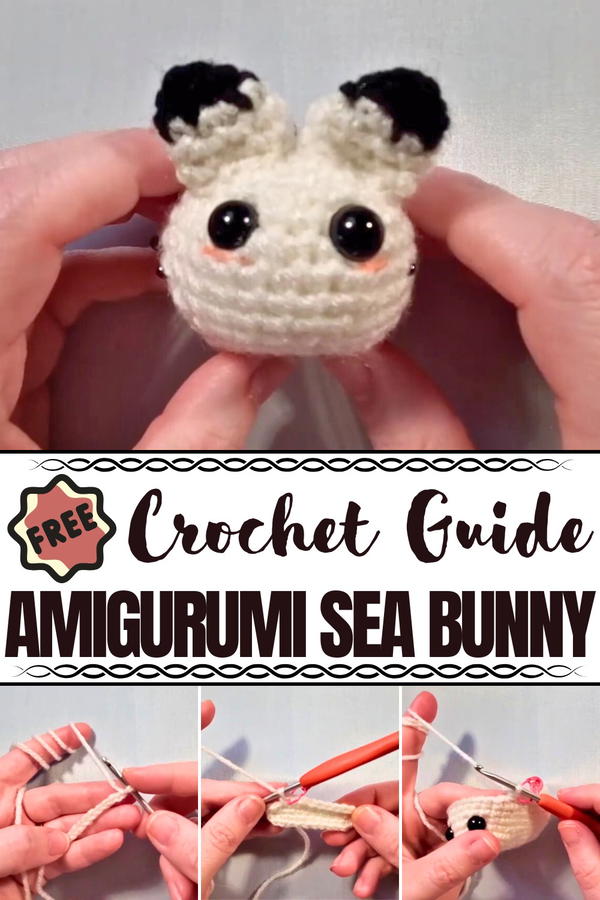
Its signature features, fluffy ear-like rhinophores and a rounded body, are easy to replicate yet full of personality. Compact and beginner-friendly, this project is perfect for quick weekend making without sacrificing style or character. Its size makes it ideal for travel accessories, ocean-themed decor, or even as a handmade surprise for a marine biology fan.
The joy of this piece lies not only in its playful look but in the lighthearted reaction it brings out in others. Stitch by stitch, this sea bunny becomes a small symbol of joy, proving that even the quirkiest creatures can warm a heart and brighten a day with their quiet presence.
Materials Needed
The following materials are essential to crochet the sea bunny:
- Yarn Colors: Black, white, and optionally light pink for blush details.
- Polyfill or Stuffing: Leftover yarn can also be used for stuffing.
- Safety Eyes: Any size of your preference.
- Crochet Hook: 3.25 millimeter.
- Yarn Needle: For sewing the pieces together.
- Stitch Marker: Helps keep track of rounds.
- Pair of Scissors: For trimming yarn.
- Black Thread and Seed Beads: Thin thread to sew decorative black spots.
Special Features
- Ocean-Inspired Design: Modeled after a sea bunny, this crochet project mimics the appearance of the real-life sea slug.
- Oval Body Shape Instead of a Circle: Unlike many traditional amigurumi models, the sea bunny is crocheted in an oval shape.
- Optional Decorative Features: You can add blush details under the eyes and black beads to imitate spots, giving it the signature sea bunny look.
Difficulty Level
The video is beginner-friendly, but beginners should be familiar with basic crochet techniques such as:
- Single crochet
- Increase
- Invisible decrease
- Magic ring
- Handling color changes
Some slightly challenging stitches include working into the "back bumps" and handling tight stitches during the initial rounds.
Step-by-Step Instructions
1. Crochet the Body
Creating the Base
- Begin with a slip knot and chain 11 stitches.
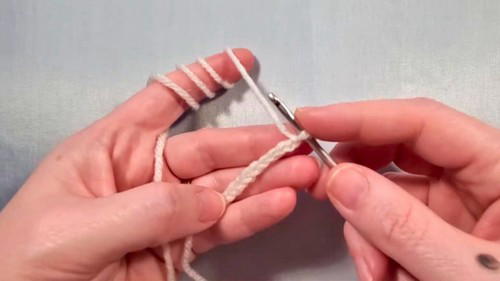
- Work into the back bumps of the chain with single crochet stitches for an oval-shaped base.

- Gradually increase the stitch count in each round until you reach 36 stitches.
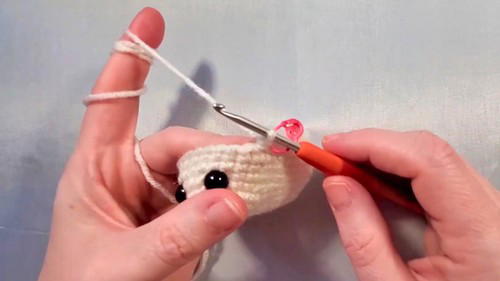
Building the Body
- Single crochet around for several rounds (about 4), maintaining 36 stitches.
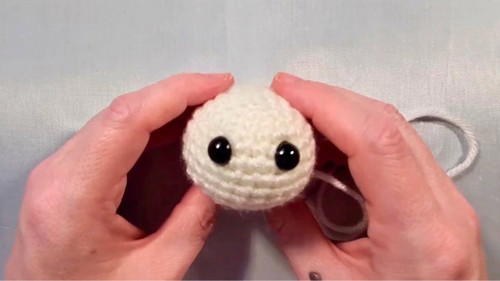
- Add safety eyes after completing the rounds, inserting them between rows 5–6 with 3 spaces between the eyes.
Decreasing and Closing the Body
- Perform invisible decreases to taper the shape toward 24 stitches.
- Fill the body with polyfill or leftover yarn before fully closing the base.
- Sew the hole closed and smooth the back with a yarn needle.
2. Crochet the Ears
Creating the Ears
- Begin with black yarn in a magic ring.
- Create four single crochet stitches and increase to six stitches in the next round before switching to white yarn.
- Continue increasing until you reach 10 stitches. Crochet one round at 10 stitches, finishing with a slip knot for sewing.
Attaching the Ears
- Place the ears close to the safety eyes, sewing them securely onto the bunny's body.
3. Crochet the Tail
- Each tailpiece is small and takes just three rounds. Start with black yarn, switch to white after the first round, and increase up to six stitches.
- Create a total of three tailpieces and sew them onto the bunny’s back, with one in the center and the others slightly diagonal.
4. Add Final Decorative Features
Blush Details
- Use pink yarn or makeup to create blush under the bunny's eyes, giving it a cute, blushed look.
Black Spots
- Thread black seed beads onto the body using a thin needle and black thread. Scatter them randomly over the bunny’s body for a decorative effect.
Tutor's Suggestions
The tutor provides several handy tips throughout:
- Use a stitch marker to make working in rounds easier.
- Avoid crocheting chains too tightly.
- Use leftover yarn pieces as stuffing for the body.
- Place safety eyes with care and always double-check their positioning.
Safety Warning: If making this for a child, consider replacing safety eyes and beads with embroidered spots to avoid choking hazards.
Uses
The crocheted sea bunny serves versatile purposes:
- As a decorative plush item.
- A unique gift for Easter.
- An alternative to a traditional Easter bunny.
- A fun addition to an ocean-themed project.
Conclusion
The sea bunny crochet tutorial is a creative project that brings the mysteries of the ocean to life in the form of a plush, artful creation. The detailed instructions combined with the optional decorative features allow you to customize your sea bunny and make it uniquely yours. Whether it's for Easter or simply a gesture of handmade love, this creation is sure to delight!
Crochet Tip
For easier stitching, especially with black yarn or tight stitches, work in a well-lit area or use a headlamp to prevent eye strain. If your yarn squeaks during crocheting, try holding your hook more loosely or switching to a different brand of yarn.


