Work a Beaded Granny Square into your next crochet bag or table mat and see how crystal beads catch the light against the soft rows of yarn around them.
Plain crochet squares do a lot of work in a bag, but sometimes you want one panel with a little shine. This Beaded Granny Square places crystal beads inside the design and frames them with a yarn border. In the sample, green beads sit near the center and darker ones form a ring around them. The flat faces of the beads catch the light at different angles, so the colors can look a little different every time you move the piece. The yarn along the edge gives your eye a place to rest and leaves a clear line where one square can meet the next.
Free Crochet Beaded Granny Square for Accessories
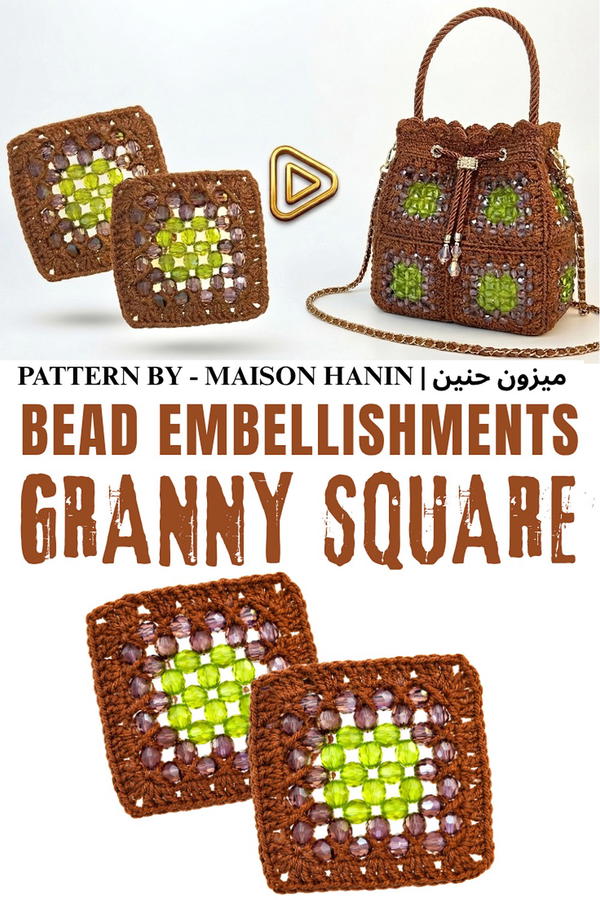
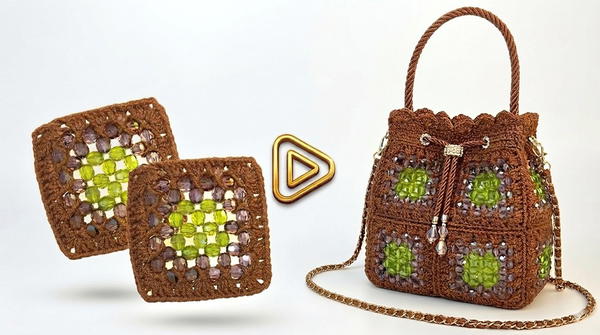
Think about where you want that shine before you decide how many squares to work. One can sit on the front of a plain pouch and draw attention to the center. Several joined together can form the front of a small handbag, where the border lines show how the pieces fit. For something to use at home, place a square on a side table as a base for a small vase. You could also pair it with solid crochet squares in a larger project so the shine appears only in a few places. Each piece is small enough to lay out and turn around as you decide which direction looks best.
Meet the creator
Small details often lead to bigger projects on this channel. The crystal square is one example, and a separate beaded bag project shows how repeating the same shape can build a whole accessory. Viewers who like working with both yarn and beads can find ideas from Maison Hanin | ميزون حنين.
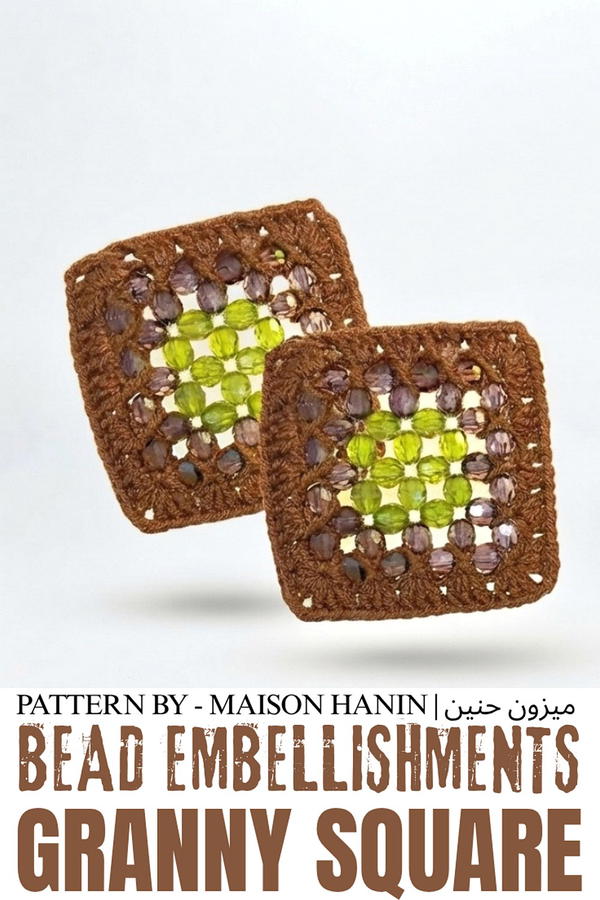
Beaded Granny Square Crochet Pattern
The beaded granny square is a beautiful and elegant crochet technique that incorporates beads for added texture and decoration. This intermediate-level pattern is suitable for crafting bags, home décor items, and fashionable accessories. By combining beadwork with classic granny square construction, this design brings a unique and luxurious touch to crochet projects.
Skill Level
Intermediate – This pattern necessitates familiarity with basic crochet stitches (chains, double crochets, slip stitches) and bead threading techniques. It is ideal for those who have prior knowledge of granny square construction.
Materials
Required Supplies:
- Yarn:
- Medium-weight yarn (YarnArt Jeans, color 70 or similar). Ensure the yarn is smooth and strong enough to support bead placement.
- Beads:
- Two contrasting colors of crystal beads (approximately 8 mm). Choose high-quality beads to enhance your design.
- Crochet Hook:
- Size 2.0 mm, or an appropriate hook for your chosen yarn and bead size.
- Fishing Line or Thread:
- For pre-stringing beads onto your yarn to streamline the process.
Stitch Abbreviations
- Ch: Chain stitch.
- DC: Double crochet stitch.
- SL ST: Slip stitch.
Useful Tips
- Bead Pre-stringing: String beads onto the yarn before beginning your crochet work. This preparation ensures smooth integration of beads into stitches. Use a fishing line or sewing thread for precise bead threading.
- Tension Control: Maintain even tension throughout to prevent distortion or unevenness in bead placement and stitch consistency.
- Shape Maintenance: Check each round to verify the symmetry and sharpness of corners (formed by chain spaces). Adjust your stitch work as needed.
- Bead Placement: Plan your bead arrangement in advance. Be sure to follow the sequence specified in your pattern to create a clean and balanced design.
Pattern Instructions
Preparation Work
- Pre-stringing Beads:
Before starting, string the beads onto the yarn using fishing line or sewing thread. The beads should be threaded in a specific, repeatable sequence that aligns with your intended design. Shift the beads to the farthest end of the yarn to keep them out of the way as you work the initial rounds.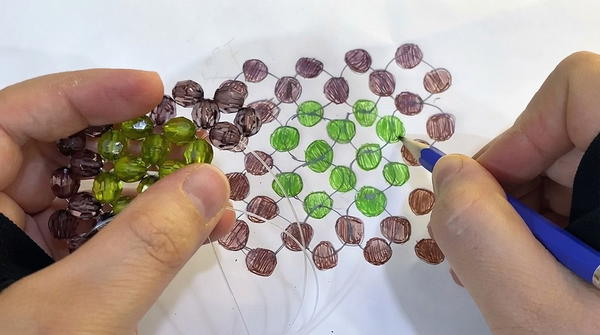
Beaded Granny Square Construction
Foundation Round
- Start the Base Ring:
- Ch 4. Create a ring by joining with a SL ST in the first chain.
- Begin the Square’s Center:
- Ch 3 (counts as the first DC). Work 2 DC into the center of the ring.
- Slide a bead into place as you work your stitches. Then Ch 2 to create the first corner space.
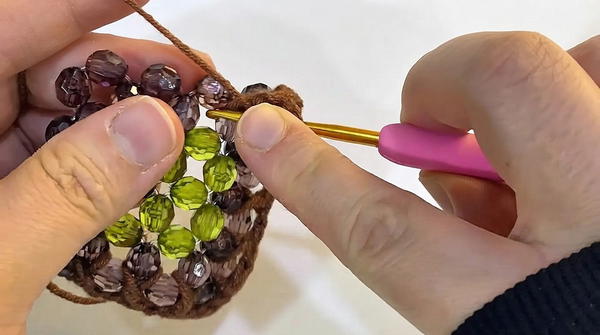
- Repeat for the Square Formation:
- Work 3 DC, slide in another bead, Ch 2 for the next corner.
- Repeat this sequence three more times until the ring is surrounded by four corners.
- Join the round with a SL ST in the top of the starting chain-3.
Expanding the Granny Square
Round 2
- Start the Next Round:
- Ch 3 (counts as the first DC). Work 2 DC into the same corner space.
- Slide a bead into position, Ch 1, and continue stitching across the side.
- Work Around the Square:
- At each corner: Work 3 DC, slide in a bead, Ch 2. Ensure that the corners remain sharp by maintaining even stitches and chain spaces.
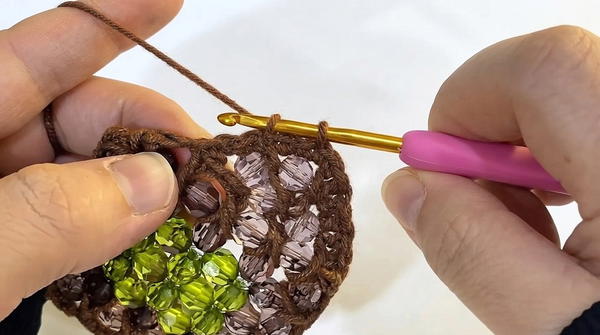
- At each corner: Work 3 DC, slide in a bead, Ch 2. Ensure that the corners remain sharp by maintaining even stitches and chain spaces.
- Complete the Round:
- End the round with a SL ST at the top of the starting chain-3.
Round 3
- Expand the Design:
- Continue working DC clusters (3 DC) in each space between corners.
- Incorporate beads into the design by sliding and securing them between DC clusters.
- Corner Work:
- Maintain corner symmetry by working 3 DC, Ch 3 with bead placement at each corner.
- Ensure Consistency Across the Square:
- Check for even bead placement and spacing throughout the round.
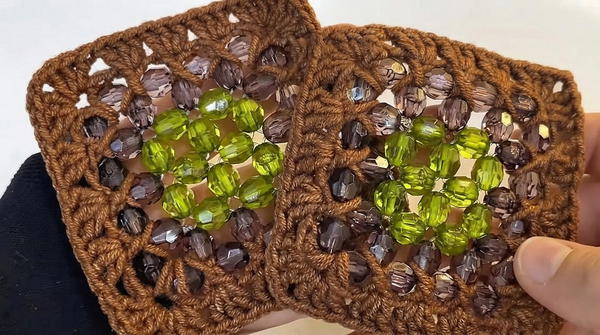
- Check for even bead placement and spacing throughout the round.
Additional Rounds (Optional Expansion)
- Add more rounds to amplify the square size as desired.
- For each round, increase the corner chain spaces slightly (e.g., from Ch 2 to Ch 3 or more).
- Beads should continue to be placed consistently between DC clusters and corners for a polished look.
Final Finishing
- Finishing the Last Round:
- Secure the square by fastening off the yarn after the last SL ST.
- Ensure corners and bead placements are symmetrical and well-aligned.
- Weaving in Ends:
- Use a yarn needle to weave in loose ends along the edges, hiding them within the stitches.
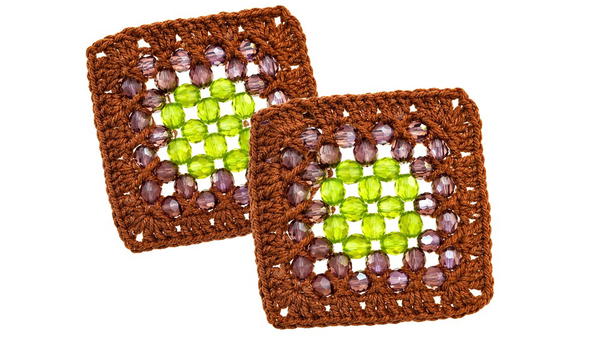
- Use a yarn needle to weave in loose ends along the edges, hiding them within the stitches.
Constructing Multiple Squares
Joining Squares for Larger Projects:
To expand this project into bags, blankets, or garments:
- Use SL ST or sewing techniques to join squares along their edges.
- Maintain alignment of beads and corners for a cohesive design.
Conclusion
The beaded granny square offers a versatile and elegant approach to crochet, blending beadwork with traditional stitch techniques. This intermediate pattern delivers a textured design, perfect as standalone decorative squares or multi-square ensembles. By focusing on symmetry, bead placement, and consistent tension, you can craft stunning projects suitable for any occasion.