Pack for a day out with this Free Crochet Oversized Bag Pattern featuring two warm shades and a zip top that keeps your small essentials together on the go.
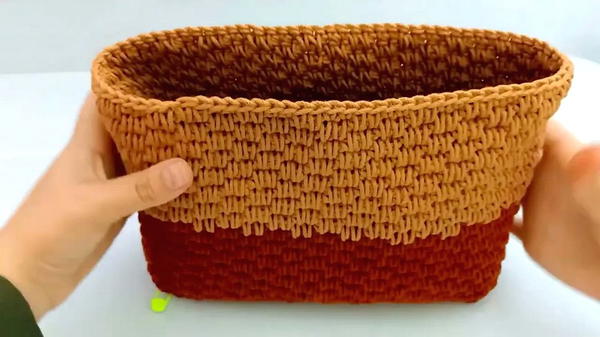
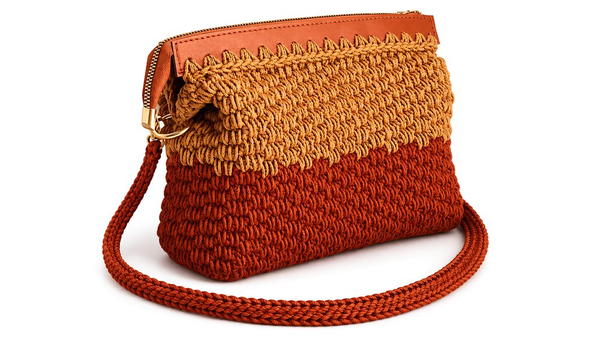
Busy mornings call for somewhere to put your things before heading out. The free crochet oversized bag pattern gives you a two-tone design with a zip across the top and a base deep enough to arrange small essentials inside. Rust covers the lower section, and a warmer tan sits above it. The stitches are easy to see in both colors, with the straight change in shade running across the front.
Lightweight Free Crochet Oversized Bag Pattern with a Zip Top

About Amena’s Designs
Room inside matters in this design, so the bag has a deep base and a top zip for things you take on a short outing. Two yarn colors give the front a clear change in shade. Everyday shapes like this are part of the work shared by Amena Crochet Bags.
At 23 cm wide, 20 cm tall, and 10 cm deep, the sample has room for your phone, a card holder, and a slim glasses case on a short outing. Its depth gives you space to place those items side by side. The zip is handy on public transport or on days when the bag rests under a chair. The sample uses cotton macrame cord in two shades, which gives the surface a clear, even texture.
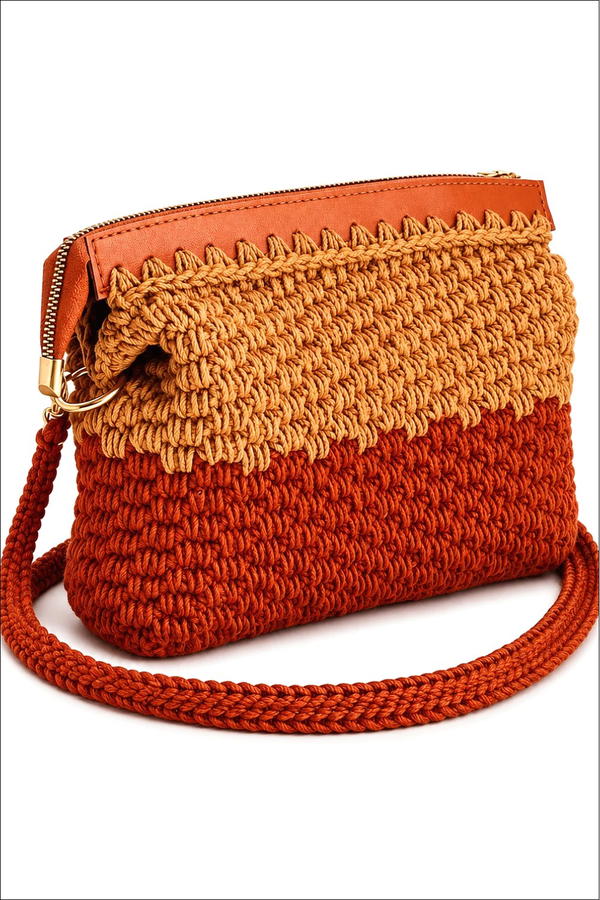
Try the brown and rust version with blue jeans and a plain shirt so the two colors stand out. For a cooler mix, navy with a light gray top section could work well with a dark jacket. Keep the top trim close to the lighter shade for the same clean finish. This is the kind of bag that fits easily into a routine full of quick stops.
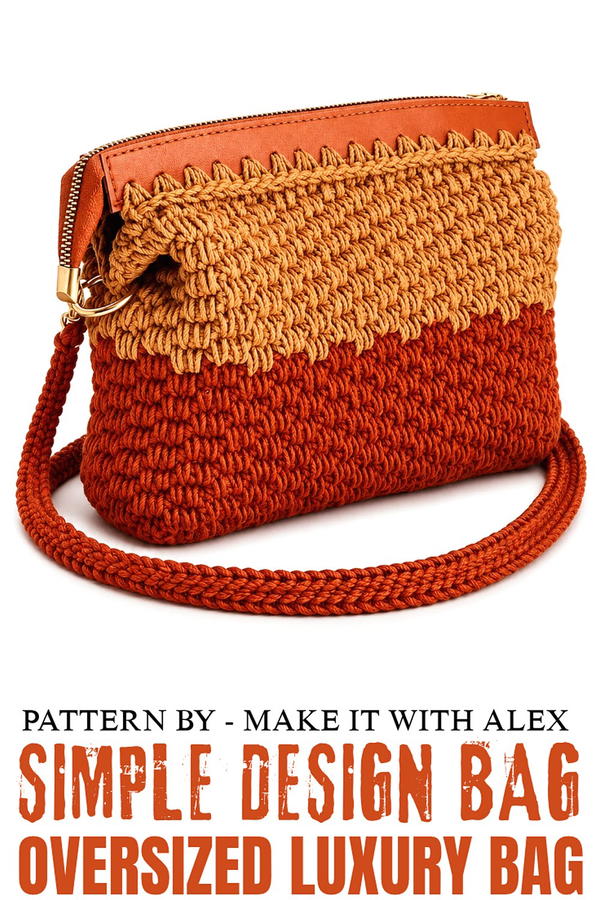
Crochet Macrame Bag with Zipper Closure
This crochet macrame bag is an elegant yet practical design, featuring a sturdy base, spacious body, and a zipper closure for added functionality. Made using macrame cotton thread, this lightweight and durable bag is perfect for everyday use, combining style and practicality.
Skill Level
Intermediate – The pattern includes foundational stitches and techniques such as shaping a bag base, working in continuous rounds, long single crochet stitches, and attaching a zipper. Some sewing is required for installing the zipper and finishing.
Materials
- Macrame Cotton Thread:
- Two rollers in contrasting colors (2.5 mm thickness).
- Crochet Hook:
- 4 mm crochet hook.
- Additional Supplies:
- Scissors – for cutting yarn.
- Zipper with leather attachment – to close the bag.
- Needle – for sewing the zipper.
- Metal Rings – for attaching bag handles or straps.
Stitch Abbreviations
- SC – Single Crochet
- Ch – Chain
Useful Tips
- Consistent Tension: Keep your tension even while creating the base and body to ensure symmetry and sturdiness.
- Mark the First Stitch: Use a stitch marker for the first stitch of each row for clarity while working in continuous rounds.
- Zipper Alignment: Ensure your zipper is symmetrically aligned before sewing to avoid uneven edges.
- Thread Length for Sewing: Leave about 1 meter of thread after completing the last stitch to make sewing easier.
- Bag Dimensions: Modify the number of rows in the base or height to customize the bag size.
Pattern Instructions
1. Base of the Bag
Step 1 – Foundation Chain:
- Create a starting knot and work 31 Ch stitches.
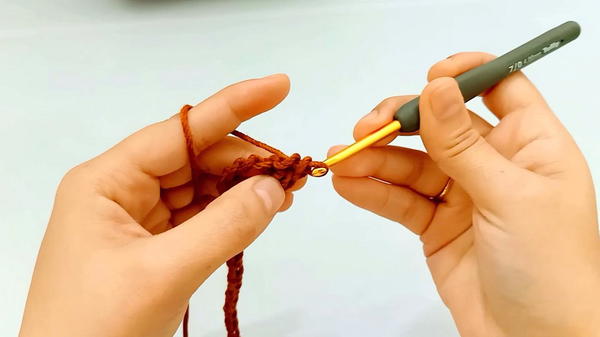
Step 2 – First Row:
- Begin in the 2nd Ch from the hook.
- Work 30 SC stitches across the chain.
Step 3 – Rows 2 to 8:
- Start each row with Ch 1 (not counted as a stitch).
- Work 30 SC stitches into both loops of each stitch from the previous row.
- Repeat this process for a total of 8 rows.
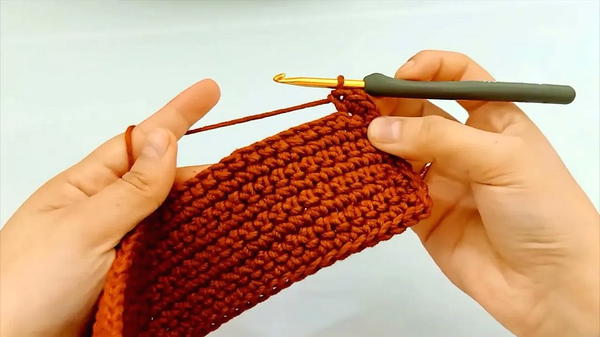
- Base Dimensions: The finished base should measure approximately 21 cm x 6 cm.
2. Single Crochet Around the Base
Step 1 – Begin Around the Outer Edge:
- Work SC stitches around the base perimeter to build its height.
- Along the long side: Work 1 SC in each stitch.
- Along the short side: Work 8 SC stitches evenly across the edge.
Step 2 – Corner Increases:
- In the first corner: Work 3 SC stitches into the same stitch.
- In the second corner: Work 2 SC stitches into the same stitch.
- Repeat this around all four corners to form a rectangular shape.
- At the end, you should have 82 SC stitches around the base.
3. Creating the Body of the Bag
Step 1 – Transition into the Bag Body:
- Skip the starting chain.
- Work 1 SC into both loops of the first stitch of the row.
- Mark the first stitch to keep track of your rows.
Step 2 – Full Single Crochet Row:
- Work a total of 82 SC stitches around the bag in both loops for one full row.
Step 3 – Long Single Crochet Pattern:
- Begin the next row:
- Work 2 SC stitches into both loops at the start of the row.
- Work 2 long SC stitches by inserting the hook under the previous SC stitches, pulling the yarn through, and completing the SC.
- Continue the sequence:
- 2 SC (in both loops), 2 long SC stitches.
- Repeat until the end of the row.
Step 4 – Additional Rows Without Closing:
- Continue repeating the long SC pattern, alternating 2 SC and 2 long SC stitches.
- Do not close the rows but continue working in continuous rounds.
- Complete 15 rows in the first color.
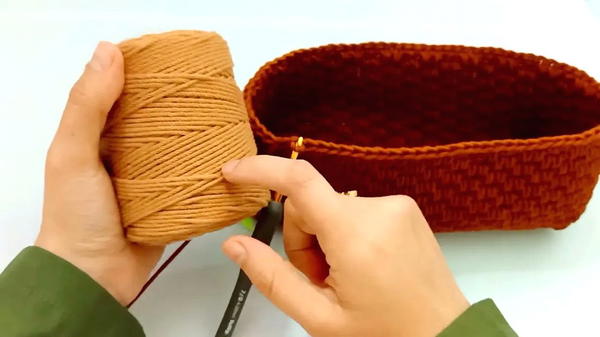
4. Changing Colors
Step 1 – Color Transition:
- At the starting mark, switch to the second color.
- Fasten off the first color and attach the new color securely.
Step 2 – Second Color Rows:
- Work an additional 15 rows in the new color, continuing the same long SC pattern.
5. Adding the Zipper
Step 1 – Preparing the Zipper:
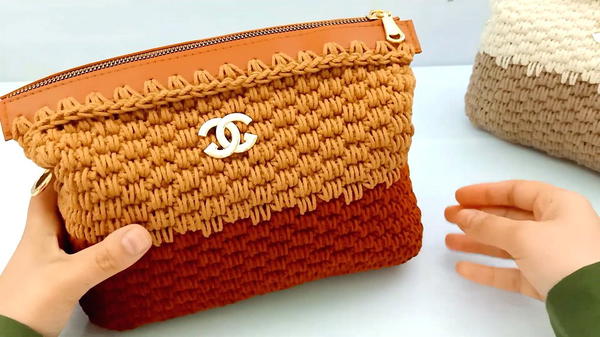
- Start from the first hole of the leather-attached zipper.
- Tie the macrame thread securely to the hole.
Step 2 – Securing the Zipper Edges:
- Ch 1 as the first stitch.
- Work 2 SC stitches into each hole of the leather attachment.
- After the last stitch, leave approximately 1 meter of thread before cutting it.
Step 3 – Repeat for the Other Side:
- Attach the zipper edge in the same way to the opposite side of the bag.
Step 4 – Attaching the Zipper:
- Use a needle and thread to sew the zipper to the last completed row of the bag.
- Align the zipper so that the sides have 32 stitches each, matching the dimensions of the zipper attachment.
Step 5 – Seam Finish:
- After the final stitch, pass the thread under 5 stitches and secure it.
6. Installing Metal Rings
Step 1 – Placement:
- Attach the metal rings to the first beige row underneath the zipper section.
Step 2 – Fix the Rings:
- Ensure they are firmly secured for proper handle attachment.
- Repeat the process for the second ring on the other side of the bag.
Measurements
- Base Dimensions: 21 cm x 6 cm.
- Body Height: Adjusted based on the number of rows.
- Handle Placement: Attached via secured metal rings.
Conclusion
This lightweight and spacious macrame bag features a durable base, smooth body texture, and a functional zipper closure. It is spacious enough for daily essentials while remaining stylish with its unique color-block design. Modifications can be made to dimensions, colors, or embellishments to suit personal preferences.