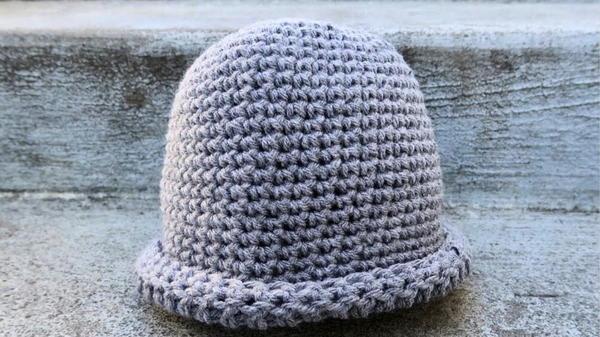
Cozy up in timeless style with this Free Crochet Hat Pattern, featuring soft texture, snug warmth, and a fit that flatters through every chilly day.
A brisk morning breeze often stirs more than the leaves, it stirs the need for something warm, personal, and timeless. Nothing speaks to that comfort like a handmade hat that fits just right and adds charm without effort. A crochet hat offers more than warmth; it's a soft shield against the chill, a staple that moves effortlessly between cozy weekends, outdoor strolls, and brisk commutes. With just the right amount of texture and stretch, it hugs the head snugly while allowing breathability, making it ideal for layering through changing seasons.
Soft Texture - Free Crochet Hat Pattern to Try Right Now
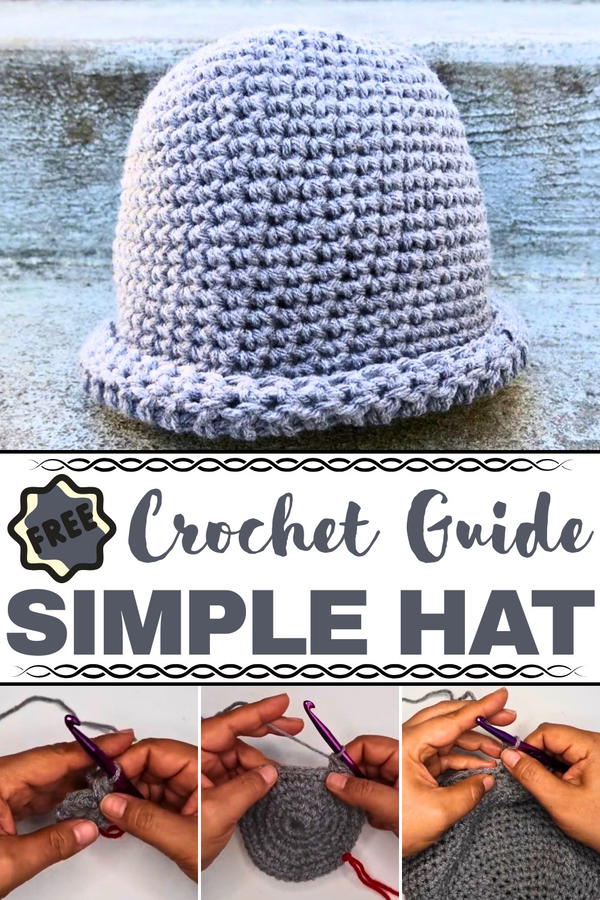
This style blends simplicity with function, using common stitches like single crochet, half-double crochet, and front post stitches to create a fabric that’s soft yet structured. It begins with a flexible ribbed band and builds upward with rounds that gradually shape the crown. Whether finished with a pom-pom or left minimalist, its appeal is in its quiet versatility.
The hat’s adaptable size suits all ages, and its repetitive rows make it an ideal project for relaxation. It’s easy to personalize with color changes or stitch adjustments and doubles as a thoughtful gift or donation. With minimal materials, the result is stylish, practical, and stitched with intention—a true winter essential.
Materials Needed
The materials required for this project are simple and can be sourced easily:
- Yarn: Vian Brown Proud of Love yarn (or a comparable medium-weight yarn).
- Hook: 6.5 mm aluminum crochet hook.
- Yarn needle: For weaving in the ends.
- Chain/stitch markers: Scraps of yarn or safety pin-style stitch markers.
- Scissors: For cutting yarn ends.
Level of Difficulty
This hat is perfect for beginners who are new to crochet. The video includes step-by-step instructions, ensuring clarity and accessibility. The tasks are repetitive, but concepts like stitch marking and weaving ends may require basic familiarity with crocheting.
Special Features of the Hat
- Customizable Size: You can add extra rows to make the hat longer or wider.
- Foldable Brim: The double-layered brim gives the hat a unique, clean look while making it warmer and more comfortable.
- Tight Weave Design: Ensures warmth and durability.
- Versatile Fit: The hat can fit various head sizes with simple adjustments.
Step-by-Step Instructions
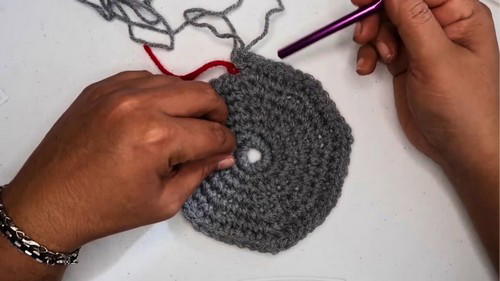
1: Start with the Base Circle
- Create a slip knot and chain 4.
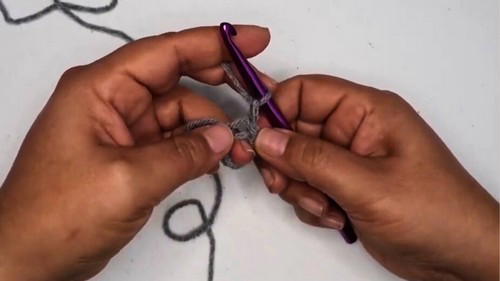
- Join the first and last chain with a slip stitch to form a small circle.
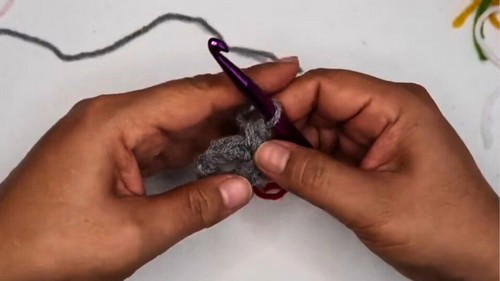
- Round 1: Chain 1 and crochet 8 single crochets into the circle. Pull the loose yarn end as you go along to secure it.
2: Increase the Circle
- Round 2: Work two single crochets in each stitch of the previous round for a total of 16 stitches. Use a stitch marker to mark each new row’s start.
- Round 3: Alternate between one single crochet in the first stitch and two single crochets in the next stitch (1-2 pattern) for a total of 24 single crochets.
- Round 4: Increase to 32 single crochets by following a 1-1-2 pattern (two separate single crochets, followed by two in one stitch).
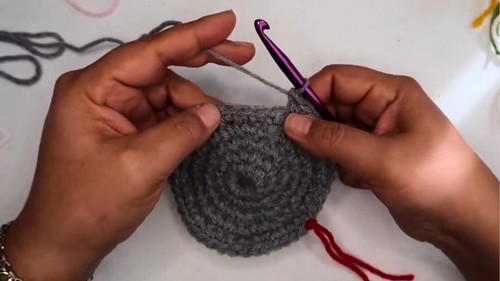
3: Continue Increasing & Define Hat Shape
- Rounds 5-6: Keep increasing by adding one extra single crochet in each sequence before a 2-single crochet increase. For example:
- Round 5: 1-1-1-2 pattern; total = 40 stitches.
- Round 6: 1-1-1-1-2 pattern; total = 48 stitches.
- Round 7: Follow the pattern of 1-1-1-1-1-2 for a total of 52 stitches.
4: Maintain the Body
- From Rounds 8 to 21 (or 22 depending on your desired size), maintain 52 single crochets per round without increasing stitches. Ensure you use a stitch marker to track the starting point of each round.
5: Begin the Brim
Row 22 (or your equivalent):
- Chain 2 (counts as the first double crochet).
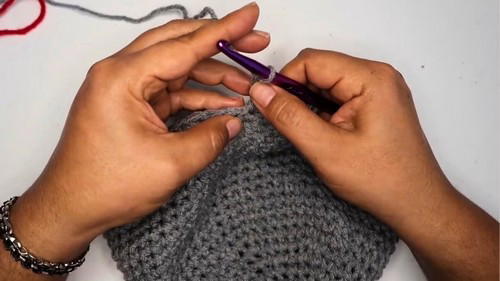
- Work double crochets in each stitch around for a total of 52 stitches.
- Slip stitch into the top of the first chain 2 to finish the round.
- Chain 2 (counts as the first double crochet).
Row 23: Repeat the same process as Row 22 (double crochet throughout).
Final Row: Replace all double crochets with single crochets for a tight and neat brim finish.
Step 6: Finishing the Hat
- Fasten off your yarn by pulling it tight through the loop and cutting the end.
- Weave the loose ends into the back loops using a yarn needle. Use a back-and-forth motion to secure the ends.
- If there's a small hole at the top of the hat, use your yarn needle and matching yarn to stitch it closed.
Tutor’s Suggestions
- Stitch Markers: Always use stitch markers to keep track of the round’s start. Without them, it’s easy to lose count.
- Tension: Keep your stitches loose when creating chains to avoid tightness in the foundation rounds.
- Customization: Add additional rows to make the hat longer or adjust the brim’s width for a custom fit.
- Counting Stitches: Use a piece of paper to jot down counts or groups to prevent mistakes.
Uses
- Winter Wear: The tightly woven pattern ensures warmth during cold weather.
- Gifts: The design is simple yet elegant, making it a thoughtful handmade gift.
- Fashion Accessory: The hat’s foldable brim adds a touch of sophistication, perfect for everyday or casual outfits.
Conclusion
The City Sophisticate Hat is a versatile and stylish crochet accessory that can be tailored to fit any preference. With its simple step-by-step instructions, even beginners can tackle this project confidently. By following the tutorial, you can create a functional yet fashionable hat that will keep you warm while looking sophisticated.
Bonus Tip
When weaving in ends, be sure to work your needle in various directions (up, down, side to side) to ensure the yarn doesn’t unravel over time. This secures your project and gives it a professional finish.


