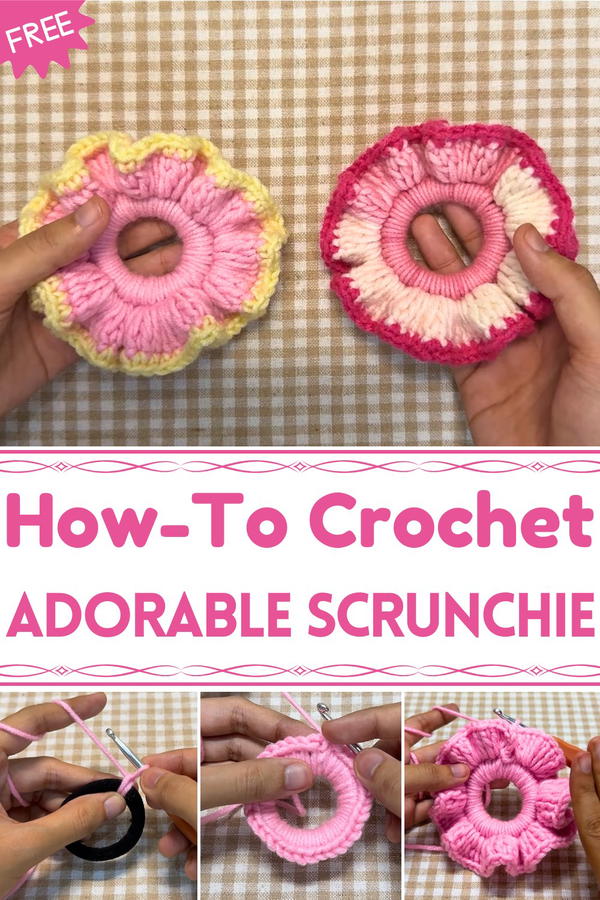
Style your hair with charm using this Free Crochet Scrunchie Pattern, offering vibrant texture, playful flair, and a chic accent for any hairstyle.
Hair accessories play an important role in daily grooming, offering both practicality and style for all hair types. Scrunchies have become a preferred choice because they hold hair securely without causing breakage or discomfort, providing a gentle alternative to standard elastics. The Free Crochet Scrunchie Pattern allows crafters to make soft, flexible hair ties that combine functionality with charm.
Cozy Charm Crochet Scrunchie Pattern for Fancy Wear
Its textured yarn provides a subtle grip that keeps hairstyles in place while remaining comfortable for extended wear. These scrunchies are versatile, suitable for casual outings, workouts, or even as a delicate accent for more formal looks. The pattern allows for customization in color, size, and stitch texture, giving each piece a unique personality that reflects individual taste. Lightweight and durable, crochet scrunchies withstand frequent use and washing while maintaining their shape and elasticity.
Beyond holding hair, they can double as wrist accessories or thoughtful handmade gifts, adding a personal touch to everyday routines. Each completed scrunchie merges utility, creativity, and aesthetic appeal, turning a simple hair accessory into a stylish, functional, and versatile item. With this crochet project, everyday hair care is enhanced by comfort, charm, and a handcrafted quality that brightens both style and routine.

Special Features
- Ruffled Design: The scrunchie features elegant ruffles that give it a stylish and full look.
- Beginner-Friendly: The tutorial uses basic crochet stitches—single crochet, double crochet, and slip stitches—with no need for precise stitch counts, making it approachable for beginners.
- Customizable: The design can be made with solid, variegated, or multiple colors to match outfits or occasions.
- Multi-Purpose: Beyond being a personal accessory, the scrunchie works as party favors, gifts, or a product to sell.
Materials Needed
- Yarn: Aran Weight 4 Acrylic Yarn in two colors (main and border colors).
- Crochet Hook: 4.5 mm hook.
- Darning Needle: A needle with a large eye for weaving in ends.
- Scissors: For trimming the yarn.
- Hair Tie (Elastic Band): The base for crocheting the scrunchie.
Level of Difficulty
Beginner: This scrunchie uses basic techniques like chaining, single crochet, double crochet, and slip stitching. The lack of precise stitch count and the repetitive pattern make it a relaxing and unintimidating project for new crocheters.
Step-by-Step Instructions
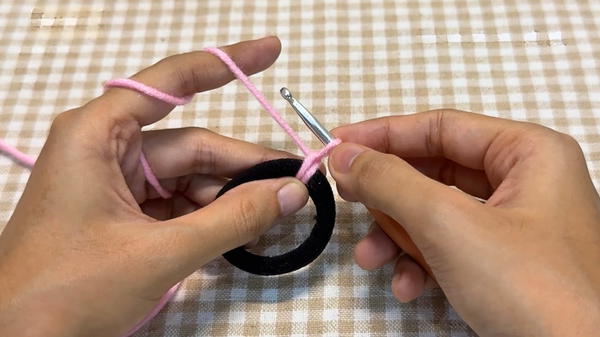
Step 1: Starting with the Hair Tie (Round 1)
Attach the Yarn:
- Hold the hair tie in one hand and the yarn in the other.
- Place the yarn behind the hair tie, leaving a substantial tail for weaving in later.
- Use your crochet hook to pull up a loop through the hair tie.
Chain 2:
- This initial chain serves as the first "single crochet" of the round.
Single Crochet Around the Hair Tie:
- Insert your hook into the center of the hair tie, yarn over, and pull up a loop.
- Yarn over again and pull through both loops on the hook to create a single crochet.
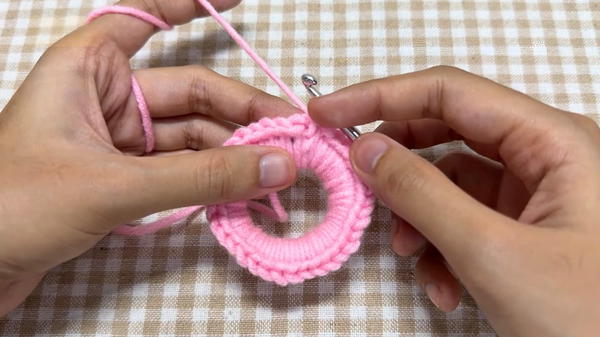
- Repeat this process, making as many single crochets as needed to completely cover the elastic. The black part of the tie should not be visible.
Close the Round:
- Slip stitch into the topmost chain of the initial chain-2 to connect the round.
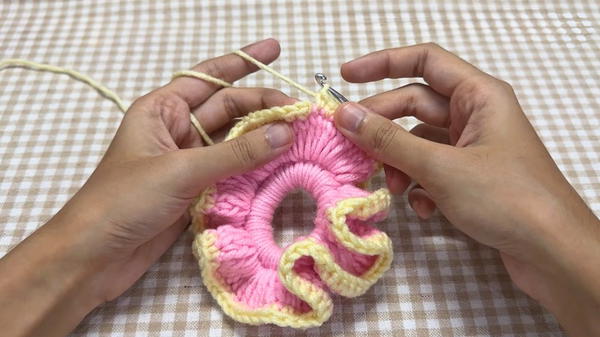
Step 2: Creating the Ruffles (Round 2)
Chain 3:
- Start Round 2 with a chain-3, which counts as the first double crochet.
Three Double Crochets in Every Stitch:
- In each stitch of the first round, make 3 double crochets.
- To create a double crochet:
- Yarn over, insert your hook into the stitch, yarn over again, and pull up a loop (3 loops on the hook).
- Yarn over, pull through the first 2 loops, yarn over again, and pull through the remaining 2 loops.
Push Stitches Aside:
- As the stitches pile up, they may become crowded and obscure the next stitch. Gently push them aside to see each stitch clearly.
Close the Round:
- Once all stitches are complete, slip stitch into the topmost chain of the initial chain-3.

- Once all stitches are complete, slip stitch into the topmost chain of the initial chain-3.
Step 3: Adding the Border (Round 3)
Change to the Border Yarn Color (Optional):
- Attach the new color yarn to any stitch using your preferred method. Ensure a length of the new yarn tail is left for weaving in.
Chain 1:
- Start the round with a chain-1.
Single Crochet in Every Stitch:
- Insert your hook into each stitch, pull up a loop, yarn over, and pull through both loops to create a single crochet.
- Repeat this around the scrunchie while carrying the tail yarn to avoid excess weaving in later.
Close the Round and Fasten Off:
- Slip stitch into the first single crochet of the round.
- Chain 1 and cut the yarn.
- Pull the tail yarn tightly to fasten off.
Step 4: Weaving in the Ends
Thread the Yarn into a Darning Needle:
- Insert the loose yarn ends into the needle.
Hide the Ends:
- Pass the needle under and behind the stitches, working on the wrong side of the scrunchie.
- To secure the yarn, reverse direction and stitch backward, creating a locking mechanism.
Trim Excess Yarn:
- Once the ends are woven in and secure, cut off any extra length.
Step 5: Shaping the Ruffles
- Adjust the ruffles according to personal preference. Keep them flat for a broader scrunchie or fold them for a dense, compact look.
Tutor’s Suggestions
- Focus on Tension: Adjust the yarn tension as you work to ensure your stitches are uniform and not too tight. This will keep the scrunchie stretchy.
- Experiment with Colors: Try using contrasting or variegated yarns to make unique and colorful designs.
- Push Stitches for Visibility: Move completed stitches aside to avoid missing any in crowded areas.
- Count for Precision: While no exact stitch count is required, observe symmetry along the band for a balanced look.
Uses
- Personal Accessory: Perfect for casual or fancy settings.
- Gifting: Makes an excellent handmade gift for loved ones.
- Party Favors: Customizable for themed parties or events.
- Small Business Product: Great for selling at craft markets or online.
Tip
When adding the ruffles, ensure that your three double crochets are evenly spaced to create consistent, full ruffles. This enhances the scrunchie’s visual appeal and texture.
Conclusion
Crocheting a ruffled scrunchie is a fun, easy, and satisfying project suitable for crafters of all levels. With a combination of creativity, beginner-friendly techniques, and endless color combinations, this scrunchie can become a staple accessory for yourself or a loved one.


