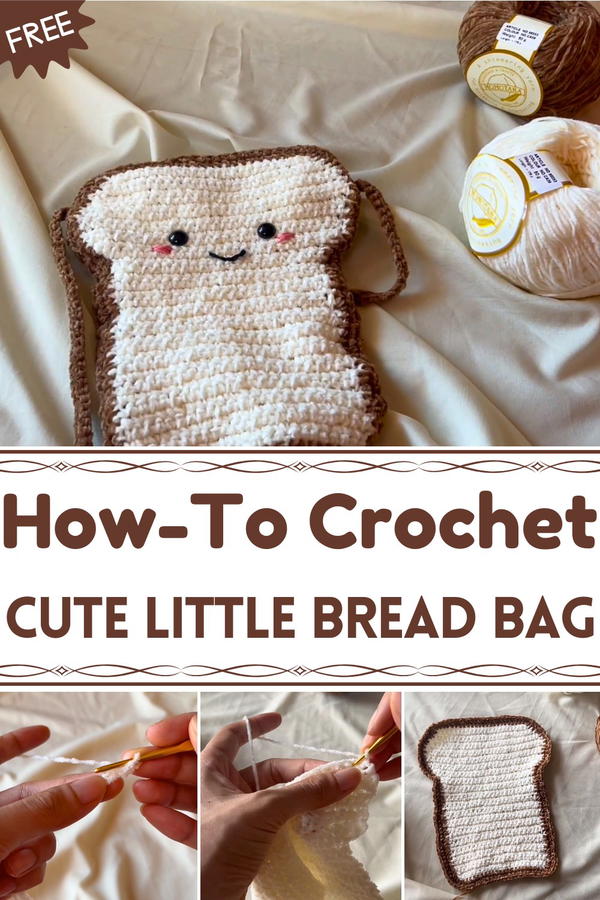
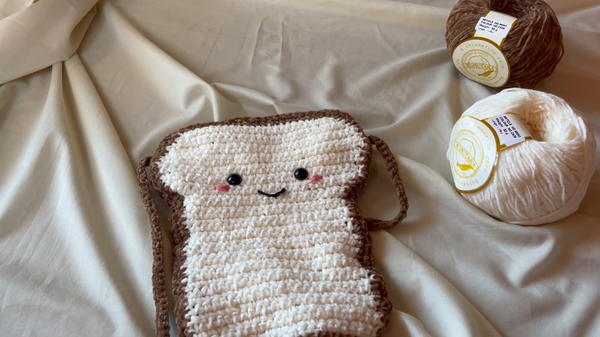
Carry charm wherever you go with the Free Crochet Little Bread Bag Pattern, making a cute and practical accessory perfect for daily use or gifting.
Crochet offers a unique way to turn simple yarn into functional and charming accessories, combining creativity with practicality. Small, handheld bags have gained popularity for their versatility and whimsical appeal, allowing crocheters to produce items that are both playful and useful. The Free Crochet Little Bread Bag Pattern captures this trend perfectly, providing an opportunity to make a miniature bread-shaped bag that stands out for its detail and utility.
How to Crochet Little Bread Bag Pattern Quickly at Home
Beyond its aesthetic appeal, this project encourages skill development, enhances fine motor coordination, and sparks creativity. The finished bag is lightweight yet durable, serving as a playful accessory, a conversation piece, or a unique gift.
By transforming simple yarn into a miniature, functional creation, this pattern demonstrates how crochet can merge artistry with practicality, producing an item that delights in both appearance and purpose.
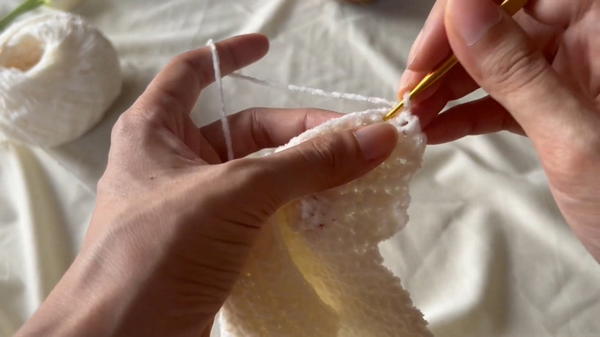
The construction begins with forming the bread’s base, followed by shaping the crust and finishing with a strap for easy carrying.
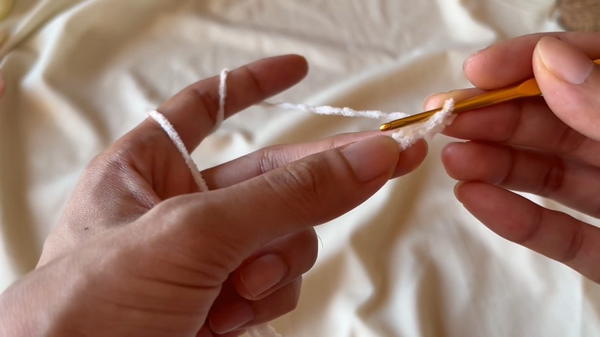
Step-by-step instructions, accompanied by clear visuals, ensure accuracy and make the process enjoyable.
This pattern guides crocheters through crocheting a small, bread-inspired bag that is ideal for carrying essentials, gifting, or adding a distinctive touch to personal accessories.
Using basic stitches, it remains approachable for beginners while offering satisfying detail for more experienced crocheters.
Materials and Tools
Yarn:
Beige or Cream Yarn: For the main body of the bread slice.
Brown Yarn: For the crust border and the shoulder strap.
Notions:
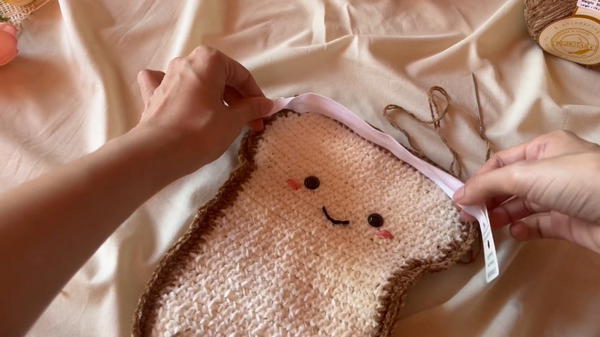
Safety Eyes (12 mm): For the face.
Zipper (7 inches): For the bag closure.
Embroidery Floss: Pink (for cheeks) and Black or Dark Brown (for the mouth).
Glue: For securing the safety eyes.
Tools:
Crochet Hook: 4/0 (2.5 mm) is recommended.
Yarn Needle (Tapestry Needle): For weaving ends and assembly.
Sewing Needle and Thread: Required for attaching the zipper.
Level of Difficulty: Intermediate
This project is best suited for Intermediate crocheters.
Flat Work and Shaping: It requires diligent counting while working flat and complex shaping involving increases for the rounded top and decreases/slip stitches for the curved side edge.
Detailed Assembly: The project is completed with hand-sewing the zipper and carefully embroidering the facial features, which requires attention to detail.
Special Features and Uses
Special Features
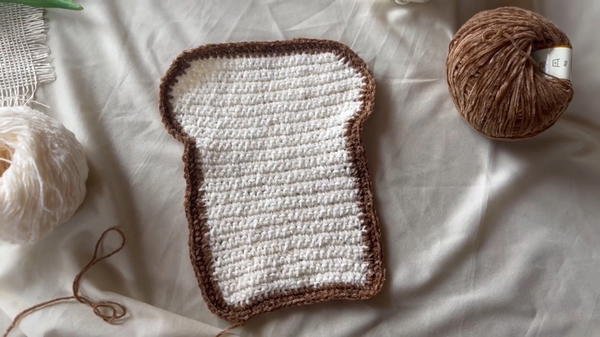
Unique Shape: It perfectly mimics a slice of bread, achieved through specific increases and decreases.
Facial Features: The use of safety eyes and embroidered cheeks/mouth gives the bag a distinct, cute Amigurumi style.
Functional Closure: The finished bag includes a hand-sewn zipper closure.
Uses
Coin Purse/Pouch: Ideal for carrying change, cards, or small items.
Novelty Bag: Can be worn as a small shoulder bag or crossbody accessory (if the strap is added).
Gift Idea: A fun and personalized handmade gift.
Tutor's Suggestions
Sizing Customization: The pattern is easily adapted for smaller or larger sizes. The tutor suggests starting with a foundation chain of 20 or 15 chains if you want a smaller bag, using the provided pattern as a proportionate guide.
Bread Slice Consistency: You must crochet two identical bread slices for the front and back of the bag. Check that both pieces are exactly the same size before proceeding to assembly.
Zipper Marking: Before sewing the two bread panels together, hold the 7-inch zipper up to the top opening and mark the exact start and end points. This ensures you leave the perfect length opening for the zipper placement.
Step-by-Step Guide
This project guides you through creating a charming, unique little pouch designed to look like a slice of bread. The pattern involves working flat, shaping the rounded top, adding a crust border, and attaching a zipper and strap to complete the functional bag. It's a delightful accessory perfect for personal use or gifting.
Conclusion
Your crocheted bread bag is now complete! The careful combination of simple stitches for shaping and the addition of embroidered details and a functional zipper results in a charming and practical accessory.
Tip
When embroidering the face, use a pin to mark the exact placement of the eyes and mouth before you commit to gluing or stitching. This allows you to easily adjust the features until they look perfectly balanced and symmetrical.


