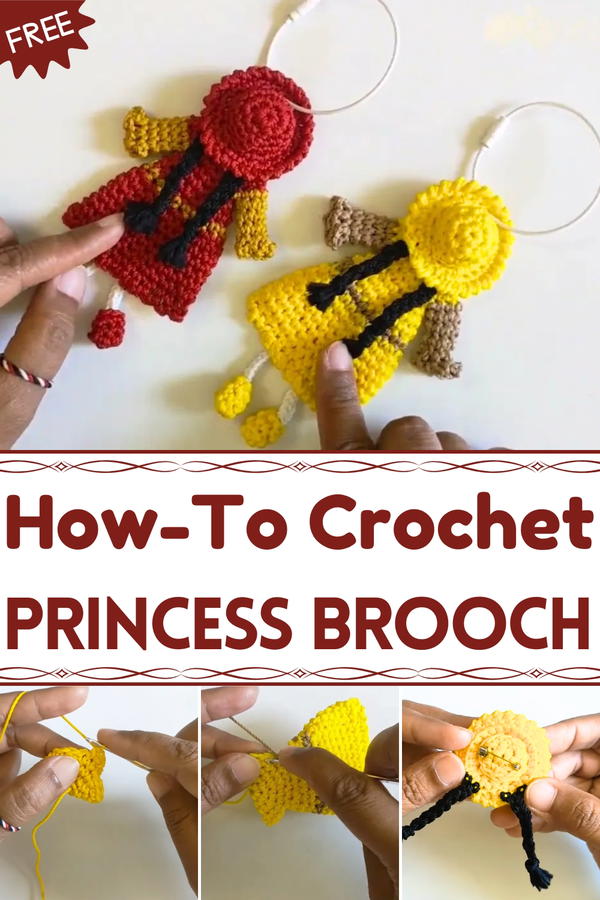
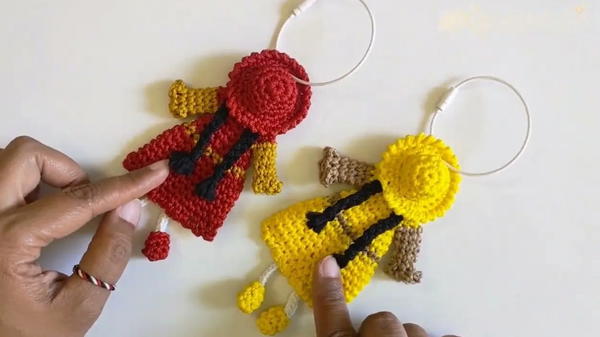
Add royal charm to any outfit with this Free Crochet Princess Brooch Pattern, a delicate handmade accessory perfect for gifts, décor, or personal flair.
Royalty has long inspired admiration, with delicate emblems and miniature adornments symbolizing elegance and charm. A Free Crochet Princess Brooch pattern brings that regal essence to a handmade accessory that can brighten clothing, bags, or scarves with a touch of whimsy. Perfect for pinning on jackets, tote bags, or gifting to young admirers, this brooch combines playful charm with a lasting keepsake quality.
How to Crochet Princess Brooch Pattern for Party Gifts
The process of shaping each detail encourages patience and focus, allowing makers to enjoy a soothing, mindful rhythm while crocheting a piece that feels both intricate and approachable. Its lightweight structure ensures comfort when worn, while customizable colors and accents make every brooch unique, reflecting personality or a favorite palette.
Beyond personal use, these brooches make thoughtful gifts for birthdays, celebrations, or themed events, adding a memorable handcrafted touch that stands out. Compact and durable, they are easy to store, transport, or display, making them versatile accessories that enhance everyday attire or special outfits. A Free Crochet Princess Brooch pattern transforms simple yarn into a charming emblem of elegance and playfulness, offering both creative satisfaction and a wearable token of joy that can be treasured for years.
Special Features
- Dual Functionality: The brooch can be used as a bag hanger or pinned onto clothing or accessories.
- Eye-Catching Details: From its lace edging to its braided accents, the brooch features charming and intricate crochet work.
- Customizable: The color choices and decorative elements can easily be tailored to your personal style.
- Beginner-Friendly Design: While featuring detailed patterns, the project is achievable for those with basic crochet skills.
Materials Needed
- Polycherry Onitsuga Yarn (or a similar yarn of your choice)
- 4/0 Crochet Hook (Tulip brand, as recommended in the video, but any size-appropriate hook will work)
- Dacron Stuffing (for filling the hat)
- Tapestry Needle
- Stitch Markers
- Scissors
- Lighter (for tidying up thread ends)
- Pin (2 cm in size)
- Optional: Carabiner (for converting the brooch into a bag hanger)
Step-by-Step Process
1. Creating the Main Brooch Body
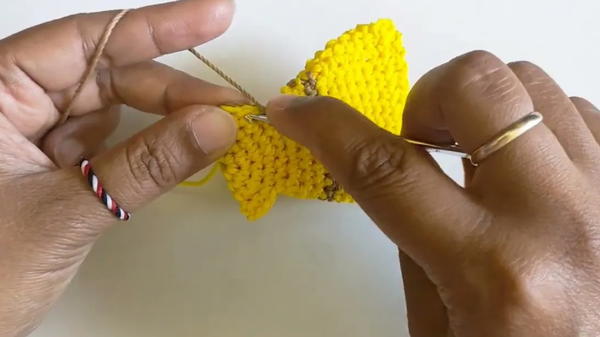
Start with Magic Ring:
- Make a magic ring and crochet 6 single crochets (sc) into the ring.
- Tighten the yarn and combine the stitches using a slip stitch.

Build On the Ring:
- Row 2: Chain one and crochet two single crochets in each stitch (increase) around (12 stitches total). Slip stitch to join.
- Row 3: Chain one, make one sc, then an increase, repeating six times (18 stitches total). Slip stitch to join.
- Row 4: Chain one, make two scs, then an increase, repeating six times (24 stitches total). Slip stitch to join.
Shape the Brooch:
- Row 5: Chain one, make six scs, skip six stitches, then crochet another six scs. Slip stitch to join (12 stitches total).
- Row 6: Chain one, make one sc and an increase, repeating six times (18 stitches total). Slip stitch to join.
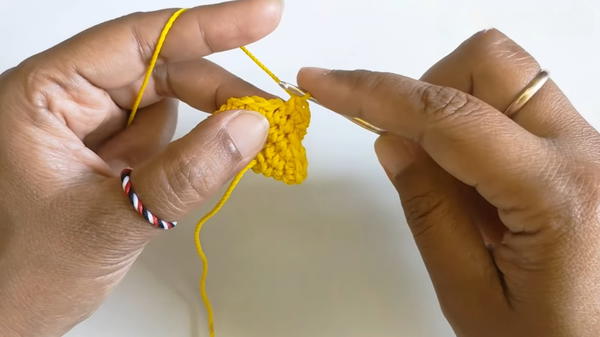
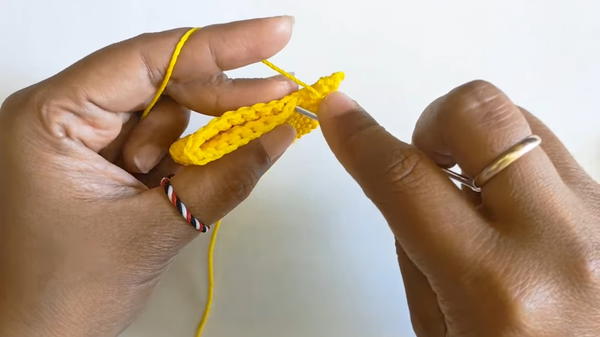
2. Adding Laces
- Rows 7-16: Crochet as described with 24 sc in 12-row combinations, alternating thread colors if desired.
- To form the laces, rotate the piece, and make three chains. Combine two stitches with a single crochet, repeating 11 times to create 12 lace edges. Tie off and tidy using a lighter.
3. Creating the Details
A. Sleeves
- Using the skipped stitches from Row 4, make one chain and six scs in every row. End with a slip stitch, continuing for 4 rows.
- In Row 5, switch to a decorative pattern: make one sc and three chains, repeating six times. Finish, secure, and break the thread neatly.
B. Legs
- For each leg, insert white thread approximately 50 cm long to the determined position. Crochet nine motifs along the designated section, skip a stitch, and repeat the pattern for the second leg.
C. Shoes
- Use a magic ring and crochet 6 scs in the first row. Repeat this for the second and third rows. When finished, combine the shoes with the leg pattern using a tapestry needle.
D. Hat
- Make two identical pieces starting with 12 scs. Combine the two pieces with scs through their edges. Stuff with dacron for shape.
- Add decorative rows: one back-loop-only row (24 stitches) and one front-loop-only row (24 stitches). End with a crab stitch for a neat edge.
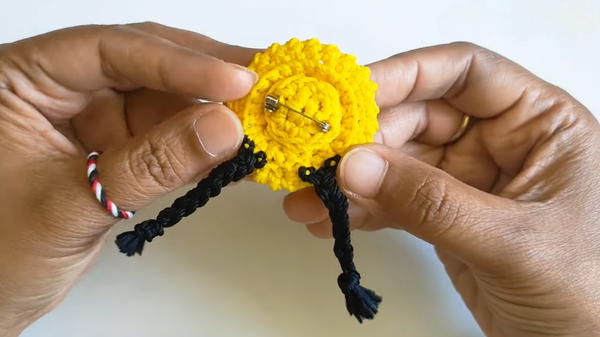
E. Hair
- Cut threads (20 cm long) into sets of three. Insert them into the back loops, knot firmly, and braid. Secure the braid neatly with scissors.
4. Final Assembly
- Combine the hat, dress, and brooch base using the tapestry needle. Sew carefully using leftover thread to make the assembly neat and secure.
- Insert the pin through the holes made earlier and stitch the remaining pieces together. Optional: attach a carabiner to convert the brooch into a bag hanger.
Level of Difficulty
- Beginner to Intermediate: Basic stitches like single crochet, slip stitch, and magic ring are employed. Additional decorative elements may require some focus, but the tutorial is easy to follow.
Tutor's Suggestions
- Use stitch markers to keep track of row beginnings, as the pattern alternates between rows with increases and rows with straight stitches.
- Focus on tension consistency to ensure the laces and decorative elements look even.
- Tidy the thread ends carefully with a lighter for a professional finish.
Uses
- Versatile Accessory: Wear it as a brooch or bag decoration.
- Personalized Gift: A thoughtful, handmade present for loved ones.
- Decorative Craft: Use it to enhance bags, hats, clothing, or even as home decor.
Tip
To avoid errors in the lacing process, count your stitches carefully and make use of stitch markers for accurate placements. For color changes, make sure to secure and tidy all threads before proceeding with new rows.
Conclusion
This crochet brooch pattern combines creativity, utility, and visual appeal, making it a great addition to your crochet projects. The intricate lace, braided hair, and optional pin or carabiner give it a unique finish that is both decorative and functional.


