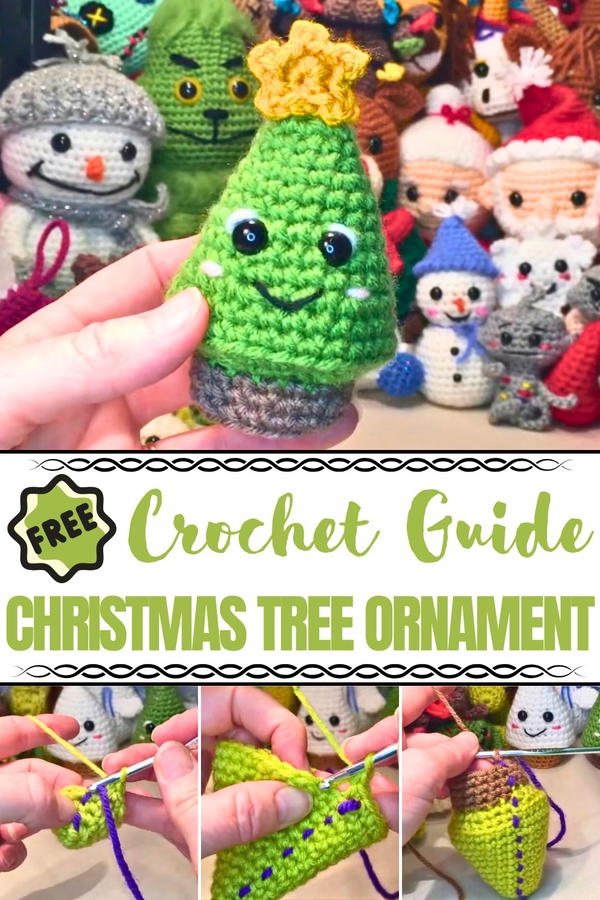
Brighten your holidays with the Crochet Christmas Tree Ornament pattern, adding timeless charm and heartfelt warmth to festive décor.
as families gather around twinkling lights and laughter fills the air, ornaments become more than decorations—they hold memories of togetherness and tradition. The Crochet Christmas Tree Ornament pattern captures this sentiment in a charming handmade form that adds warmth to any holiday setting. With its delicate stitches and festive silhouette, this ornament becomes a timeless keepsake, perfect for hanging on the tree, adorning garlands, or even brightening gift wraps with a personal touch.
Elegant Crochet Christmas Tree Ornament for Seasonal Style
Its lightweight build makes it easy to display, while its soft texture adds a cozy, homely feel compared to store-bought alternatives. Whether gifted to loved ones or kept as part of a treasured collection, each ornament carries a story stitched into its detail. The process of making it offers calm and focus, rewarding patience with a delightful finished piece that symbolizes the joy of the season.
Color variations, small embellishments, or added sparkle can turn each ornament into a unique treasure, reflecting individual style and tradition. More than just decoration, these handmade ornaments become heirlooms, passed down through holidays to come, bringing both beauty and heartfelt meaning to the festive season. The Crochet Christmas Tree Ornament pattern truly captures holiday spirit in yarn and stitches.
Materials Needed
To crochet this Christmas tree, you will need:
- Yarn:
- Green yarn (tree)
- Brown yarn (trunk)
- Yellow yarn (star)
- Optional pink yarn (cheeks)
- Optional black yarn (mouth or other decorations)
- Hook: 4.25mm crochet hook
- Safety Eyes: 10mm safety eyes
- Fiber Filling: For stuffing the tree and trunk.
- Scissors and Darning Needle: For cutting yarn and sewing parts together.
- Stitch Marker (Optional): To mark the beginning of rows.
Special Features
- Beginner-Friendly Design: Simple stitches make it accessible for beginners, with detailed guidance provided.
- Cute and Customizable: Add safety eyes, embroidered cheeks, or even bows to personalize the tree.
- Versatile Christmas Décor: Can work as an ornament, a desk accessory, or a handmade gift.
- Clean Finish Techniques: Includes tips for making details like seamless stars, adding stuffing proportionally, and hiding knots effectively.
Level of Difficulty
Beginner-Friendly with Some Experience Recommended
While the tutorial uses basic crochet stitches (magic ring, single crochet, increases, and decreases), switching between different yarn colors, adding facial details, and assembling small parts might require some familiarity with amigurumi techniques.
Tutor's Suggestions
- Start Low and Slow: For beginners, focus on the initial rows to establish a smooth foundation. Use a stitch marker to track the start of each round.
- Control Tension: Keep your stitches tight but not too tight; this ensures the stuffing doesn't show through gaps.
- Stuff Gradually: Stuff small amounts along the way to maintain the shape of the tree and trunk.
- Add Personal Touches: Consider unique detailing like little ornaments, embroidered patterns, or tiny bows to make your work stand out.
Step-by-Step Instructions
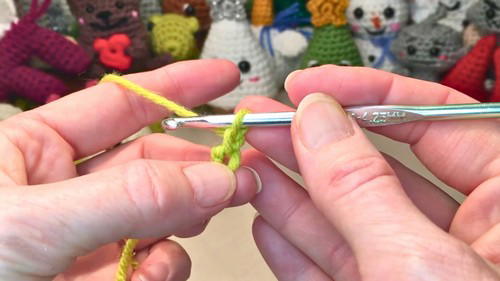
1. Crocheting the Tree
Start with the Tip:
- Create a magic ring and make 6 single crochets (sc) into the ring. Pull the loop tight to close.
- For Row 2, alternate 1 sc and 1 increase, resulting in 8 stitches.
- In Row 3, alternate 1 increase, 1 sc around for 12 total stitches.
Expand and Shape the Cone:
- Continue increasing in future rows as follows:
- Row 6: 1 sc, 1 increase = 18 stitches.
- Row 9: 2 sc, 1 increase = 24 stitches.
- Row 12: 3 sc, 1 increase = 30 stitches.
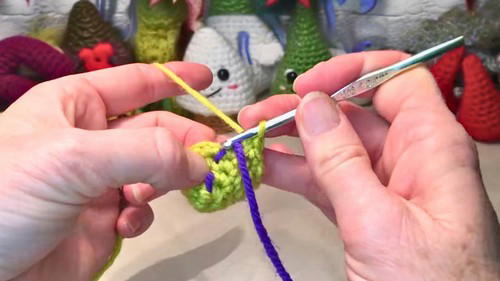
- For the even-numbered rows, work around the previous row in single crochets without increases.
- Continue increasing in future rows as follows:
Add the Base:
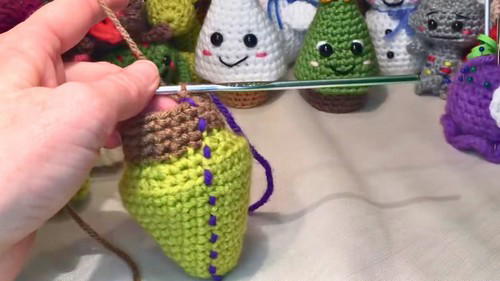
- In Row 15, crochet only in the back loops to create a ridge that defines the base of the tree.
- In Row 15, crochet only in the back loops to create a ridge that defines the base of the tree.
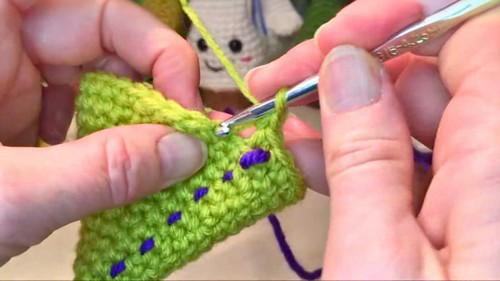
2. Adding the Trunk
Transition to Brown Yarn:
- After decreasing toward the base of the tree, switch to the brown yarn for the trunk. Tie the two colors securely together and pull the new yarn through the remaining loops of the last decrease stitch.
- Crochet in the front loops only for the first row of the trunk to create a neat turning point.
Shape the Trunk:
- Work several rows (approximately Rows 17–21) in single crochet using the full stitch.
- Gradually decrease stitches for Rows 21 and 22 to close the trunk, using decreases across the round.
- Work several rows (approximately Rows 17–21) in single crochet using the full stitch.
3. Assembling the Tree
Insert Safety Eyes and Stuffing:
- Insert the safety eyes approximately 5 rows below the back-loop ridge at the tree base. Leave 3–4 stitches of space between the eyes.
- Use fiber filling to stuff the tree and the trunk. Ensure the stuffing fills the shape without stretching the fabric.
Close the Base:
- Weave your working yarn through the remaining loops of your final row. Pull tight to close and secure.
4. Adding the Star
Start the Star:
- Use yellow yarn to create a magic ring with 5 stitches.
- For each point of the star, slip stitch into the next stitch, chain 2, and slip stitch back into the same base stitch. Repeat for all 5 points.
Attach the Star to the Tree:
- Position the star at the top of the tree and sew it securely using leftover tail yarn. Adjust the points to ensure the star sits upright.
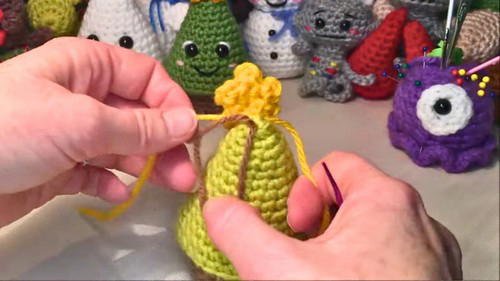
- Position the star at the top of the tree and sew it securely using leftover tail yarn. Adjust the points to ensure the star sits upright.
5. Adding Final Details
Cheeks and Mouth (Optional):
- Use pink yarn for rosy cheeks. Thread and stitch small blush marks just below each eye.
- For the mouth, use black or dark-colored yarn to create a gentle smile. Use embroidery techniques for a clean finish.
Other Decorations:
- Add bows, tiny yarn ornaments, or embroidery for added design.
Uses of the Crochet Christmas Tree
- Ornament: Hang it on your Christmas tree as a festive handmade ornament.
- Gift: Perfect as a personal, handmade gift for friends and family.
- Table Décor: Use it as a decorative piece for desks, shelves, or holiday tables.
- Keepsake: A timeless décor item for years to come.
Pro Tip
For the best results, maintain even tension throughout the project. If using it as a hanging ornament, leave a long tail at the top to sew and loop a hanging string securely through the star.
Conclusion
This crochet Christmas tree is a delightful and rewarding project to get into the holiday spirit. Tailored for all skill levels, it provides plenty of room for creativity while maintaining a simple, step-by-step structure. Personalize it with colorful yarn, unique expressions, or ornaments to make it your own.


