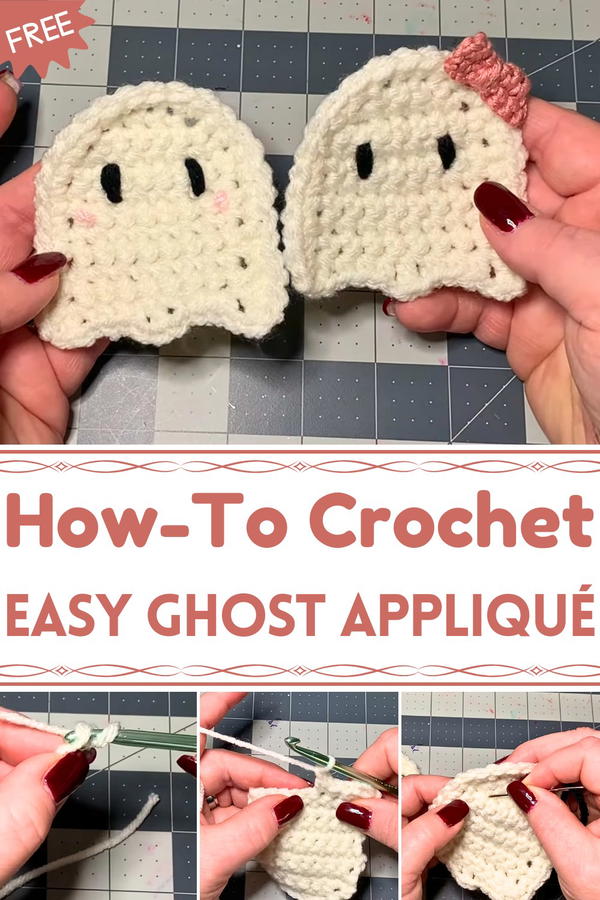
Haunt your décor with fun using this Free Crochet Halloween Ghost Appliqué Pattern, perfect for spooky accents, festive crafts, and playful Halloween vibes.
Decorations that bring whimsy and fun into a space have always added charm to celebrations. The Free Crochet Halloween Ghost Appliqué pattern turns soft yarn into a playful, handmade accent that instantly lifts the atmosphere. Each ghost appliqué is perfect for adding character to costumes, treat bags, banners, wall hangings, or table décor, giving everyday items a touch of creativity.
Cute Crochet Halloween Ghost Appliqué for Festive Fun
Its lightweight and flexible structure makes it easy to attach anywhere, while the simple stitching ensures a satisfying experience for both beginners and experienced makers. Working on this project also provides a calming, mindful activity, encouraging focus, patience, and fine motor skill development. Multiple appliqués can be combined to form garlands, layered displays, or decorative arrangements, offering endless opportunities to enhance any festive setting.
The Free Crochet Halloween Ghost Appliqué pattern also makes a thoughtful handmade gift, allowing friends, family, or children to receive a personalized and playful keepsake. With a variety of color, size, and placement options, each appliqué can reflect individual taste and creativity. Whether used as a subtle accent or a prominent decoration, this charming ghost appliqué brings personality, cheer, and a handcrafted touch to celebrations.
Materials Needed
The materials for this project are simple and easy to find:
- Yarn: Weight #4 yarn in white (for the ghost), black (for the eyes), pink (for cheeks), and any additional color for the bow.
- Hook: 5.5mm crochet hook (for the ghost), and a 4mm hook (for the bow).
- Scissors: For trimming yarn ends.
- Darning needle: For weaving in ends and adding details like the face.
Special Features
- Beginner-Friendly: This project uses basic stitches like single crochet (SC) and double crochet (DC), and includes increases, making it a great skill-building project.
- Easy Customization: Add unique touches such as bows, blush cheeks, or other facial expressions.
- Quick to Make: The ghost is small and requires minimal rows, making it a quick weekend or even evening project.
- Versatile Design: Can be used as home decor, appliques, keychains, or even a kid’s DIY craft addition.
Level of Difficulty
- Beginner Level: Most of the stitches and shaping are simple, and the tutorial goes slowly, explaining the steps clearly. However, adding facial features and working around the edges may require some practice.
Step-by-Step Guide
1. Creating the Ghost’s Base
Row 1: Foundation Row
- Start with a slip knot.
- Chain 6.
- Work 1 single crochet (SC) in the second chain from the hook and in each chain across (5 SC total).

Row 2-3: Increasing the Shape
- Chain 1, turn your work.
- In the first stitch, work 2 SC (increase).
- Work 1 SC in the next 3 stitches.
- In the last stitch, work another 2 SC (increase). You now have 7 stitches. Repeat this row again to end with 9 stitches.
Row 4-10: Building the Body
- Chain 1, turn your work.
- Work 1 SC in each stitch across (no increases).
- Repeat for a total of 7 rows in this manner.
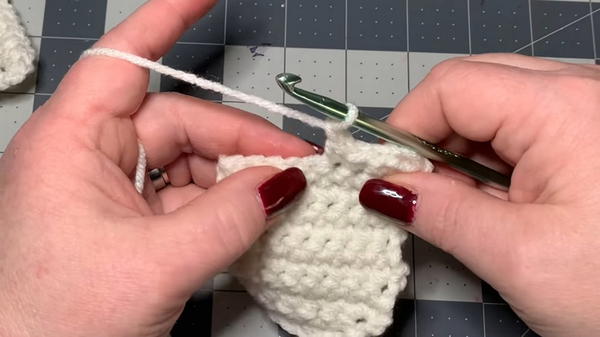
2. Creating the Bottom "Wavy" Edge for the Ghost
- Chain 1, turn your work.
- Start the row with a double crochet (DC) in the first stitch.
- Chain 1, then work 1 SC in the next 3 stitches.
- Chain 1, work 1 DC in the next stitch.
- Repeat this pattern: chain 1, 3 single crochets, chain 1, and a double crochet until the end of the row.
- Chain 1 and prepare to work around the ghost for the border.
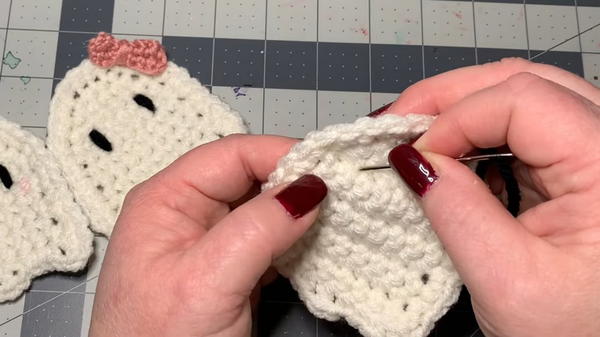
3. Adding the Border to the Ghost
- Work single crochets (SC) evenly around the edge of the entire ghost, excluding the base. Follow these steps:
- Add 1 SC around the last double crochet you made.
- Find the next "space" (not a stitch) along the edge and place another SC.
- Add SCs evenly down one side, working into spaces for smooth edges.
- When you reach the top of the ghost, place 5 SC evenly across.
- Work down the other side in the same manner, and finish by slip-stitching to the starting point.
- Cut the yarn, chain 1, and pull through to secure.
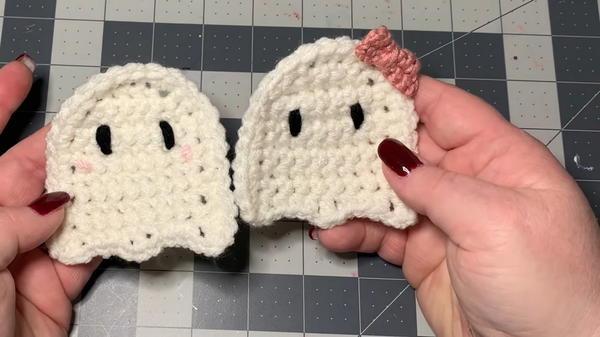
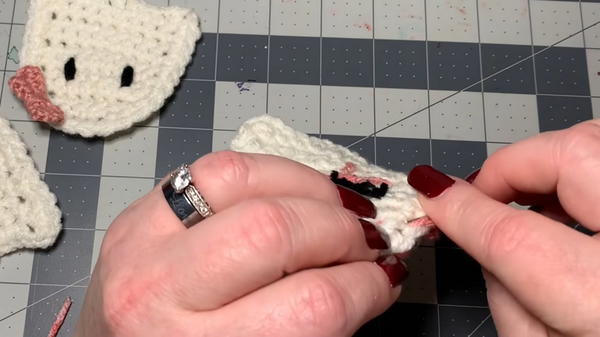
4. Adding the Face
Using a darning needle, add the facial details such as the eyes and blush:
Adding Eyes (Black Yarn):
- Count 3 rows down and 3 stitches over for the first eye.
- Insert the needle and yarn to create a simple vertical embroidered eye. Repeat 2-3 times to thicken the eye.
- Repeat on the other side for the second eye.
Adding Cheeks (Pink Yarn):
- Count 1 row down from each eye and move slightly outward.
- Use pink yarn to add small blush-like stitches back and forth.
5. Making and Attaching the Bow (Optional)
- Using the smaller hook (4mm), make a slip knot and chain 5.
- Work 1 SC in each chain across (4 SC total). Chain 1 and turn.
- Repeat for 2 rows of SC.
- Use the yarn end to cinch the center of the rectangle, forming a bow shape.
- Attach the bow to the top of the ghost with the darning needle.
Tutor’s Suggestions and Tips
- Take Your Time: Don stresses working slowly, especially if you’re new to crochet. The ghost’s simplicity allows even beginners to refine their techniques.
- Fixing Uneven Edges: Be mindful of spacing your stitches evenly when working the border to ensure a neat finish.
- Customization: Feel free to add Halloween elements like spiderwebs, other facial features, or even glow-in-the-dark yarn.
Uses
- Halloween decorations (e.g., garlands, wall hangings, or ornaments).
- Appliques for clothing, bags, or hats.
- Keychains or small gifts.
Conclusion
This cute crochet ghost project is ideal for beginners and allows for creative personalization. Don Marie’s tutorial ensures clear guidance, helping you complete a fun and spooky seasonal decoration. Whether you use it alone or add it to other projects, this ghost will surely bring festive cheer to Halloween!
Bonus Tip
- Use Stitch Markers: If you’re new to crocheting, use stitch markers to keep track of your stitches when creating the increases and border. This will simplify the process and ensure you don’t miss any important stitches.


