Spark festive joy with this Free Crochet Christmas Tree Pattern, perfect for holiday décor, charming accents, and adding a cheerful touch to any space.
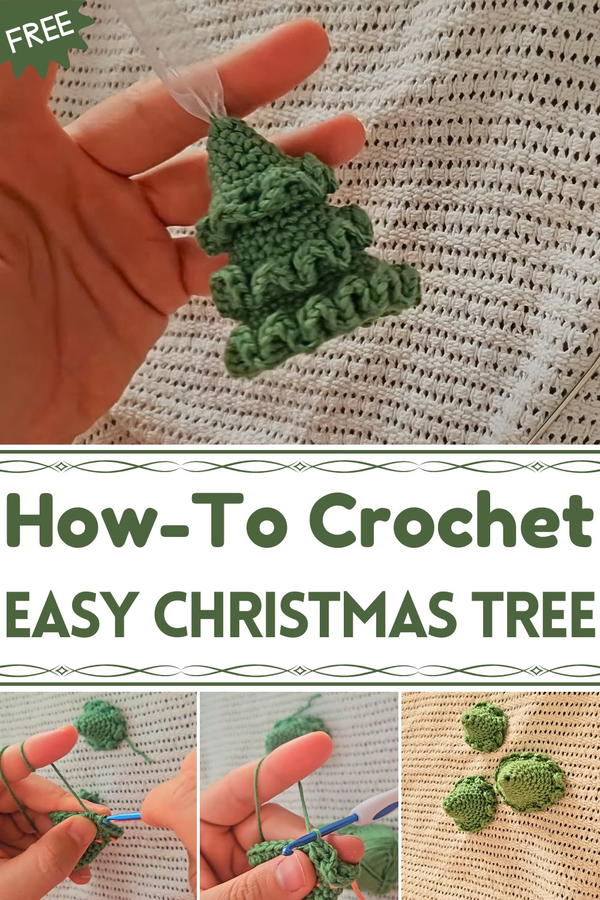
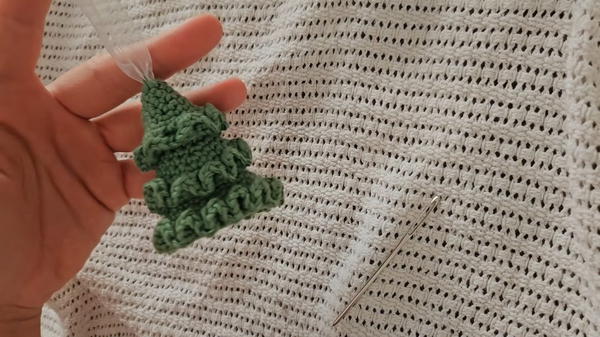
A tiny Christmas tree can come to life with layers of cozy crochet, turning any space into a festive corner full of charm and cheer. Each tier of the tree builds on the last, creating a playful, layered look that’s both elegant and fun. Perfect for shelves, tabletops, or as a cute gift topper, this handmade tree brings personality and a joyful touch to any décor.
Adorable Crochet Christmas Tree Pattern Perfect for Party Decor
Beyond decoration, making this tree is an enjoyable project that improves dexterity and focus while producing a cheerful, handcrafted accent. Its playful layers and customizable details ensure it spreads warmth, charm, and a handmade touch to any space, making it a perfect addition for anyone who loves festive, creative décor.
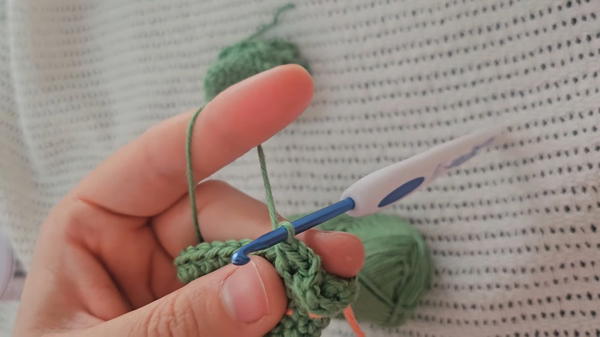
The tree begins with a foundation chain, followed by rows of half double crochet stitches that shape its classic triangular form.
Simple increases and decreases create the layered effect, and a small trunk is added at the base to complete the silhouette.
Then tiny beads, sequins, or a star on top can be added for extra sparkle, allowing each tree to feel unique and festive.
Lightweight yet structured, this crochet tree works well as a standalone ornament, part of a miniature forest display, or strung together into a playful garland. At last the repetitive rows make the process relaxing and satisfying, with visible progress after each round.
Materials and Uses
Yarn: Cotton thread (hilo de algodón) or cotton-blend yarn, specifically recommended as 'Cinta Crochet Number 3' or similar.
Hook Size: Not explicitly stated, but typically a hook size appropriate for 'Number 3' thread.
Tools: Yarn needle, scissors, and textile glue (pegamento textil), which may be needed if you want to stiffen the tree layers.
Uses: Depending on the size, it can be used as a small Christmas tree ornament or as a festive table centerpiece (centro de mesa).
Special Features
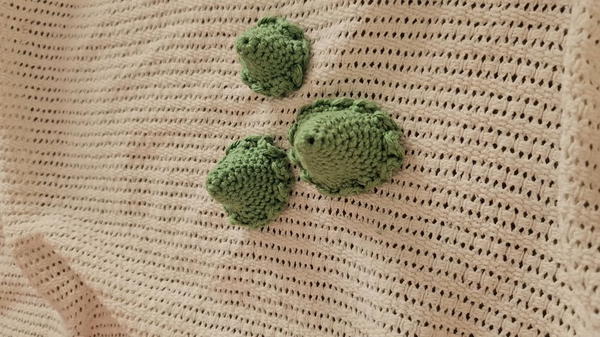
Layered Construction: The tree is created by crocheting three separate conical layers—superior (top), intermediate (middle), and inferior (bottom)—which are then stacked and glued or sewn together to create a tiered effect.
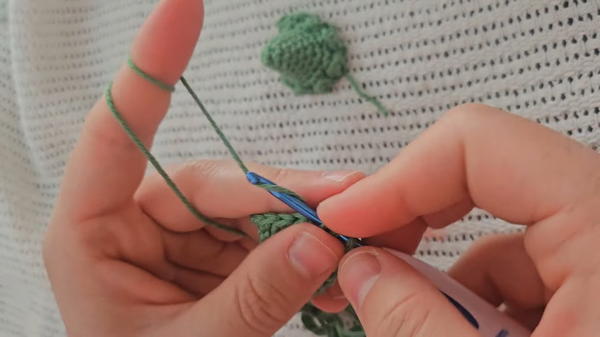
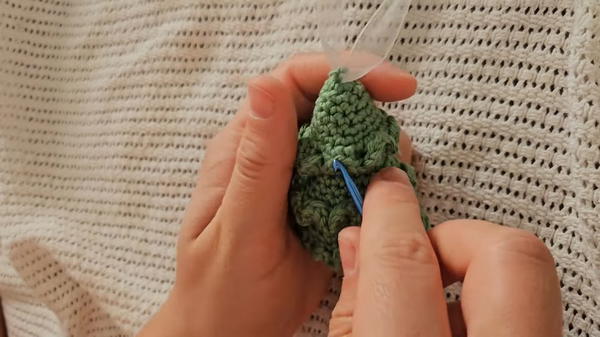
Wavy Edges (Onditas): Each layer features a distinctive wavy border created by a specific stitch sequence, giving the tree a soft, decorative ruffle.
Amigurumi Style Cone: The main body of each layer is worked in increasing rounds of single crochet, forming a hollow cone shape.
Level of Difficulty and Tutor's Suggestions
Level of Difficulty: Easy. The pattern uses only basic stitches (Single Crochet and Half Double Crochet) and follows a consistent increase rhythm, than making it very accessible for beginners.
Tutor's Suggestions:
The project can be adapted in size by adjusting the number of rounds for each layer.
Using textile glue is a suggestion for those who wish to stiffen the crochet fabric.
Step-by-Step Instructions
Welcome to this tutorial on creating a beautiful, multi-layered crochet Christmas tree! This simple model is perfect for holiday decorations, whether used as a tree ornament or a centerpiece.
Conclusion
With the three layers complete and assembled, you have created a beautiful, three-dimensional crochet Christmas tree that is ready for display. This project is a wonderful way to personalize your holiday decorations with a handmade touch.
Tutor's Tip
When crocheting the Wavy Edge, ensure you are working your 4 stitches (3 SC and 1 SC) all into the same HDC stitch below. This is what creates the clustered, ruffling effect that gives the tree its distinctive decorative border.


