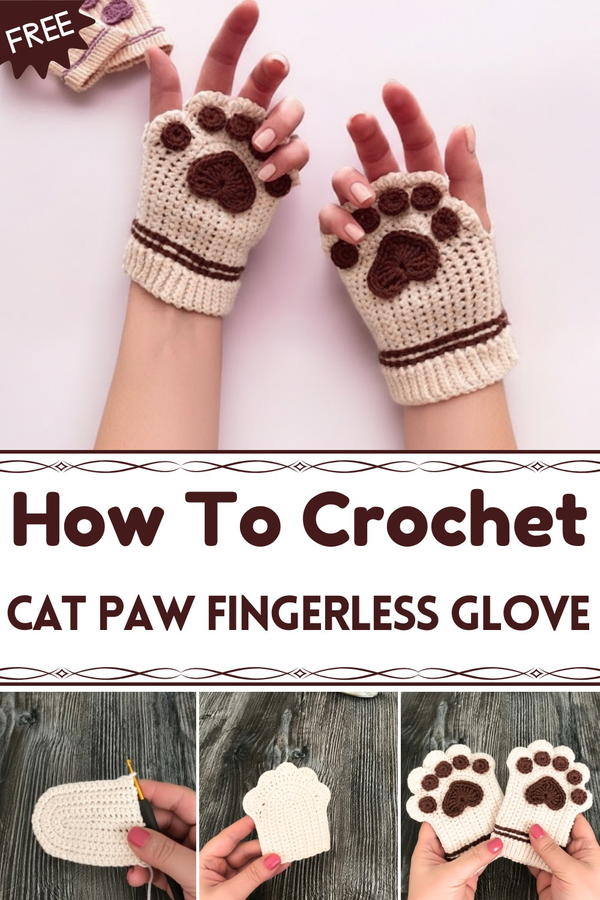
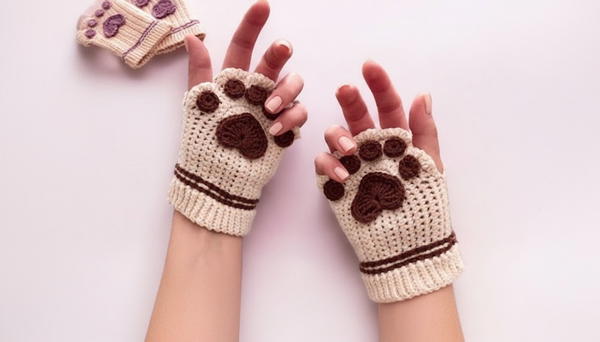
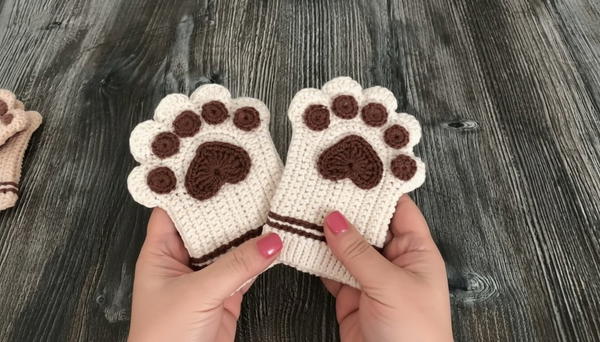
Stay cozy and playful with these cute cat paw fingerless gloves that warm your hands while letting your fingers move freely for all you love to do.
On a cold day, it feels wonderful to keep your hands warm while still being able to move your fingers easily. These gloves are soft and cozy, shaped just like little cat paws that add a fun and cute look to your hands. They cover your palms and wrists but leave your fingers free so you can use your phone, write, or do chores without taking them off. The soft yarn feels gentle on your skin and keeps the cold away.
How to Crochet Cute & Cozy Cat Paw Fingerless Gloves
Their playful design makes them perfect for anyone who loves animals or wants to add a touch of joy to their outfit. Wearing these gloves is like carrying a little warmth and happiness wherever you go. They are great for chilly mornings, cool evenings, or any time you want a bit of extra comfort with a fun, charming look. A perfect mix of warmth and whimsy that’s easy and fun to wear!
Crochet Paw Print Gloves Pattern
Special Features:
Cute paw-shaped gloves, quick to make (2 pairs in a day possible), customizable size
Level: Intermediate
Materials Needed:
- Cotton yarn (or any yarn of your choice)
- Crochet hook size 4 (2.50 mm)
- Needle for weaving and assembling
- Glue (optional, for decorations)
Step-by-Step Pattern
Note: Each stitch name is in bold. Numbers in parentheses denote stitch counts for rows/rounds.
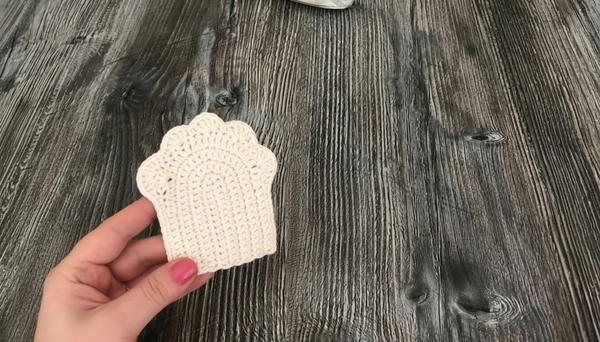
Step 1: Starting the Foundation Chain
- Make a chain of 15 stitches (ch 15).
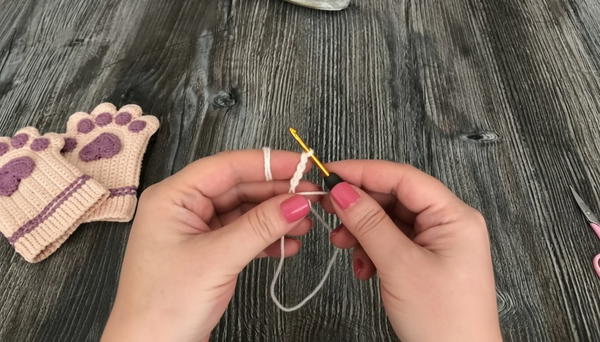
- Leave a long tail for weaving later.
- Pull chains tightly to create a firm base.
Step 2: First Row of Single Crochet (sc)
- Make 1 single crochet in the second chain from the hook.
- Continue with single crochet stitches across the chain (total 13 sc).
- In the last stitch, make 3 single crochet stitches (increase) to turn.
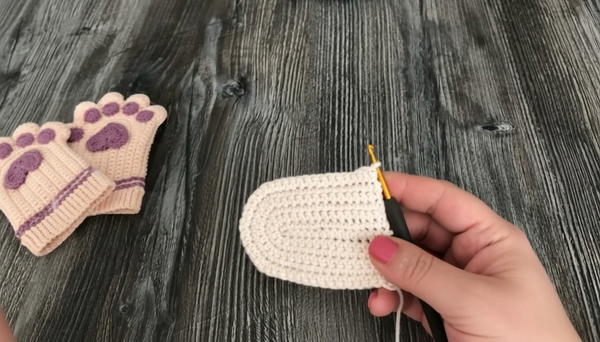
Step 3: Return Row
- Work 13 single crochet stitches on the opposite side of the foundation chain (13 sc).
- This creates a sturdy base row.
Step 4: Row with Increases
- Continue with single crochet in each stitch, making two single crochet stitches in 3 specific stitches to increase (6 increases total).
- Work 13 sc down after increases.
Step 5: Repeating the Pattern
- Repeat rows of 13 single crochet stitches with increases as before, alternating with chains to turn your work.
- Follow counts closely to ensure proper shaping.
Step 6: Adding Double Crochet (dc) Stitches
- Work rows alternating single crochet (sc) and double crochet (dc) stitches for shaping.
- For increase rows, double crochet twice in the second stitch, then continue with singles, doubling where required.
- Repeat consistently.
Step 7: Thumb Opening
- When you reach thumb placement, work 2 single crochet stitches in the thumb section.
- Use double crochet stitches to shape the opening neatly.
- Refer to counts around rows 15:12 to 20:20 for specifics.
Step 8: Paw Print Decoration
- Create a magic ring and chain 1.
- Work 10 single crochet stitches into the ring to make paw pads.
- Make 10 pieces (5 per glove) to decorate the gloves.
Step 9: Assembly and Joining
- Align thumb sections carefully; ensure they match on both gloves.
- Join edges using single crochet stitches and a slip stitch method, working along edges as described in timestamp 21:18 to 26:57.
- Finish seams securely.
Step 10: Final Rows and Edging
- Work one last round of single crochet stitches (approx. 36 stitches) to finish the cuffs and edges smoothly.
- Make chains and slip stitches to form cuffs that fit snugly.
Step 11: Finishing Touches
- Attach the paw pads to the gloves center using glue or sewing.
- Weave in all loose ends.
- Block gloves gently if desired for shape.
Guide & Tips from the Tutor
- Yarn choice: Cotton yarn is preferred for softness and durability but feel free to experiment with other yarns.
- Hook size 4 (2.50 mm) balances tight stitches and flexibility.
- You can adjust the chain length and stitch counts for bigger or smaller gloves.
- Keep tension even for neatness.
- Use stitch markers if needed to keep track of increases and thumb placement.
Uses
These gloves are perfect for autumn and winter wear, casual or gift items. Their unique paw shape adds playful charm to your accessories.
Quick Summary
- Chain 15 for foundation
- Single crochet foundation rows with increases
- Incorporate double crochets for shaping
- Thumb opening shaped with stitches
- Decorate gloves with paw pads from magic rings
- Join edges with slip stitch and single crochet
- Finish with neat edging
Pro Tip:
When assembling your gloves, always keep track of the thumb alignment to ensure a comfortable fit. Using a stretchy yarn makes the gloves easier to wear and gives them a cozy feel!
Conclusion
With this detailed step-by-step pattern, you can crochet adorable paw print gloves quickly and easily. Their charming design and comfortable fit make them a delightful project for yourself or as a special handmade gift.