Style your favorite clothes with the Crochet Chic Formal Jacket Free Pattern for a smart outer layer that goes nicely with skirts, tailored pants, and simple dresses.
Want something stylish to wear on a special day? The Crochet Chic Formal Jacket is a lovely clothing project for women who prefer a smart and elegant look. It offers a different way to dress up without wearing the usual store-bought clothes. You can pair it with your favorite outfits for a neat and confident appearance.
Rasha Crochets shares this fashionable idea for anyone interested in crochet clothing.
Free Crochet Chic Formal Jacket Pattern That Looks Lovely
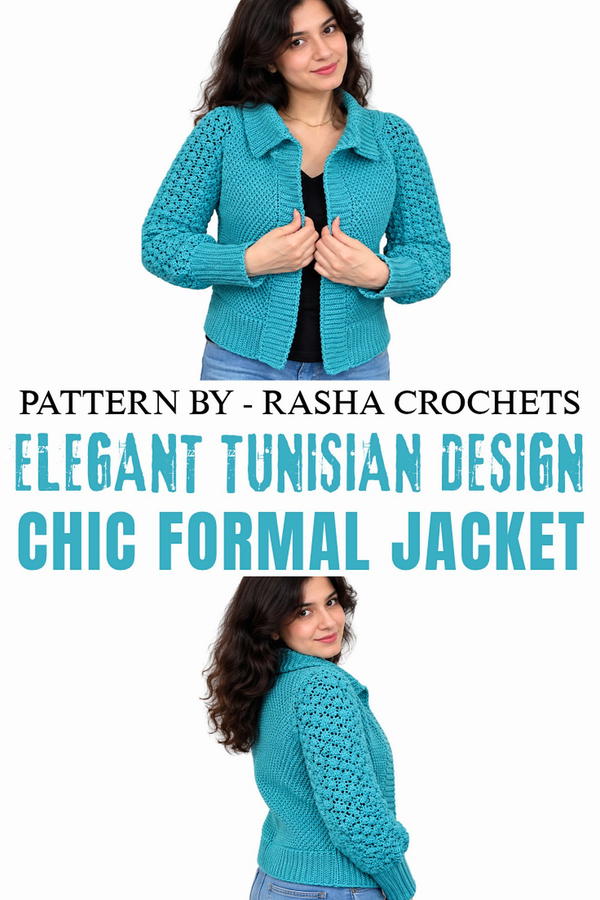 One nice thing about this jacket is its formal style. The crochet fabric gives it a special texture that looks different from regular jackets. You can choose black, navy blue, or cream yarn for a classic look. These shades are easy to match with other clothes. The finished garment can also be styled with simple accessories without making the outfit feel too busy.
Working on this jacket involves following the crochet instructions carefully and checking the size as you go. Choosing suitable yarn is important because it can affect how the fabric feels and hangs. Neat finishing around the edges helps give the clothing a tidy appearance.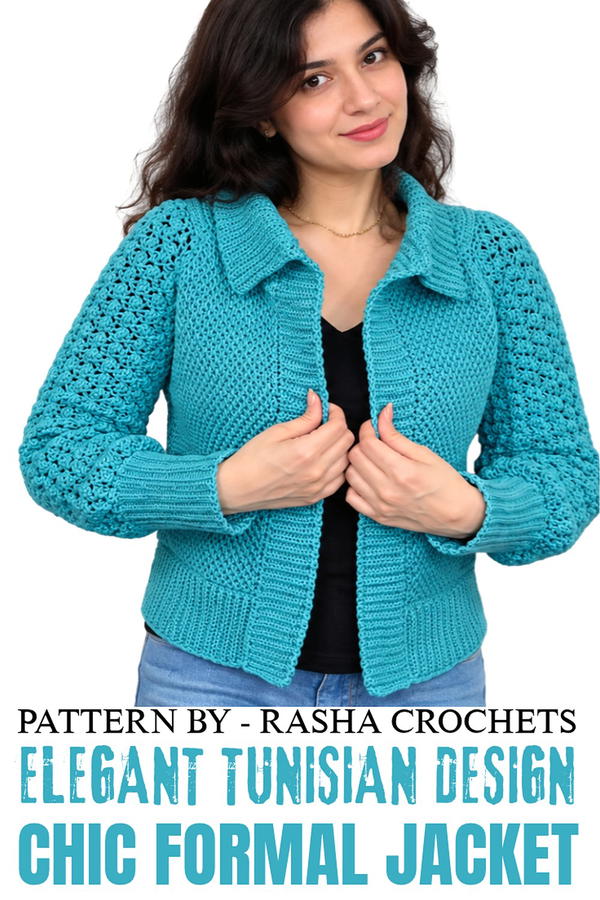 You can wear this jacket over a plain blouse with formal trousers for office meetings. It can also be paired with a long dress for a family dinner or worn over a simple outfit for a special event. A small handbag and matching shoes can complete the look.
This jacket is a useful choice for women who like dressing neatly while keeping their personal style. It offers a lovely way to wear crochet clothing for occasions beyond everyday casual wear.
About the Pattern
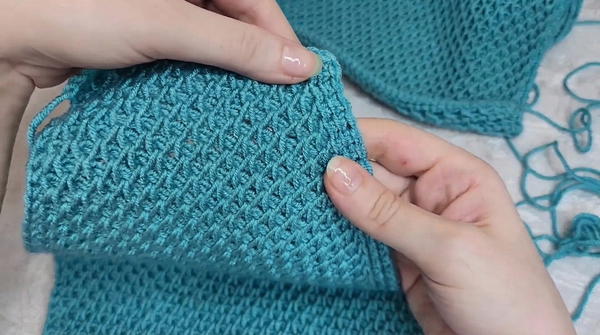
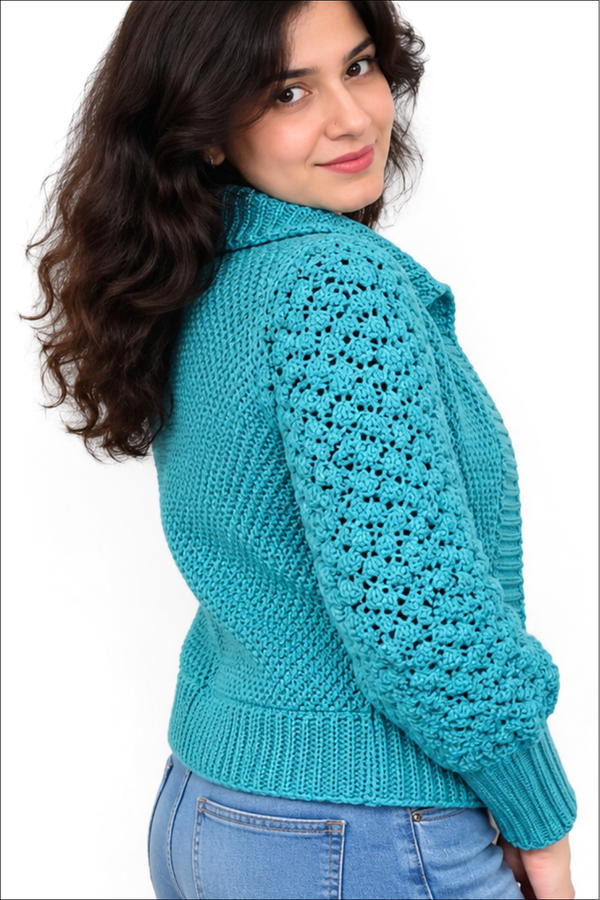
This Tunisian crochet jacket pattern is constructed through modular assembly and blends classic technique with clever shaping. The garment is built from individual panels—left front, right front, and back—allowing for a tailored fit and custom sizing. The signature Tunisian stitch texture, defined by its alternating pattern, produces a structured fabric suitable for any season. Shoulder extensions and ribbed trims enhance comfort and add professional finish details, while precise shaping enables clean armholes and a fitted sleeve.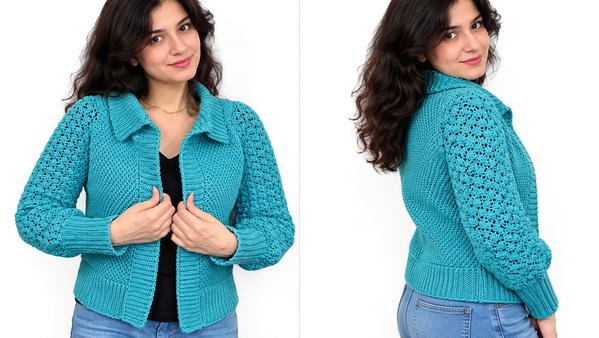
Pattern at a Glance
- Panels: Constructed in flat Tunisian crochet, using multiples of 2+1 chains as the base.
- Alternating Pattern Rows: The main stitch sequence alternates between compensated and non-compensated rows for distinct texture.
- Shaping: Armholes and sleeve shaping use focused increases and decreases.
- Assembly: Constructed with traditional sewing for shoulders, seamless sleeve and neckline attachment, and finished with ribbed trims.
- Flexible Edging: The front band can be left open or worked into a snug, stand-up collar.
Important Notes
- Consistently count your stitches to maintain structure, especially on decreasing (armhole shaping) and increasing (sleeve) rows.
- Panels are constructed separately, then assembled for best fit.
- When making the sleeves and bands, switch to a smaller hook for improved elasticity and comfort.
- Read through the special stitch guides before beginning to familiarize with Tunisian methods.
- Adjust length of panels and ribbing for a custom fit.
Difficulty Level
Intermediate. The project uses foundational Tunisian stitches, shaping, seaming, and ribbing techniques. Experience with Tunisian and conventional crochet, as well as following assembly instructions, is recommended.
Supplies Needed
- Yarn: Worsted or light aran weight yarn, quantity as needed for size
- Tunisian crochet hook: 5mm (or size to match gauge)
- Regular crochet hook: 3mm (for ribbing and finishing)
- Tapestry needle (for assembly)
- Scissors
Size & Measurements
- Sizing: Highly adaptable (sample: fits 34–38 inch chest)
- Panels: Chain foundation and row count can be adjusted for preferred size—always use a chain count that is a multiple of 2 + 1.
- Sleeve length/width and body length: Determined by row and chain count; adjust for fit.
Gauge & Stitch Details
- Gauge: In main Tunisian pattern, 10 stitches x 12 rows = 10 cm x 10 cm
- Stitch Placement: All Tunisian pattern stitches are worked as described, alternating compensation and original rows, for a woven effect.
Crochet Abbreviations
- ch: chain
- sc: single crochet
- hdc: half-double crochet
- dc: double crochet
- sl st: slip stitch
- blo: back loop only
- yo: yarn over
- tog: together
Special Stitch Guide
- Tunisian Forward Pass: Insert hook under designated loops, yarn over, pull up loop and retain on hook throughout row.
- Tunisian Return Pass: Yarn over, pull through one loop (edge), then yarn over, pull through two for all remaining loops across.
- Compensated Tunisian Row: Insert under two loops, yarn over, pull up a loop, then yarn over to add a compensating loop; repeat.
- Non-Compensated Tunisian Row: Insert under one loop, yarn over, pull up; do not compensate.
- Ribbed Single Crochet: Work single crochet in back loop only for cuffs and bands.
Complete Crochet Pattern
Panel Construction
1: Foundation
- Chain a multiple of 2 + 1 (sample: 17 chains).
2: Foundation Forward Pass
- Insert Tunisian hook into each chain, yarn over, and pull up loops across. Retain all loops on hook.
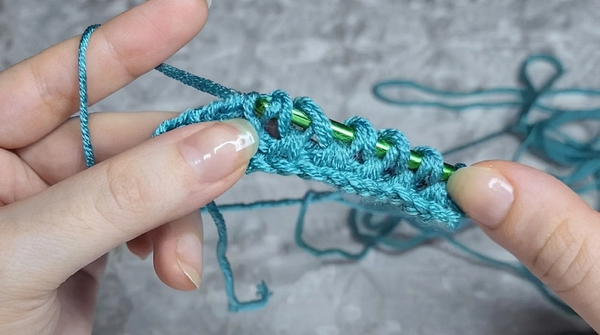
3: Return Pass
- Yarn over, pull through one (edge).
- Yarn over, pull through two on all remaining loops to end.
4: Pattern Row 1 (Compensated)
- Insert into the first two loops, pull up a loop, then compensate with a yarn over loop; repeat this sequence until end of row.
- Retain all loops on the hook.
5: Return Pass
- As before—yarn over, pull through one, then yarn over, pull through two across.
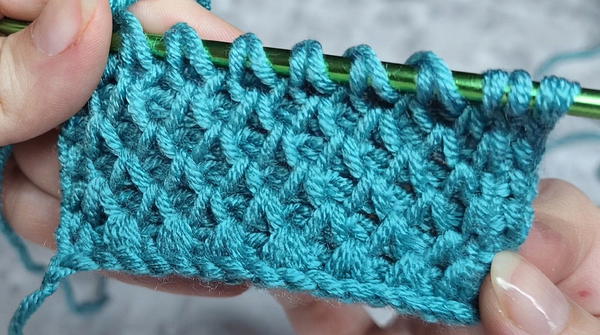
6: Pattern Row 2 (Non-Compensated)
- Insert into only one loop, pull up a loop—no compensation this row. Continue to end.
7: Return Pass
- Repeat the return pass as in earlier rows.
- Repeat Rounds 4–7 (alternating compensated and non-compensated pattern rows) until you’ve reached the desired length for the left front, right front, and back panels.
Armhole Shaping (Panels)
- Begin armhole decreases at the start and end of each row—at each armhole edge, decrease a stitch every right-side row:
- At start: Slip next stitch unworked, or work two stitches together as preferred.
- At end: Leave one stitch unworked, or work final two stitches together.
- Continue decreasing until armhole height is achieved, then continue without decreases to shoulder.
Panel Completion
- Fasten off panels, leaving a long tail for seaming.
- Complete both front pieces and back piece using above method.
Assembly
1: Joining Panels
- Place back piece facing up.
- Position front pieces on top, right sides together.
- Sew shoulder seams using a tapestry needle and whip stitch (or mattress stitch).
2: Shoulder/Armhole Border
- With a regular 3mm hook, single crochet evenly around each armhole to stabilize edge.
3: Shoulder Extension
- At the top of shoulder (where sleeve attaches), chain 15 to extend foundation; this creates extra cap room for sleeve.
Sleeve Construction
1: Sleeve Foundation
- Chain 52 with main (larger) hook.
2: Sleeve Pattern
- Work across in alternating* half-double crochet (hdc)** and double crochet (dc) for the first row.*
3–13: Sleeve Shaping
- At the start and end of rows, increase with an extra hdc or dc as needed for sleeve shape (refer to video for precise frequency).
- Continue alternating hdc and dc for the length of the sleeve.
14+: Armhole Decrease
- Begin decreasing at the underarm every other row:
- At each end, hdc2tog or dc2tog (depending on pattern placement).
- Continue until you have reached the required taper, matching armhole opening on body panels.
Cuff
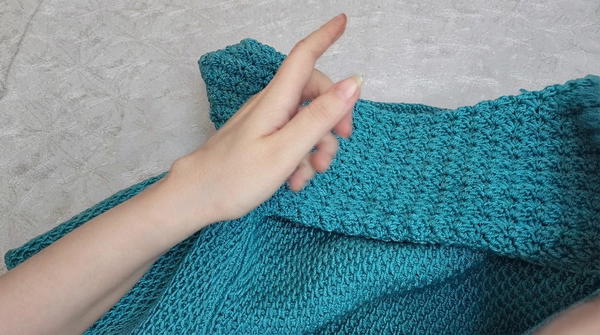
- Switch to a 3mm hook.
- Single crochet in the back loop only (blo) across cuff edge, repeating for desired ribbed effect (approx. 10 rows for a snug wrist).
Neckline and Front Edging
Rounds 1–?
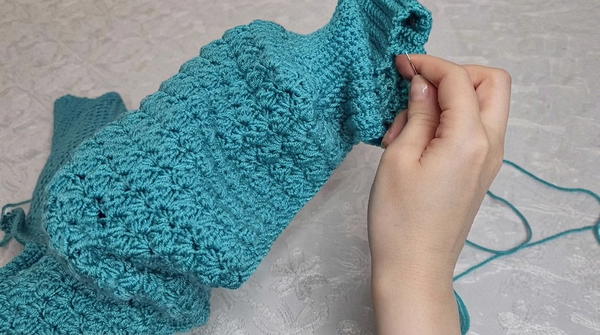
- With 3mm hook and jacket right side facing, single crochet in the back loop only evenly along the front edge and around the collar.
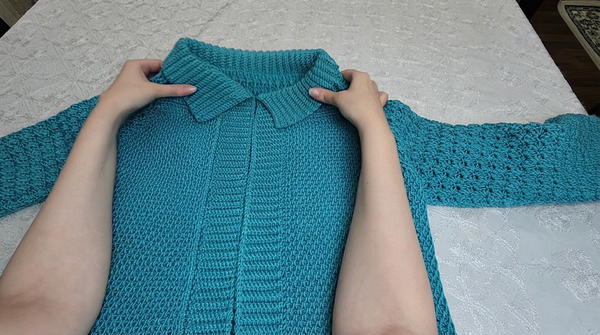
- Work enough rows to build a ribbed edging (continue until desired width for a subtle band or a tall collar).
Finished Size & Conclusion
The completed Tunisian crochet jacket combines structured, textured panels with smooth joining and tailored finishing touches. Ribbed bands offer comfort and defined edges on sleeves, collar, and front opening. The alternating pattern and careful shaping create a jacket with architectural interest and lasting fit. This method produces a substantial, wearable garment that is both practical and designed with attention to detail, serving as an excellent showcase of Tunisian crochet’s possibilities for garments.