Give your kitchen a playful touch with the Crochet Fridge Magnet Sheep Free Pattern, a sweet farm animal for holding shopping lists and notes.
Your refrigerator doesn't have to look plain when a tiny animal decoration can give it a fun touch. The Crochet Fridge Magnet Sheep is a cute little yarn accessory that combines a farm animal design with a useful magnet. Its woolly appearance and small size give your kitchen a playful look without taking up extra space. This lovely idea comes from Rasha Crochets.
Quick Crochet Fridge Magnet Sheep Free Pattern For Home Decor
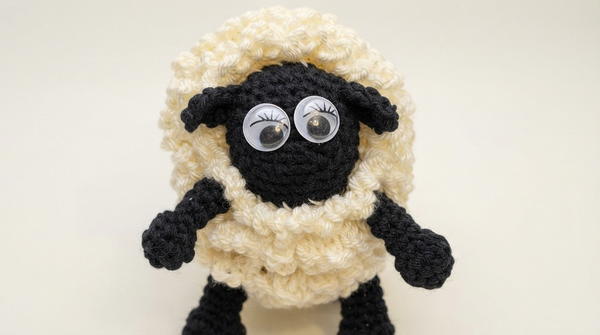
The sheep has a fluffy body with small, raised stitches that look like thick wool. Its little face sits in the middle, with tiny ears on both sides and a short nose. Cream yarn can give the wool a soft appearance, while beige or gray can be used for the face. The textured surface makes the design more interesting than an ordinary flat magnet.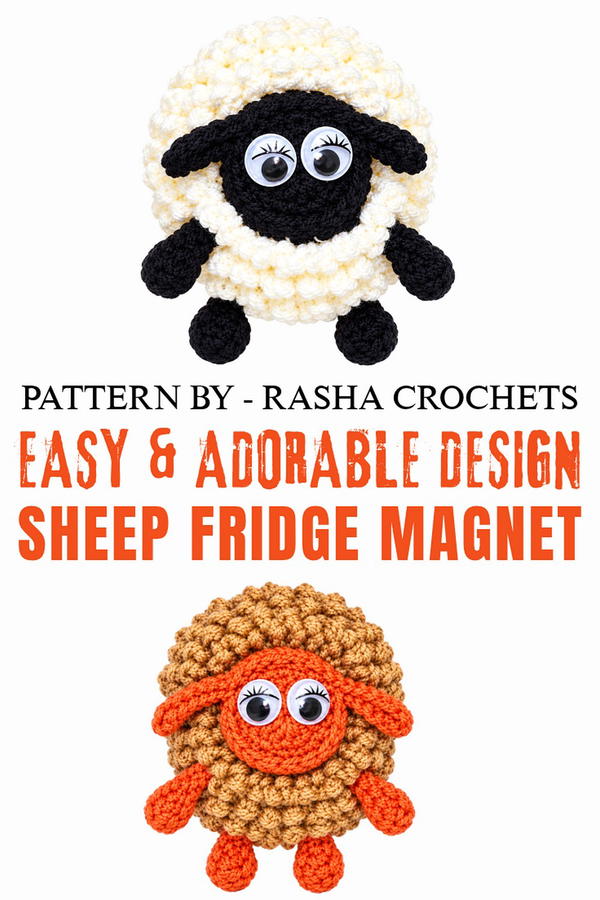 The sheep can be crocheted using basic stitches. Small groups of stitches help form the woolly sections, while the face and ears can be worked separately. A magnet is then attached firmly to the back so the finished piece can stay on a suitable metal surface.
You can use this little sheep to hold a weekly meal plan, display a favorite family photograph, or keep an important appointment card on the fridge. It is also a nice gift for someone who recently moved into a new apartment.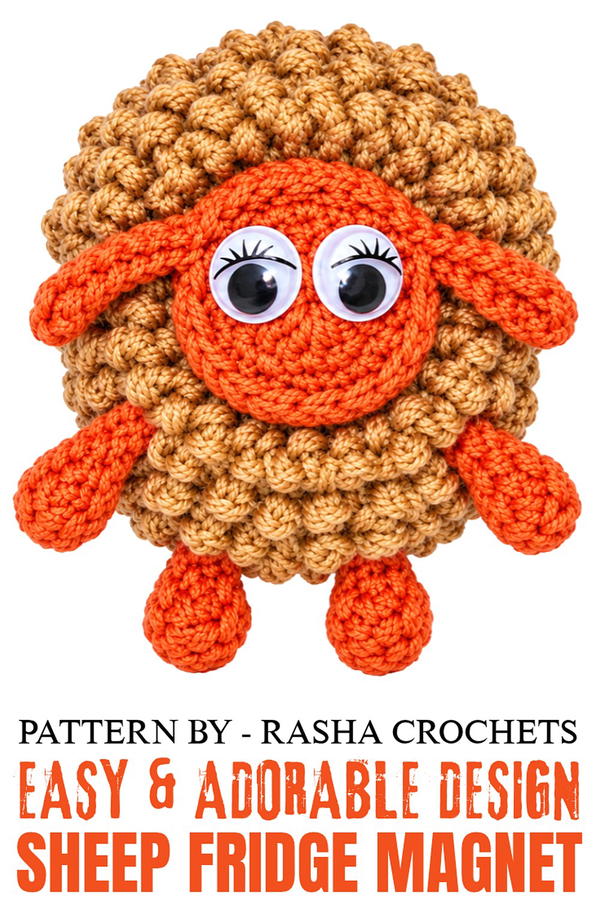 This tiny accessory gives an everyday household item a cheerful animal theme. It is a simple way to keep useful papers close while adding a little personality to your kitchen.
Crochet Sheep Pattern – Proper Step-by-Step Formatting
This sheep amigurumi pattern combines simple construction techniques and clever use of texture. Each part is made separately before assembly, giving versatility in color and shaping. Layered loops create the characteristic woolly look, and basic stitches are used for all components. The finished soft sheep is a charming addition to any collection of handmade animals, suitable for gifting, play, or display.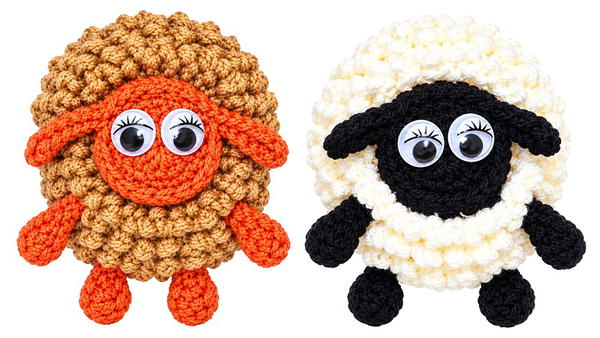
Pattern Basic Points
- The sheep is created from multiple flat and textured pieces: main body, face, arms, and legs.
- Body and face feature magic ring foundations.
- Wool texture is achieved by crocheting chains and slip stitches into loops, using unused fronts and backs of stitches.
- Ears, arms, and legs are made with simple chains and single crochet for easy shaping.
- Final construction involves sewing all pieces securely for durability and neat finishing.
Special Notes
- Use a contrasting color for the sheep’s face to highlight features.
- The wool texture is formed by looping chains and working into unused loops for a fluffy effect.
- Maintain an even tension throughout, especially in textured rows, to ensure loops stay consistent.
- If desired, add facial embroidery or small beads for eyes after the face is attached.
Skill Level
This pattern is suitable for beginners with some experience or intermediate crocheters. The texture technique and separate assembly pieces make it a manageable first amigurumi or decorative project, requiring only basic stitches and straightforward sewing skills.
Materials
- Worsted or DK weight yarn: brown (body), cream/white (texture/wool), pink or beige (face), plus matching colors for arms and legs
- Crochet hook (recommended 3.25 mm or size to match yarn for a tight fabric)
- Yarn needle for sewing parts
- Scissors
- Stitch marker (optional)
- Small amount of stuffing (optional, for adding dimension to face and limbs)
Measurements & Gauge
- Finished Size: Approx. 11–13 cm diameter for the main body, with limbs and face proportional
- Gauge: Not essential; tight stitches will prevent gaps, especially in amigurumi. Adjust hook size for your own tension
Stitch Abbreviations
- ch – chain
- sl st – slip stitch
- sc – single crochet
- dc – double crochet
- MR – magic ring
- st(s) – stitch(es)
- BLO – back loop only
Special Stitches
- Magic Ring (MR): Wrap yarn into a loop, insert hook and work initial stitches into loop, then pull tight to close.
- BLO (Back Loop Only): Work only in the back loop of each stitch for a ridged texture.
- Chain Loop Texture: Chain a number (e.g., ch 4 or ch 3), sl st into the next stitch; creates loops for wool texture.
Crochet Pattern
1. Main Body (Brown Base)
- Round 1: Make a MR, ch 1, and work 15 dc into ring. Join with sl st.
- Round 2 (Increase): Ch 2, then 2 dc in each st around (30 dc total). Join with sl st.
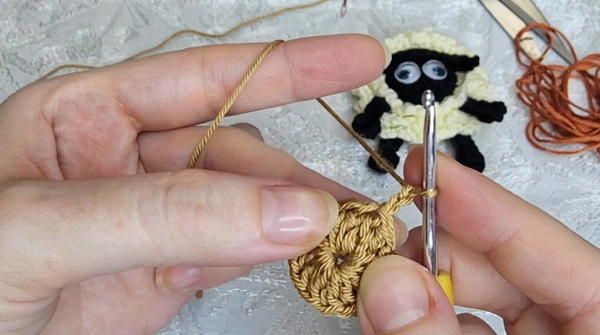
- Rounds 3-4 (Back Loop Rows): Work 2 rows of sc in BLO of each stitch. (Creates ridged base for texture layers)
- Wool/Texture Layers (Layer 1):
Ch 4, sl st into BLO of next st, repeat around the row to create loops. - Wool/Texture Layers (Layer 2):
Drop to next row (unused FLO from previous rows).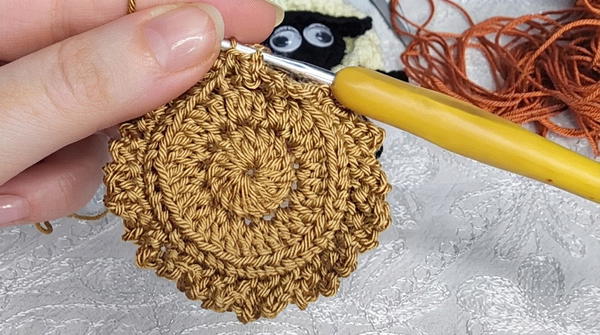
Ch 4, sl st into FLO of next st, repeat around to form second fluffy layer. - Final Texture Row:
In remaining loops, ch 3, sl st in next available loop, repeat around to finish edge with more texture.
2. Face
- Round 1 (Foundation): Make a MR, ch 1, and work 15 dc into ring. Join with sl st.
- Rounds 2-3: Work 2 rows of sc in every st, no increases.
- Ears:
- Ear 1: Ch 7, starting from the second ch from hook:
- 1 sl st, then sc across remaining 6 chains.
- Sl st into face base to join.
- Sc 6 stitches along side of face to next ear position.
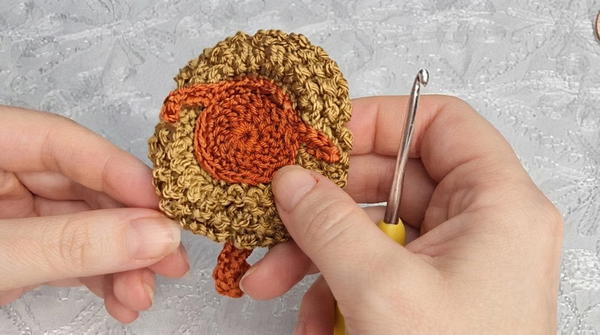
- Ear 2: Repeat the ch 7 process and attach second ear to opposite side.
- Ear 1: Ch 7, starting from the second ch from hook:
3. Legs
- Round 1: Make a MR, ch 1, and work 6 sc into ring. Join with sl st.
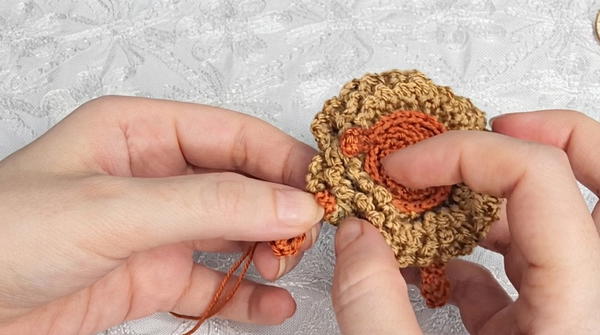
- Length: Ch 6, then work sc back down the chain (5 sc). Fasten off, leaving a tail for sewing.
4. Arms
- Round 1: Make a MR, ch 1, and work 6 sc into ring. Join.
- Length: Ch 5, then work sc back down the chain (4 sc). Fasten off, leaving a tail.
Assembly & Finished Size
- Face Attachment:
Center the face onto the main woolly body. Sew securely, using remaining yarn tails or a yarn needle. - Ears:
Position ears outward from face for a gentle, realistic look. - Legs and Arms:
Sew legs to the lower back or sides of the sheep body, leaving space for arms on either side.
Attach arms slightly above legs for a balanced appearance.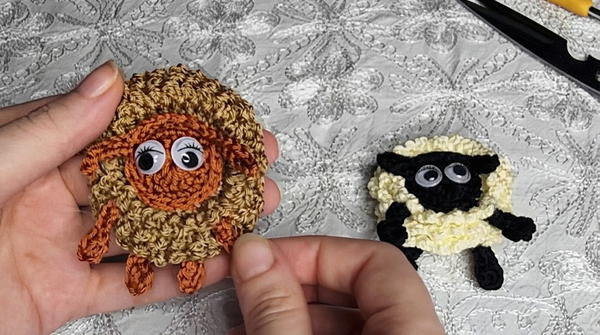
- Final Construction:
Secure all pieces, weave in ends tightly. If desired, lightly stuff face and limbs before finishing for added dimension.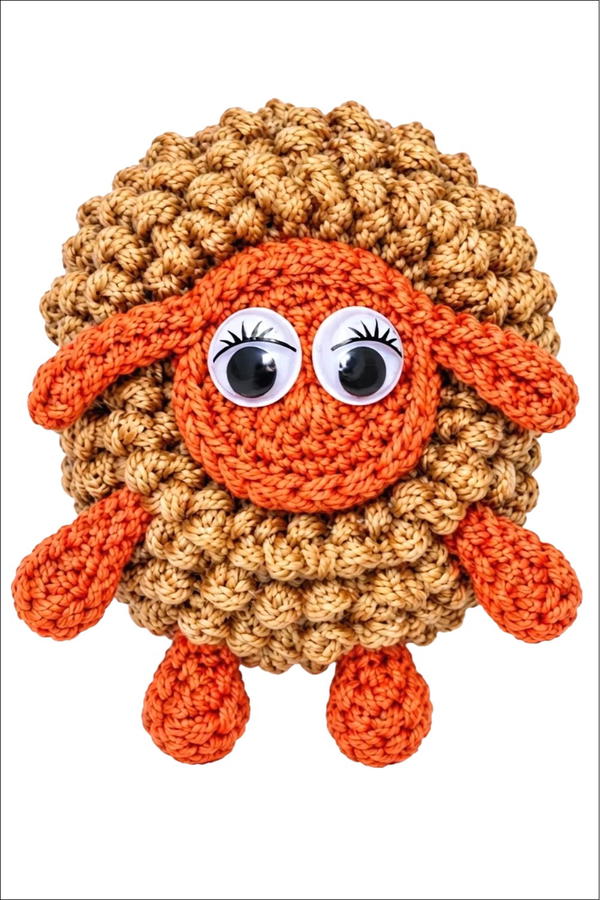
Conclusion
This sheep crochet pattern provides a creative approach to textured amigurumi, making use of layered chain loops for a fluffy effect and easy-to-construct limbs and face. The pattern emphasizes clarity in shaping and consistent texture, producing a sheep with charming character and tactile appeal. Adjust colors, add embroidered features, or size up for larger projects to customize the sheep to your preference. The resulting animal is suitable for decoration, gentle play, or gifting, with sturdy assembly techniques that ensure lasting quality.